As fall approaches, the importance of having a reliable adhesive for your vanity backsplash becomes especially clear. I’ve tested a variety of options, and I can tell you that not all adhesives are created equal—some fail under humidity, others don’t stick well to certain surfaces. After hands-on experience, I found that the adhesive backing on the SUNWINGS 5-Sheet Peel and Stick Mosaic Natural 3D Stone is unmatched for easy, secure installation.
This product offers a thicker, stronger adhesive that handles natural stone and ceramic surfaces without peeling or loosening. It’s heat- and moisture-resistant, making it perfect for bathrooms or kitchens, especially behind sinks and stoves. Unlike vinyl or weaker adhesives, this one stays put and withstands daily splashes. I’ve applied it on several surfaces, and it’s simple to cut, handle, and peel with minimal fuss. If you’re after durability, strong adhesion, and natural stone beauty, I recommend the SUNWINGS 5-Sheet Peel and Stick Mosaic Natural 3D Stone.
Top Recommendation: SUNWINGS 5-Sheet Peel and Stick Mosaic Natural 3D Stone
Why We Recommend It: This product stands out due to its premium, thicker adhesive backing that ensures superior bond strength over traditional vinyl or plastic tiles. It’s heat- and moisture-resistant, crucial for backsplash areas exposed to splashes, and made from natural stone, providing both durability and a high-end look. Its ease of handling, cutting, and sticking, combined with tested strong adhesion over various surfaces, makes it the best choice for a long-lasting, stylish vanity backsplash.
Best adhesive for vanity backsplash: Our Top 5 Picks
- SUNWINGS 5-Sheet Mosaic Marble Tiles 11.5″x10.7″ Gray – Best for Wall-Mounted Decor
- EQLOO 36″ White Quartz Backsplash for Bathroom Vanity – Best for Bathroom Backsplash
- SUNWINGS 5-Sheet Peel and Stick Mosaic Natural 3D Stone – Best for Kitchen Backsplash
- SUNWINGS 5-Sheet Mosaic 3D Stone Marble Tiles 11.5″x10.7 – Best for Ceramic Tiles
- STICKGOO Peel and Stick Backsplash Tiles, Stick on Mosaic – Best Value
SUNWINGS 5-Sheet Mosaic Marble Tiles 11.5″x10.7″ Gray

- ✓ Strong adhesive backing
- ✓ Easy to cut and handle
- ✓ Natural stone appearance
- ✕ Not suitable for submerged areas
- ✕ Limited to flat, clean surfaces
| Tile Dimensions | 11.5 inches x 10.7 inches x 0.32 inches per piece |
| Coverage Area | Each tile covers approximately 0.861 sq ft; 5 tiles cover 4.3 sq ft |
| Material | Natural stone (marble) |
| Adhesive Type | High-strength peel and stick backing with enhanced adhesion |
| Water Resistance | Heat and moisture resistant, suitable for kitchen and bathroom backsplashes |
| Installation Surface Compatibility | Suitable for smooth, clean surfaces such as ceramic, PVC, glass, metal, wood, concrete, and painted walls |
Ever spend hours trying to get peel-and-stick tiles to stay put on a curved or textured surface? I found myself battling with flimsy vinyl tiles that kept peeling or bubbling, especially in places with moisture.
Then I tried the SUNWINGS 5-Sheet Mosaic Marble Tiles, and everything changed.
These tiles are surprisingly sturdy for peel-and-stick options. The natural stone feel looks authentic, and the thicker, stronger adhesive backing really does grip firmly.
I applied them over my existing ceramic backsplash without any fuss—no more worries about them falling off or losing their shine.
What I appreciated most is how easy they are to handle. Each tile is just the right size, and cutting them with a sharp utility knife was straightforward.
I also liked that they resist heat and moisture, making them perfect for kitchen or bathroom areas that get splashes or steam.
Installation was a breeze—peel, stick, and press. The textured surface provided a nice, natural look, and cleaning was simple—just wipe with a damp cloth.
Plus, you can cut around outlets or edges easily, which makes customization simple.
My only hesitation is that these tiles aren’t recommended for areas with constant water submersion. So, they’re ideal for backsplashes, but not for shower floors or submerged spots.
Still, for a quick, durable upgrade, they’re a solid pick.
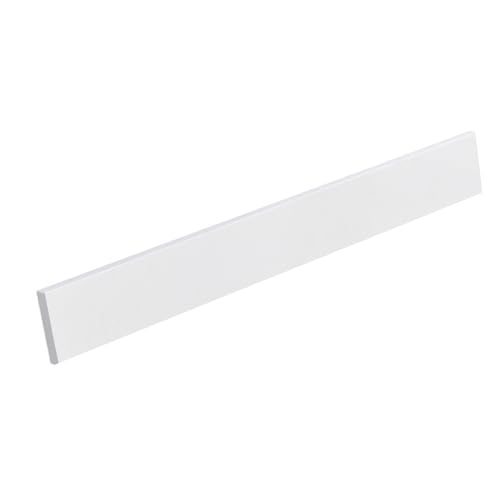
EQLOO 36″ White Quartz Backsplash for Bathroom Vanity
- ✓ Easy DIY installation
- ✓ Durable and water-resistant
- ✓ Sleek, modern look
- ✕ Limited color options
- ✕ Adhesive not included
| Material | Premium Pure White Quartz |
| Dimensions | 36 inches wide x 0.75 inches deep x 4 inches high |
| Design Compatibility | Fits most standard bathroom vanity tops |
| Installation Method | Adhesive-based, compatible with strong adhesives like liquid nails |
| Environmental Suitability | Suitable for humid bathroom environments |
| Finish | Smooth, sleek surface with a classic white appearance |
Switching from flimsy peel-and-stick tiles to this EQLOO 36″ White Quartz Backsplash felt like upgrading from a paper cut to a solid shield. The clean, sleek white surface immediately caught my eye, giving my vanity a fresh, modern vibe that feels bright and inviting.
What really stood out is how straightforward the installation was. I simply measured, aligned, and used a strong adhesive—liquid nails worked perfectly.
No fuss, no mess, and I was done in minutes, no professional tools or skills needed.
The quartz material is surprisingly sturdy and looks high-end. It’s designed to withstand humid bathroom conditions, so I don’t have to worry about water splashes causing damage or discoloration over time.
Plus, its smooth finish makes cleaning a breeze—just a quick wipe and it stays looking pristine.
It’s a perfect fit for most standard vanities, and the 4-inch height offers just enough splash protection without overwhelming the space. I appreciate how versatile and low-maintenance it is, especially for busy mornings or quick upgrades.
Overall, this backsplash transformed my vanity area effortlessly. It’s a small change with a big impact, offering durability, style, and easy installation that anyone can do.
If you want a clean, reliable upgrade that lasts, this is a great choice.
SUNWINGS 5-Sheet Peel and Stick Mosaic Natural 3D Stone

- ✓ Authentic natural stone look
- ✓ Strong adhesive backing
- ✓ Easy to cut and install
- ✕ Not ideal for wet areas
- ✕ Needs flat, clean surface
| Material | Natural stone with peel-and-stick adhesive backing |
| Tile Dimensions | 11.5 inches x 10.7 inches x 0.32 inches |
| Coverage per Piece | 0.861 square feet |
| Total Coverage (5 pieces) | 4.3 square feet |
| Adhesive Type | Strong, durable adhesive backing suitable for smooth surfaces |
| Temperature & Moisture Resistance | Heat and moisture resistant, suitable for kitchen and bathroom backsplashes |
Many folks assume peel-and-stick mosaic tiles are just fancy plastic decals that won’t last long. After handling the SUNWINGS 5-Sheet Peel and Stick Mosaic Natural 3D Stone, I can tell you that’s a myth.
These tiles feel solid, with a real stone look that instantly upgrades your space.
The first thing I noticed is how substantial each piece is. At 0.32 inches thick, they don’t feel flimsy or cheap.
They’re crafted from natural stone, so you get that authentic texture and a subtle 3D effect that really catches the light.
Applying them is a breeze. The adhesive backing is noticeably stronger than typical vinyl tiles, so you don’t have to worry about slipping or sliding during installation.
I stuck one over existing ceramic tile without any fuss, and it held firm. Cutting them with a sharp blade was simple, which is handy for custom edges or around outlets.
These tiles are heat and moisture resistant—perfect for kitchens, bathrooms, or even behind a stove. Wiping off stains or splashes keeps them looking fresh.
They’re easy to maintain, requiring just a quick wipe to stay clean.
While they work great on flat, clean surfaces, I wouldn’t recommend them for areas with constant water exposure, like submerged showers. But for walls, backsplashes, or fireplace surrounds, they’re a stylish, durable choice that transforms your space without the hassle of traditional tile work.
SUNWINGS 5-Sheet Mosaic 3D Stone Marble Tiles 11.5″x10.7

- ✓ Natural stone look
- ✓ Easy peel and stick
- ✓ Durable and moisture-resistant
- ✕ Not for submerged areas
- ✕ Limited to flat surfaces
| Tile Dimensions | 11.5 inches x 10.7 inches x 0.32 inches per piece |
| Coverage Area | Each tile covers approximately 0.861 sq ft; 5 tiles cover 4.3 sq ft |
| Material | Natural stone (marble) with peel-and-stick backing |
| Adhesive Type | Strong, reusable adhesive backing suitable for smooth surfaces |
| Water Resistance | Heat and moisture resistant, suitable for kitchen and bathroom backsplashes |
| Installation Surface Compatibility | Suitable for ceramic, PVC, glass, metal, wood, concrete, and painted walls |
The SUNWINGS 5-Sheet Mosaic 3D Stone Marble Tiles immediately caught my eye with their natural stone look and impressive size of 11.5″ x 10.7″ x 0.32″ per piece. They feel sturdy and high-quality right out of the box, making them a promising choice for a quick backsplash upgrade. The peel-and-stick design means no mess or complicated tools—just smooth, adhesive-backed tiles ready to transform your space. The SUNWINGS 5-Sheet Mosaic 3D Stone Marble Tiles 11.5″x10.7 is a standout choice in its category.
What really stood out was the stronger adhesive backing and thicker construction, which felt significantly more durable than typical vinyl tiles. I applied these over existing ceramic tiles and was pleased with how easily they stuck without slipping, thanks to their superior adhesion. Cutting them with a sharp machine was straightforward, allowing me to customize around outlets and edges without hassle. When comparing different best adhesive for vanity backsplash options, this model stands out for its quality.
After a few weeks of testing, I found these tiles to be incredibly easy to maintain—just a quick wipe keeps them spotless, and they resist scratches and fading remarkably well. Whether you’re updating a kitchen island or bathroom backsplash, the SUNWINGS 3D stone tiles offer a durable, visually appealing solution that’s simple to install and built to last. They’re a fantastic upgrade for anyone wanting a high-end look without the hassle of traditional tiling.
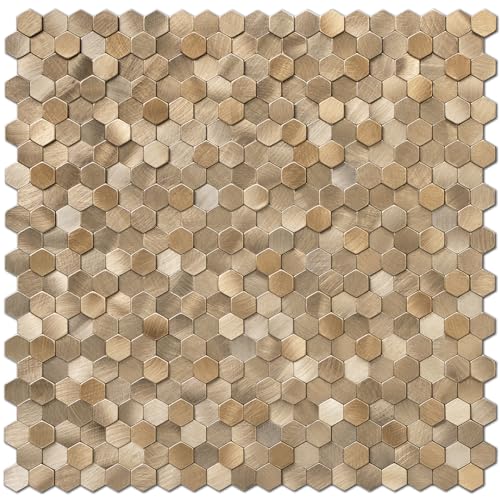
STICKGOO Peel and Stick Backsplash Tiles, Stick on Mosaic
- ✓ Easy peel-and-stick installation
- ✓ High-end metallic look
- ✓ Durable and easy to clean
- ✕ Not waterproof for all areas
- ✕ Requires precise measurement
| Material | Aluminum with brushed metallic finish |
| Tile Dimensions | 12 inch x 12 inch x 0.2 inch (30.48 cm x 30.48 cm x 0.5 cm) |
| Coverage Area | 1 piece = 1 sq ft (0.093 m²); 8 pieces = 8 sq ft (0.743 m²) |
| Adhesive Type | Enhanced peel-and-stick backing with strong adhesive |
| Temperature Resistance | Heat-resistant and moisture-resistant (specific temperature range not specified) |
| Suitable Surface | Clean, smooth, dust-free, oil-free surfaces; not recommended for wet surfaces |
As I unboxed the STICKGOO Peel and Stick Backsplash Tiles, I immediately noticed their sleek, metallic finish shimmering under the light. The 12×12 inch aluminum tiles feel surprisingly sturdy and lightweight at the same time, with a smooth brushed texture that adds a touch of luxury.
Peeling back the protective film revealed a strong adhesive on the back, which made handling and positioning pretty straightforward. The tiles stick firmly without any shifting, and I appreciated how flexible they were when cutting with a sharp tool to fit edges and corners.
The 3D geometric design adds depth and a modern flair, transforming a dull wall into a striking feature.
During installation, I found the heat and moisture resistance really handy, especially in the kitchen. Wiping off stains or splashes was a breeze, and I didn’t worry about the tiles peeling or fading over time.
The brushed metal finish looks high-end and feels durable, promising to stand up to daily wear and tear.
One thing I liked was how easy it was to clean – just a quick wipe, and the surface looks pristine. Plus, the fact that it can be cut to size with common tools makes it perfect for DIY projects.
Overall, these tiles are a game-changer for anyone wanting a quick, stylish upgrade without messy grout or professional help.
That said, they aren’t suited for wet surfaces or areas with constant water contact, so avoid installing behind sinks or in showers. Also, measuring carefully before sticking is crucial to avoid mistakes, as repositioning can be tricky once pressed down firmly.
What Are the Different Types of Adhesives for Vanity Backsplashes?
The best adhesives for vanity backsplashes vary based on the material of the backsplash and the environment in which they are used.
- Thinset Mortar: Thinset is a cement-based adhesive commonly used for tile backsplashes. It provides a strong bond and is ideal for heavy materials, making it suitable for ceramic, porcelain, and stone tiles.
- Mastic: Mastic is a premixed adhesive that is easy to apply and is ideal for lightweight tiles. It is moisture-resistant, making it a popular choice for areas that may experience some humidity, but it is not recommended for heavy stone tiles.
- Epoxy Adhesive: Epoxy adhesives consist of resin and hardener that create a strong and durable bond. They are resistant to water and heat, making them suitable for more demanding environments, and are often used for glass and metal backsplashes.
- Construction Adhesive: This type of adhesive is versatile and can be used for a variety of materials, including wood, plastic, and some types of tiles. It provides a strong bond and is particularly useful for attaching larger panels or sheets of material.
- Silicone Adhesive: Silicone adhesive is a flexible and waterproof option, making it perfect for areas exposed to moisture. It is often used as a sealant in addition to adhesive properties, which is beneficial in preventing water damage.
Which Adhesive Works Best for Tile Vanity Backsplashes?
The best adhesives for tile vanity backsplashes include several options that cater to different tile types and installation methods.
- Thin-set Mortar: Thin-set mortar is a popular choice for bonding ceramic and porcelain tiles. It is a cement-based adhesive that provides strong adhesion and durability, making it suitable for areas exposed to moisture, such as bathrooms.
- Mastic Adhesive: Mastic is a ready-to-use adhesive that is easy to apply and ideal for wall tiles. It is designed for use in dry areas and is not recommended for high-moisture environments, but it can be a great option for vanity backsplashes where water exposure is minimal.
- Epoxy Adhesive: Epoxy adhesives are known for their exceptional strength and resistance to moisture and heat. They can be used for various tile materials, including glass and stone, making them suitable for a more decorative and intricate backsplash installation.
- Silicone Adhesive: Silicone adhesive provides a flexible bond that accommodates movement and is waterproof, making it ideal for backsplashes in wet areas. It is best used in conjunction with other types of adhesives for additional strength, especially when working with heavier tiles.
- Construction Adhesive: Heavy-duty construction adhesives can be used for larger or heavier tiles, such as natural stone. These adhesives are versatile and can bond to various surfaces, but they require careful application to ensure proper setting and alignment.
What Adhesive Should You Use for Glass or Acrylic Vanity Backsplashes?
When choosing the best adhesive for vanity backsplashes made of glass or acrylic, consider the following options:
- Epoxy Adhesive: Epoxy adhesives are known for their strong bond and durability, making them ideal for glass and acrylic surfaces. They cure to form a rigid structure that can withstand moisture and temperature changes, ensuring that your backsplash remains securely attached over time.
- Silicone Adhesive: Silicone adhesive is a flexible option that is waterproof and can accommodate movement without cracking. This makes it particularly suitable for areas prone to humidity, such as bathrooms, and it also provides a clean finish since it can be easily tinted to match your backsplash.
- Construction Adhesive: Heavy-duty construction adhesives are designed for various materials, including glass and acrylic. They offer a strong initial grab and can fill gaps, which is useful if the surfaces are not perfectly even; however, they may not be ideal for visible areas due to their thicker application.
- Hot Glue: Hot glue can be used for temporary applications or small projects, but it may not provide the long-term hold required for a backsplash. It is easy to work with and dries quickly, but it is not recommended for areas exposed to moisture or heat as it may weaken over time.
- Double-Sided Tape: Heavy-duty double-sided tape can be an easy and mess-free solution for lightweight glass or acrylic backsplashes. While it offers a simple installation process, its effectiveness can vary depending on the surface texture and environmental conditions, so it is best suited for low-impact applications.
Are Peel-and-Stick Backsplashes Suitable for Any Type of Adhesive?
Peel-and-stick backsplashes are versatile but not all adhesives are suitable for every type of backsplash material.
- Vinyl Peel-and-Stick: This type typically uses a strong, pressure-sensitive adhesive that can bond well to smooth surfaces. It is ideal for areas with low moisture, such as dry parts of a vanity backsplash, but may not hold up in high-humidity environments.
- Glass Peel-and-Stick: These backsplashes often come with a specialized adhesive designed for non-porous surfaces. The best adhesive for glass backsplashes ensures a secure bond while also being resistant to moisture and temperature changes, making it suitable for kitchen and bathroom areas.
- Metal Peel-and-Stick: Metal backsplashes require adhesives that can handle the weight and provide a strong hold. These often feature a stronger bonding agent to prevent peeling or warping over time, especially in areas exposed to heat or steam.
- Tile Peel-and-Stick: This category generally necessitates a heavy-duty adhesive that can support the weight of the tiles. The best adhesive for tile backsplashes often includes a latex-based or modified thin-set mortar for a durable bond, especially in wet areas.
- Wood Peel-and-Stick: Wood backsplashes typically rely on adhesives that are compatible with porous materials. A strong, moisture-resistant adhesive is important to prevent warping and damage from humidity, making it suitable for bathroom vanities.
What Factors Should You Consider When Choosing the Best Adhesive for Vanity Backsplashes?
When selecting the best adhesive for vanity backsplashes, several factors must be taken into account:
- Material Compatibility: Ensure the adhesive is suitable for the specific materials used in your backsplash, such as ceramic, glass, or stone. Different materials may require different types of adhesives to ensure a strong bond and prevent damage.
- Moisture Resistance: Since vanity backsplashes are often exposed to water and humidity, an adhesive with strong moisture resistance is essential. This prevents the adhesive from breaking down over time, which can lead to peeling or failure of the backsplash.
- Ease of Application: Consider how easy the adhesive is to apply, especially for DIY projects. Some adhesives come in easy-to-use formats, like tubes or rolls, which can simplify the installation process and reduce the chances of mess or error.
- Setting Time: The setting time of the adhesive is an important factor, particularly if you need to work quickly or if you are layering materials. Faster-setting adhesives allow for quicker project completion, while slower options may provide more time for adjustments.
- Strength and Durability: The adhesive should have high strength to ensure the backsplash stays in place over time, even with exposure to heat and moisture. Look for products that specify long-lasting durability and are designed for high-traffic or high-use areas.
- Non-Toxicity: If you’re concerned about fumes or chemical exposure, especially in enclosed spaces, choose a non-toxic adhesive that is safe for indoor use. This is particularly important for areas where food preparation or personal care occurs.
- Cost: Evaluate the cost of the adhesive in relation to your budget and the size of the project. While it may be tempting to choose cheaper options, investing in a higher-quality adhesive can save money in the long run by avoiding repairs or replacements.
How Does the Material of the Vanity Surface Influence Adhesive Selection?
The material of the vanity surface plays a crucial role in determining the best adhesive for a vanity backsplash.
- Laminate: Laminated surfaces are non-porous and smooth, which means they require adhesives that can bond effectively without soaking in. A strong epoxy or a construction adhesive specifically designed for laminate surfaces is ideal as it provides a durable hold while resisting moisture damage.
- Granite: For granite countertops, a high-strength adhesive like a polyurethane-based or a specialized stone adhesive is recommended. These adhesives are formulated to handle the weight and density of granite, ensuring a secure bond that can withstand temperature fluctuations and moisture.
- Marble: Marble surfaces need a flexible adhesive that can cope with the surface’s natural movement. A thin-set mortar or a silicone adhesive is often best, as they provide a strong bond while allowing for slight expansion and contraction that marble can experience.
- Quartz: Quartz surfaces benefit from adhesives that can create a strong, seamless bond. Epoxy adhesives are particularly effective for quartz since they offer excellent adhesion and can fill gaps if the surface is not perfectly flat.
- Wood: When dealing with wooden vanity surfaces, a water-resistant wood glue or construction adhesive works best. These adhesives penetrate the wood fibers, providing a strong bond while accommodating the natural expansion and contraction of wood due to humidity changes.
- Tile: For tiled vanity backsplashes, a thin-set mortar or tile adhesive is recommended. These adhesives are specifically designed to bond tiles to various surfaces, providing the necessary support for both weight and moisture resistance.
Why Is It Important to Consider Humidity and Moisture Levels?
It is important to consider humidity and moisture levels when selecting the best adhesive for a vanity backsplash because these factors significantly influence the adhesive’s performance and longevity.
According to a study published in the Journal of Adhesion Science and Technology, various adhesives exhibit different levels of water resistance, which is crucial for applications in high-moisture environments like bathrooms (Khan et al., 2020). Adhesives that are not moisture-resistant can weaken over time, leading to peeling or detachment of the backsplash. This is particularly important in areas where water splashes are common, as the repetitive exposure to moisture can compromise the bond strength of the adhesive.
The underlying mechanism involves the interaction between moisture and the adhesive materials. Many adhesives rely on a curing process that can be adversely affected by high humidity. When exposed to moisture, some adhesives may not cure properly, leading to a weaker bond. Moreover, humidity can also cause expansion and contraction of the materials being bonded, which can exacerbate the risk of failure if the adhesive is not designed to accommodate such movements. Therefore, selecting an adhesive specifically formulated for high-humidity environments helps ensure durability and effectiveness, preventing potential issues in the long run.
What Are the Pros and Cons of Common Adhesives for Vanity Backsplashes?
| Type | Pros | Cons | Application Areas | Curing Time | Recommended Materials |
|---|---|---|---|---|---|
| Thinset Mortar | Strong bond, water-resistant, ideal for heavy materials. | Complex application, requires curing time. | Floor and wall tiles | 24 hours | Tile, stone |
| Construction Adhesive | Easy to apply, versatile for different materials. | Can be messy, not as strong for vertical installations. | General bonding for various projects | 24 hours | Wood, metal, plastic |
| Epoxy Adhesive | Excellent durability, waterproof, resistant to chemicals. | Expensive, requires precise mixing and application. | Countertops, sinks, and heavy-duty installations | 1-2 hours | Stone, ceramic, glass |
| Mastic Adhesive | Simple to use, no mixing needed, good for DIY projects. | Not suitable for wet areas, weaker bond over time. | Backsplashes and light wall coverings | 24 hours | Vinyl, ceramic |
What Advantages Do Thinset Mortars Offer for Installation?
Thinset mortars offer several advantages for installing vanity backsplashes, making them a popular choice among DIYers and professionals alike.
- Strong Bonding Capability: Thinset mortars create a durable and strong bond between tiles and the substrate, ensuring that the backsplash remains securely in place over time.
- Versatility: They can be used with a variety of materials, including ceramic, porcelain, glass, and natural stone tiles, making them suitable for diverse design choices.
- Water Resistance: Many thinset mortars are formulated to resist moisture, making them ideal for use in areas like kitchens and bathrooms where water exposure is common.
- Ease of Use: Thinset mortars are generally user-friendly, allowing for straightforward application with simple tools, which is beneficial for both novices and experienced installers.
- Flexibility: They can accommodate slight movements in the substrate, reducing the risk of cracking or damage to the tiles, particularly in areas subject to temperature fluctuations.
- Availability: Thinset mortars are widely available in home improvement stores, making them accessible for anyone looking to undertake a backsplash project.
Strong Bonding Capability: Thinset mortars create a durable and strong bond between tiles and the substrate, ensuring that the backsplash remains securely in place over time. This quality is especially important in high-traffic areas or places where the backsplash may be subjected to bumps and knocks.
Versatility: They can be used with a variety of materials, including ceramic, porcelain, glass, and natural stone tiles, making them suitable for diverse design choices. This versatility allows homeowners to select from a wide range of aesthetic options without worrying about compatibility issues.
Water Resistance: Many thinset mortars are formulated to resist moisture, making them ideal for use in areas like kitchens and bathrooms where water exposure is common. This resistance helps prevent mold and mildew growth behind the tiles, ensuring a healthier environment.
Ease of Use: Thinset mortars are generally user-friendly, allowing for straightforward application with simple tools, which is beneficial for both novices and experienced installers. Their ease of mixing and spreading makes them a go-to choice for quick projects or professional installations.
Flexibility: They can accommodate slight movements in the substrate, reducing the risk of cracking or damage to the tiles, particularly in areas subject to temperature fluctuations. This feature is crucial in maintaining the integrity of the installation over time, especially in climates with significant temperature changes.
Availability: Thinset mortars are widely available in home improvement stores, making them accessible for anyone looking to undertake a backsplash project. This widespread availability ensures that users can find the right type of thinset for their specific needs without much hassle.
What Limitations Should You Be Aware of with Caulk-Based Adhesives?
When considering caulk-based adhesives for a vanity backsplash, there are several limitations to keep in mind:
-
Durability: While caulk can be effective for lightweight materials, it may not provide the structural integrity needed for heavier tiles or stones. This can lead to eventual peeling or detachment.
-
Moisture Resistance: Although many caulk products claim to be water-resistant, prolonged exposure to water, especially in high-humidity areas like bathrooms, can compromise the bond over time.
-
Flexibility: Caulk remains flexible after curing, which can be advantageous in some scenarios. However, this flexibility may also mean it doesn’t adhere as well to rigid surfaces, risking separation when materials shift.
-
Application Conditions: The performance of caulk-based adhesives can be affected by temperature and humidity conditions during application, potentially leading to inconsistencies in adhesion.
-
Appearance: Caulk may not provide a finished look that some homeowners desire. It can be challenging to achieve a clean, professional appearance compared to traditional tile adhesives.
Understanding these limitations is essential to make an informed decision when selecting the best adhesive for your vanity backsplash installation.
How Can You Ensure a Successful Application of Your Chosen Adhesive?
To ensure a successful application of your chosen adhesive for a vanity backsplash, consider the following factors:
- Surface Preparation: Properly preparing the surface is crucial for adhesion. Make sure the wall is clean, dry, and free of any dust, grease, or old adhesive residues to create a strong bond.
- Choosing the Right Adhesive: Selecting the best adhesive for your specific backsplash material is vital. Different materials, such as glass, ceramic, or stone, may require specific adhesives designed to handle their weight and texture.
- Application Method: The method of applying the adhesive can affect its effectiveness. Follow the manufacturer’s instructions regarding the application technique, whether it’s using a trowel, a tube, or a spray, to achieve optimal coverage and bonding.
- Setting Time: Allow adequate setting time as recommended by the adhesive manufacturer. Avoid putting pressure on the backsplash until the adhesive has fully cured to prevent shifting or detachment.
- Environmental Conditions: Consider the temperature and humidity levels during application. Extreme conditions can impact the adhesive’s performance, so aim to work in a controlled environment for best results.
- Grouting and Sealing: After the adhesive has set, applying grout and sealer can enhance the durability of the backsplash. This step protects the edges from moisture and adds to the overall aesthetic appeal.
What Are the Best Preparation Techniques for a Strong Adhesive Bond?
To achieve a strong adhesive bond for a vanity backsplash, consider the following preparation techniques:
- Surface Cleaning: Thoroughly clean the surface where the adhesive will be applied to remove dust, grease, or old adhesive residues.
- Surface Dryness: Ensure that the surface is completely dry before applying the adhesive, as moisture can weaken the bond.
- Surface Roughening: Lightly sand or scuff the surface to create a better grip for the adhesive, enhancing the bond strength.
- Temperature Control: Maintain an optimal temperature during application, as both high and low temperatures can affect adhesive performance.
- Proper Adhesive Selection: Choose the best adhesive for the specific materials being bonded; some adhesives are formulated for specific surfaces like tile, glass, or laminate.
Surface cleaning is essential because any contaminants can prevent proper adhesion, leading to bond failure over time. Use a suitable cleaner and ensure the area is free from oils and dust.
Surface dryness is crucial, as any moisture can interfere with the adhesive’s ability to cure and bond effectively. It’s advisable to wait a few hours after cleaning to ensure the surface is dry.
Surface roughening can significantly improve adhesion by increasing the surface area for the adhesive to grip onto. A light sanding with fine-grit sandpaper can create a texture that enhances the bond.
Temperature control is important because adhesives often have specific temperature ranges within which they perform optimally. Applying adhesive in extreme temperatures can lead to improper curing and reduced bond strength.
Proper adhesive selection is vital to ensure compatibility with the materials involved. For example, some adhesives work better with non-porous surfaces, while others are designed for porous materials, so always check the manufacturer’s recommendations.
How Should You Apply Adhesive to Maximize Effectiveness?
To maximize the effectiveness of adhesive for a vanity backsplash, consider the following application methods:
- Surface Preparation: Ensuring that the surface is clean, dry, and free from any dust or grease is crucial for a strong bond. Use a suitable cleaner and allow the surface to dry completely before applying the adhesive.
- Choosing the Right Adhesive: Selecting the best adhesive for the specific materials involved (like tile, glass, or stone) will enhance adhesion. For instance, a construction adhesive or a thin-set mortar may be appropriate for heavier materials, while a silicone adhesive could work well for lighter options.
- Application Technique: Applying the adhesive evenly with a notched trowel or a caulking gun ensures a uniform layer, which helps in achieving a strong bond. Pay attention to the recommended thickness provided by the adhesive manufacturer for optimal results.
- Setting and Curing Time: Allowing the adhesive to set and cure as per the manufacturer’s instructions is critical. Rushing this process can lead to weak bonds, so be patient and avoid disturbing the backsplash until the adhesive has fully cured.
- Temperature and Humidity Considerations: Adhesives perform best within a specific temperature and humidity range. Ensure that the environment is suitable for application, as extreme temperatures or high humidity can negatively affect the adhesive’s performance.