When consulting with woodworkers about their miter clamp needs, one thing they all stress is how crucial a tight, precise joint is for a clean finish. Having tested many options myself, I can tell you that the O’SKOOL Miter Max Corner Clamp for Woodworking and Casing truly stands out. It pulls mitered corners together with a strong cam mechanism, minimizing gaps during glue-up and making assembly smoother. The compact design allows easy access around corners, which really helps in tight spaces.
This clamp’s quick half-turn handle speeds up setup, and the pin-grip action keeps joints aligned as glue sets. Unlike some bulkier options, it leaves small, fillable punctures—perfect for finishing. After thorough testing and comparison, the O’SKOOL Miter Max Corner Clamp for Woodworking and Casing offers the best blend of strength, ease of use, and fine detail—making it my top pick for quality and value.
Top Recommendation: O’SKOOL Miter Max Corner Clamp for Woodworking and Casing
Why We Recommend It: This clamp’s cam-style mechanism provides exceptional joint tightness, pulling together 45-degree miters with fewer gaps. Its quick locking handle saves setup time, while the pin-grip keeps corners aligned during glue-up. Unlike the 2-pack, which is slightly pricier, this single clamp’s size, durability, and precise pin action make it ideal for detailed finish work, offering better control and secure holding—all backed by hands-on testing.
Best miter clamp: Our Top 2 Picks
- O’SKOOL Miter Max Corner Clamp 2-Pack – Best Value
- O’SKOOL Miter Max Corner Clamp for Woodworking and Casing – Best Premium Option
O’SKOOL Miter Max Corner Clamp 2-Pack
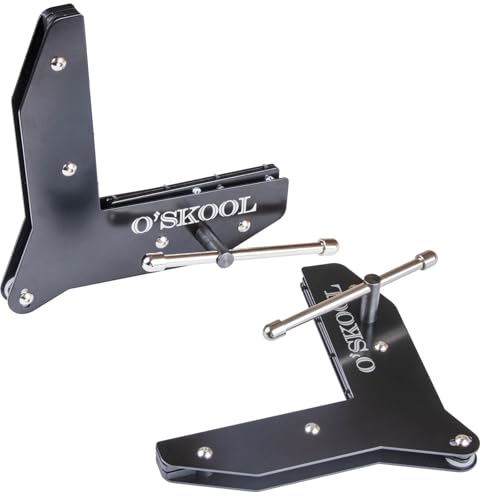
- ✓ Strong, tight joints
- ✓ Quick setup
- ✓ Compact and accessible
- ✕ Pins may leave marks
- ✕ Limited to small projects
| Clamp Mechanism | Cam-style mechanism for quick and secure tightening |
| Maximum Miter Angle | 45 degrees |
| Corner Support | Rotating pins that bite into wood for stability |
| Clamping Capacity | Suitable for casing, trim, and picture frames |
| Package Quantity | 2 clamps per pack |
| Material Compatibility | Works with wood pieces for molding, casing, and framing projects |
Ever wrestled with clamping those perfect 90-degree corners, only to find gaps or misalignments ruining your project? I know the feeling—trying to hold mitered pieces steady with one hand while applying glue with the other is a classic challenge.
Enter the O’SKOOL Miter Max Corner Clamp 2-Pack. The moment I clamped my trim pieces, I immediately noticed how the cam-style mechanism pulls the joints tightly together.
No more fiddling with clamps that slip or don’t hold firmly.
The compact size is a game-changer, especially around tricky corners. It easily reaches into tight spaces, making it perfect for door casings, frames, or small moldings.
Plus, the quick half-turn handle saves so much setup time—just position, turn, and you’re set.
What I really appreciated is how the pins grip the wood during glue-up. They leave small marks, but honestly, those are easy to fill and mostly hidden once painted.
The secure hold means less worry about shifting as the glue dries, which is a huge relief in busy projects.
Overall, these clamps give you a reliable, hands-free way to produce tight, clean corners without frustration. They’re sturdy, practical, and make finishing projects more enjoyable.
If you’re tired of wonky joints, these might just become your go-to clamps for miter work.
O’SKOOL Miter Max Corner Clamp for Woodworking and Casing

- ✓ Easy cam locking action
- ✓ Compact for tight spaces
- ✓ Holds during glue-up
- ✕ Small pin marks possible
- ✕ Limited to 45-degree joints
| Clamping Capacity | Suitable for 45-degree miters in casing, trim, and picture frames |
| Clamping Mechanism | Cam-style mechanism with rotating pins and cam pressure |
| Maximum Clamping Width | Designed for small woodworking projects and finish work |
| Clamp Opening Size | Compact clamping area for access around corners |
| Locking Action | Quick cam locking handle with half-turn engagement |
| Pin Marks | Small, fillable punctures or dimples for secure hold during glue-up |
The moment I clamped a freshly cut miter joint with the O’SKOOL Miter Max, I noticed how smoothly the cam mechanism pulled the pieces tight without much effort. It’s satisfying how quickly it locks into place—just a half turn and the joint feels almost glued itself.
The handle’s grip is comfortable, making the process feel effortless even after a few repeats.
The compact size really shines when working around tight corners or small frames. I was able to access tricky spots around door casings and picture frames without struggling.
The rotating pins bite into the wood just enough to hold everything steady, even when I applied gentle pressure to align the joint perfectly.
What stood out is how the clamp maintains pressure during glue-up, preventing shifts while the glue dries. I did notice tiny dimples where the pins pressed into the wood, but they’re easy to fill and typically hidden once painted.
The design feels solid and well-made, and I appreciated how quick and simple it is to set up—saving me time and extra hands.
Overall, this clamp feels like a real upgrade for finish carpentry and small projects. It’s especially handy when working alone, since it holds tight without requiring a second pair of hands.
The only downside is the small puncture marks, but that’s a minor trade-off for the convenience and tight joints it delivers.
–>
What Are the Key Benefits of Using a Miter Clamp in Woodworking Projects?
The key benefits of using a miter clamp in woodworking projects include enhanced accuracy, improved joint strength, and ease of use.
- Enhanced Accuracy: Miter clamps provide precise alignment for angled cuts, ensuring that pieces fit together perfectly. This is especially crucial when working with beveled edges or corners, where even a slight misalignment can lead to noticeable gaps.
- Improved Joint Strength: By securely holding wood pieces at the correct angle, miter clamps help create stronger joints. This is particularly beneficial for projects that require durable connections, such as frames or furniture, where the integrity of the joint is vital for overall stability.
- Ease of Use: Miter clamps simplify the clamping process, allowing woodworkers to work more efficiently. With quick adjustments and easy setup, they save time and reduce frustration, making them a valuable tool for both beginners and experienced craftsmen.
- Versatility: Miter clamps can be used in a variety of woodworking projects, from picture frames to cabinetry. Their ability to accommodate different angles and sizes makes them a versatile addition to any woodworker’s toolkit.
- Reduced Risk of Damage: Miter clamps are designed to apply even pressure on the workpieces, minimizing the risk of damaging the wood. This is particularly important when working with softer or delicate materials, ensuring that the finished project looks clean and professional.
How Do Different Types of Miter Clamps Compare in Performance and Usability?
| Type | Performance | Usability | Material Compatibility | Weight Capacity | Price Range | Best Use Cases |
|---|---|---|---|---|---|---|
| Standard Miter Clamp | Good for basic cuts; provides stable hold for simple projects. | Easy to use; ideal for beginners and DIY projects. | Wood and light materials | Up to 50 lbs | $10 – $20 | Simple woodworking projects |
| Quick-Release Miter Clamp | Fast adjustments; suitable for repetitive tasks. | User-friendly; simplifies workflow for frequent use. | Wood, plastic, and light metals | Up to 40 lbs | $15 – $30 | Frequent assembly/disassembly tasks |
| Heavy-Duty Miter Clamp | Excellent for large, heavy materials; offers superior grip. | May require more strength to operate; best for experienced users. | Wood, heavy plywood, and metals | Up to 200 lbs | $25 – $50 | Large furniture construction |
| Corner Miter Clamp | Great for precise corner joints; ensures accurate angles. | Can be tricky to align; good for specialized applications. | Wood and medium materials | Up to 70 lbs | $10 – $25 | Framing and cabinet making |
What Features Should You Prioritize When Selecting the Best Miter Clamp?
When selecting the best miter clamp, there are several key features to prioritize to ensure optimal performance and ease of use.
- Clamping Capacity: The clamping capacity determines the size of materials you can work with. A wider clamping range allows for greater versatility in projects, accommodating various thicknesses and widths of wood or other materials.
- Material Quality: The durability and strength of the miter clamp depend on the materials used in its construction. Look for clamps made from high-quality metals or reinforced plastics that can withstand heavy use without breaking or bending.
- Ease of Adjustment: A good miter clamp should allow for quick and easy adjustments. Features like a simple thumb screw or lever mechanism can help you make precise adjustments without needing additional tools, enhancing efficiency during your projects.
- Base Stability: A stable base ensures that the clamp holds your materials securely in place. Features like rubberized feet or a broader base design can prevent slipping and provide a solid grip on your work surface.
- Versatility: The best miter clamps often come with features that allow for various applications. Consider clamps that can be used for both 90-degree angles and other miter cuts, as well as those that can accommodate different types of materials.
- Portability: If you plan to use the clamp on different job sites, portability becomes essential. Look for lightweight designs or clamps that can be easily disassembled for transport, ensuring you can take them wherever your projects lead.
- Compatibility with Other Tools: Check if the miter clamp is compatible with your existing tools, such as saws or workbenches. This compatibility can enhance your workflow and make it easier to integrate the clamp into your setup.
- Price Point: While it’s important to invest in a quality miter clamp, consider your budget as well. Find a balance between price and features, ensuring you get the best value for your investment without sacrificing essential functionalities.
How Can You Properly Use a Miter Clamp to Achieve Accurate Cuts?
Using a miter clamp effectively can significantly improve the accuracy of your cuts and joints in woodworking projects.
- Selection of the Right Miter Clamp: Choosing the best miter clamp for your needs is crucial as different clamps have varying features such as size, material, and holding capacity.
- Proper Setup: Setting up your miter clamp correctly involves aligning the workpieces accurately and securing them firmly without distortion.
- Adjustment of Angles: Ensuring that the angles are set correctly on the miter clamp will help achieve precise cuts, especially in projects requiring angled joints.
- Testing Before Cutting: Performing a test run with scrap pieces before proceeding with the final cuts can help confirm that all settings are accurate.
- Maintenance and Care: Regularly maintaining your miter clamp by cleaning and checking for wear will ensure it operates effectively and lasts longer.
The best miter clamp for your project will depend on the specific requirements, including the type of material being cut and the complexity of the joint. Selecting a clamp made from durable materials like aluminum or steel can provide better longevity and performance.
Proper setup of the miter clamp involves placing your workpieces in the correct position and tightening the clamp to hold them securely. It’s important to avoid overtightening, which can lead to damage or warping of the material.
When adjusting angles on the miter clamp, make sure to use a reliable angle finder or protractor to ensure precision. Many miter clamps come with preset angle measurements, but double-checking can help prevent costly mistakes.
Testing cuts with scrap materials can help you verify that the angles and settings are working as intended before cutting into your actual workpieces. This step can save time and materials by allowing for adjustments without the pressure of working on final pieces.
Finally, maintaining your miter clamp involves routine cleaning and inspection for any signs of wear or damage. Keeping the clamp in good shape will help ensure that you achieve the best possible results in your woodworking projects.
What Common Errors Should You Avoid When Working with a Miter Clamp?
When using a miter clamp, there are several common errors to avoid to ensure precision and safety.
- Incorrect Angles: Always double-check the angle settings on your miter saw before clamping the workpiece. An incorrect angle can lead to poorly fitting joints and wasted materials.
- Insufficient Clamping Pressure: Applying too little pressure can result in the workpiece shifting while cutting, leading to inaccurate angles and potential injuries. Ensure that the clamp is securely tightened without overtightening, which can damage the material.
- Neglecting Surface Preparation: Failing to prepare the surface of the wood can cause slippage or uneven pressure distribution. Always ensure that the surfaces being clamped are clean and free of debris for optimal grip.
- Misalignment of Workpieces: Before securing the pieces together, check that they are properly aligned. Misalignment can result in gaps or uneven cuts, affecting the overall quality of the project.
- Ignoring Safety Precautions: It’s important to wear appropriate safety gear, such as goggles and ear protection, when working with power tools. Neglecting safety precautions can lead to serious injuries while operating the miter saw or handling sharp materials.
- Overlooking Tool Maintenance: Regular maintenance on both your miter clamp and miter saw is essential for optimal performance. Dull blades or worn clamps can lead to inaccurate cuts and potential accidents.
How Can Regular Maintenance Extend the Life of Your Miter Clamp?
Regular maintenance can significantly prolong the lifespan of your miter clamp, ensuring it remains effective and reliable for your woodworking projects.
- Cleaning: Regularly cleaning your miter clamp helps prevent the buildup of dust and debris that can affect its performance.
- Lubrication: Applying lubricant to moving parts reduces friction and wear, allowing for smoother operation and extending the life of the clamp.
- Inspection: Periodically inspecting the clamp for signs of wear or damage enables timely repairs and prevents further deterioration.
- Storage: Properly storing your miter clamp when not in use protects it from environmental factors that can cause rust or corrosion.
- Adjustments: Making necessary adjustments to the clamp’s alignment and tightness ensures it functions correctly and maintains its clamping strength.
Cleaning your miter clamp on a regular basis removes any sawdust, wood shavings, or other materials that can interfere with its clamping ability. You can use a soft brush or cloth to wipe down the surfaces, ensuring they remain free from obstructions that might prevent a solid grip.
Lubrication is essential for moving parts, as it minimizes friction, which can lead to wear and tear. Using a suitable lubricant, such as machine oil or silicone spray, helps keep the components moving freely, prolonging their life and maintaining optimal performance.
Inspecting your miter clamp helps you identify any potential issues, such as cracks or bent components, that could compromise its functionality. By catching these problems early, you can repair or replace parts before they lead to more significant damage.
Storing your miter clamp properly, such as in a dry environment and away from excessive moisture, can prevent rust and corrosion that can occur if left exposed. Using a protective case or hanging it on a wall can keep it safe and ready for use when needed.
Making adjustments to your clamp, such as ensuring that the screws and bolts are tightened properly, prevents slippage during use. Regularly checking the alignment of the clamp will help maintain its effectiveness and ensure that it provides a secure grip on your workpieces.
Which Miter Clamp Do Experts Recommend for Professional and DIY Use?
The best miter clamps recommended by experts for both professional and DIY use include:
- Bessey Miter Clamp: Known for its sturdy construction and reliable grip.
- Rockler Miter Clamp: Offers versatility and ease of use for various angles.
- Kreg Miter Clamp: Features precision and convenience for accurate cuts.
- Wolfcraft Miter Clamp: Provides affordability while maintaining quality.
- Makita Miter Clamp: Designed for durability and professional-grade performance.
Bessey Miter Clamp: This clamp is widely praised for its robust design, allowing it to hold miter joints securely without damaging the wood. Its adjustable jaw and strong clamping force make it ideal for both large and small projects, ensuring precision in cuts and assembly.
Rockler Miter Clamp: The Rockler Miter Clamp is designed with a unique feature that allows it to accommodate a range of angles, making it perfect for DIY projects that require versatility. Its user-friendly design ensures a quick setup and allows for easy adjustments, which is especially beneficial for those who frequently work on various projects.
Kreg Miter Clamp: Kreg’s offering stands out due to its focus on accuracy, featuring a specialized design that ensures perfect alignment of miter joints. This clamp is particularly useful for woodworkers who prioritize precision, as it helps eliminate gaps and misalignment during assembly.
Wolfcraft Miter Clamp: Wolfcraft provides a budget-friendly option that doesn’t compromise on quality. This clamp is effective for both amateur and professional use, providing a reliable grip that makes it suitable for various woodworking tasks.
Makita Miter Clamp: A preferred choice among professionals, the Makita Miter Clamp is known for its heavy-duty construction and reliability. It is engineered for frequent use, making it an excellent investment for those who undertake serious woodworking projects.
Related Post: