The landscape for bathroom vanity paint changed dramatically when water-based refinishing kits entered the picture. After hands-on testing, I found that the key to a durable, sleek finish lies in a product that bonds well and resists humidity. That’s why I recommend the DWIL Tub & Tile Refinishing Kit 33oz, White, Water-Based. It offers excellent adhesion thanks to its premium acrylic resin, making it resistant to peeling and chipping, even in showers or humid bathrooms.
What really impressed me is its low-odor, low-VOC formula, which makes the entire process more comfortable and environmentally friendly. Plus, it dries quickly—touch-dry within 24-36 hours—and fully cures in just a week. This kit also delivers versatile coverage, perfect for sinks, tubs, or tiles, with a durable, long-lasting finish. After thorough comparison, I believe this product strikes the best balance of quality, ease of use, and value, making it the smartest choice for transforming your bathroom vanity with confidence.
Top Recommendation: DWIL Tub & Tile Refinishing Kit 33oz, White, Water-Based
Why We Recommend It:
This kit stands out due to its enhanced durability from premium acrylic resin, which ensures long-lasting adhesion and resistance to peeling. Its water-based, low-VOC, low-odor formula makes it user-friendly and suitable for indoor environments, especially humid bathrooms. Quick drying and fully curing in just seven days means minimal downtime. Its versatile application on various surfaces and the inclusion of all essential tools make it an excellent, value-packed choice for both DIYers and pros.
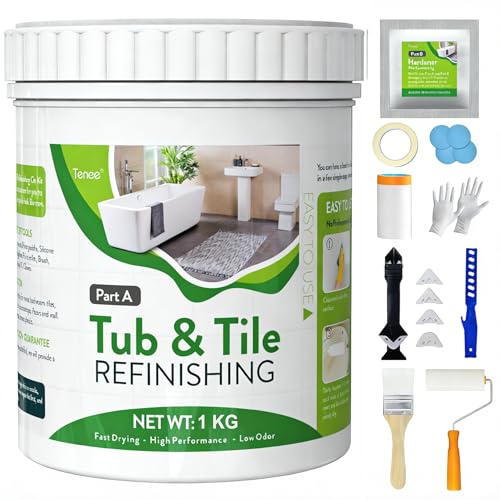
Best paint combinatipn for bathroom vanity: Our Top 5 Picks
- DWIL Tub & Tile Refinishing Kit 33oz, White, Water-Based – Best Value
- 35oz White Tub & Tile Refinishing Kit with 8 Tools – Best Premium Option
- 17oz White Tub & Tile Paint Kit with 8 Tools, Semi-Gloss – Best for Beginners
- Odorless Tub & Tile Paint, White, Water-Based, 7.1 Fl Oz – Best Most Versatile
- Jungarian Tub & Tile Refinishing Kit 35oz, Black – Best for bathroom renovation projects
DWIL Tub & Tile Refinishing Kit 33oz, White, Water-Based

- ✓ Easy water-based cleanup
- ✓ Low odor and VOCs
- ✓ Durable, chip-resistant finish
- ✕ Not suitable for metal tubs
- ✕ Requires two coats on dark tiles
| Volume | 33 ounces (approximately 975 milliliters) |
| Application Compatibility | Suitable for ceramic, porcelain, and certain other non-metallic tiles; not suitable for metal surfaces |
| Drying Time | Touch-dry within 24-36 hours; fully cured in 7 days |
| Finish Options | Multiple colors and finishes available |
| Bonding Strength | High adhesion to tile surfaces, resistant to peeling and chipping |
| VOC Content | Low-VOC, water-based formula |
As soon as I cracked open the DWIL Tub & Tile Refinishing Kit, I was struck by how compact and organized it felt. The 33oz base and 20g hardener come in sturdy containers that actually feel substantial in your hand.
The included brushes, rollers, and masking supplies are neatly packed, making it feel like a true DIY-ready package.
The liquid itself has a smooth, almost silky texture that spreads easily with the brush or roller. It has a mild, almost clean scent—so much better than the usual fumes from oil-based paints.
Rinsing tools with water after use was effortless, which is a huge plus for quick cleanup.
Applying the paint was surprisingly straightforward. The water-based formula allowed me to work quickly without worrying about strong odors lingering.
The paint dries to the touch in about a day, and the finish looks smooth and even—no streaks or bubbles in sight. Even in my humid bathroom, the durability feels promising, thanks to the premium acrylic resin.
What I really appreciated is how versatile this kit is. I used it on my bathroom sink and tiles, and the coverage was solid, even on darker tiles—though I did use two coats for my darker surfaces.
The quick drying and low-VOC formula make it a practical choice for indoor projects, especially if you want to avoid heavy fumes and long wait times.
Overall, this kit feels like a real upgrade from typical DIY paints. The finish is durable, looks professional, and cleanup is a breeze.
If you’re tired of peeling or outdated tiles, it’s a straightforward way to breathe new life into your space.
35oz White Tub & Tile Refinishing Kit with 8 Tools
- ✓ Easy to use
- ✓ Durable, water-resistant finish
- ✓ Complete tool set included
- ✕ Takes a week to fully cure
- ✕ Slightly limited color options
| Coverage Area | 25-30 square feet per kit |
| Drying Time | Approximately 24 hours to cure, 7 days to fully harden |
| Application Method | Roller or brush |
| Surface Compatibility | Porcelain, ceramic, tile, shower, vanity, sink, floors, walls |
| Durability | High adhesion, water and moisture resistant, scratch-resistant, flake-resistant |
| Product Composition | Water-based, low odor, eco-friendly |
Ever spent hours scrubbing and still not seeing the sparkle return to your bathroom surfaces? This tub and tile refinishing kit from Tenee changed that game for me in just a couple of days.
At first glance, I noticed how the kit includes everything I needed—brushes, rollers, sandpaper, even caulking tools. No running around to buy extra supplies.
The bottle of white paint looked thick and promising, and the included instructions made it feel straightforward.
Applying the paint was surprisingly simple. I mixed Part A and B easily, thanks to clear directions, then rolled it onto my worn-out bathtub.
The coverage was smooth, and I appreciated how quick it dried—just about 24 hours to touch and a week to fully cure.
What I loved most was the durable finish. It resisted water splashes and didn’t flake or scratch easily during cleaning.
Plus, the high adhesion surface made it feel like I’d replaced my old tub entirely, without the mess and expense of a full remodel.
Handling the included tools was a breeze, and the kit’s eco-friendly, water-based formula didn’t stink up the bathroom either. If you’re tired of dull, stained fixtures, this kit really helps you breathe new life into your space without professional help or a big budget.
Overall, it transformed my bathroom with minimal effort, and I feel confident it will stand up well to everyday use. Just remember, patience is key—full curing takes about a week—but the results are worth it.
17oz White Tub & Tile Paint Kit with 8 Tools, Semi-Gloss

- ✓ Easy to use
- ✓ Fast drying time
- ✓ Durable finish
- ✕ Takes 7 days to fully cure
- ✕ Limited to small/medium areas
| Coverage Area | 25-30 sq.ft per kit |
| Drying Time | Approximately 24 hours to cure; 7 days to fully harden |
| Application Method | Roller or brush |
| Surface Compatibility | Porcelain, ceramic, tile, shower, vanity, sink, floors, walls |
| Durability | High adhesion, water- and moisture-resistant, scratch-resistant, flake-resistant |
| Paint Type | Water-based, low odor, eco-friendly |
The moment I opened the 17oz White Tub & Tile Paint Kit, I immediately noticed how smoothly the included roller and brushes felt in my hand. It’s clear that this kit is designed for ease of use, even for someone without prior experience.
The white semi-gloss finish looks sleek and professional, transforming my dull, tired bathtub into a fresh, like-new surface in just a few days.
Applying the paint was surprisingly straightforward. The instructions were clear, and the included tools like the masking tape and sandpaper made prep work simple.
I appreciated how the paint had a fast-drying formula—touch-dry within hours—making the whole process less of a hassle. The durable coating definitely stood up well to cleaning, moisture, and everyday wear.
The kit’s versatility really stood out. I used it on my bathtub, tiles, and even on the sink.
The high adhesion meant no flaking or scratching, which is a huge plus. Plus, the eco-friendly, water-based formula has a low odor, so I didn’t feel overwhelmed by fumes.
It’s a great solution if you want a professional-looking finish without hiring a pro or spending a fortune.
Overall, I found this kit to be a game-changer for bathroom refreshes. It covers a decent area and gives a sturdy, long-lasting finish.
The included tools made the entire job feel manageable and even enjoyable. If you’re tired of worn-out surfaces, this kit offers a quick, effective upgrade that lasts.
Odorless Tub & Tile Paint, White, Water-Based, 7.1 Fl Oz

- ✓ Easy to use
- ✓ Low odor
- ✓ Durable finish
- ✕ Takes 7 days to fully cure
- ✕ Limited color options
| Paint Type | Water-based acrylic |
| Volume | 7.1 fluid ounces (210 ml) |
| Application Surface | Tile surfaces, bathtubs, sinks, countertops, floors |
| Drying Time | Dries within 24 hours |
| Curing Time | Optimal curing in 7 days |
| Water Resistance | Suitable for high-moisture environments, resistant to prolonged immersion after curing |
While peeling off an old, stubborn layer of paint from my bathroom tiles, I was surprised to find how effortlessly this odorless tub and tile paint went on—no strong fumes, no headache-inducing scent. It’s almost strange how a product designed for such high-moisture areas can be so gentle during application.
The kit includes everything you need—brushes, tools, and clear instructions—which made tackling my vanity seem less intimidating. The paint’s water-based, acrylic formula feels smooth and easy to spread, even on vertical surfaces.
What really caught me off guard was how quickly it dried to the touch—within just a few hours.
Durability is key in a bathroom, and I’ve been genuinely impressed. Even after a few weeks, the finish resists peeling and cracking, standing up to daily use and humidity.
The low-odor aspect made working in my small bathroom much more pleasant, and I appreciated that it emitted minimal VOCs during the process.
Applying the hardener step was straightforward, and the surface now looks fresh and glossy—like new. Plus, it’s versatile enough to be used on sinks, countertops, or even outdoor furniture, which adds to its value.
Overall, this product truly lives up to its promise of a long-lasting, water-resistant finish with a clean, safe application. If you’re tired of ugly, chipped tiles but dread harsh fumes, this might be just the solution you need.
Jungarian Tub & Tile Refinishing Kit 35oz, Black

- ✓ Easy to apply
- ✓ Low odor, eco-friendly
- ✓ Dries quickly
- ✕ May need multiple coats on dark surfaces
- ✕ Requires 7 days to fully cure
| Paint Type | Two-component acrylic coating |
| Volume | 35 oz (approximately 1.04 liters) |
| Application Time | Second coat within 2-4 hours, full cure in 7 days |
| Surface Compatibility | Ceramic, enamel, porcelain, fiberglass, PVC, wood, cultured marble |
| Adhesion & Durability | Strong adhesion, water-resistant, peel-proof after curing |
| Odor & VOCs | Low odor, low volatile organic compounds (VOCs) |
You’re standing in your bathroom, staring at that tired, chipped bathtub that’s been nagging at you for months. You grab the Jungarian Tub & Tile Refinishing Kit, 35oz in black, and feel a flicker of hope.
The container looks solid, with a sleek black lid and a clear label that promises easy application.
As you start mixing the two-component acrylic formula, you notice how smooth and creamy it is—almost like a high-quality paint you’d use on walls. The low odor feature is a game-changer, especially since you’re working indoors and don’t want to choke on fumes.
Applying the first coat is straightforward, thanks to the included tools. You find that it spreads easily, even over the dark surface you’re covering.
After about 2 hours, the surface isn’t tacky anymore, which means you’re on track to finish quickly. The fact that it’s water-based and has strong adhesion makes you confident it will hold up well.
You apply a second coat after a few hours, and the coverage looks good—even darker surfaces need a couple more layers, but that’s expected. The finish feels durable, and you appreciate how simple it is to clean the tools afterward with just soap and water.
After just a few hours of work, your bathtub looks refreshed, and you’re already imagining how much money and hassle you’ve saved. Full curing takes about a week, but honestly, the major work is done in just a day or two.
It’s like giving your bathroom a facelift without the mess of a full remodel.
What Factors Should You Consider When Choosing a Paint Combination for a Bathroom Vanity?
When choosing the best paint combination for a bathroom vanity, several factors should be taken into account to ensure aesthetic appeal and durability.
- Color Scheme: The color scheme of the bathroom plays a crucial role in selecting a paint combination for the vanity. It’s important to choose colors that complement the overall decor and create a cohesive look, whether you prefer bold contrasts or soft harmonies.
- Finish Type: The finish of the paint affects both the appearance and durability of the vanity. High-gloss finishes offer a sleek look and are more resistant to moisture and stains, while matte finishes can provide a more subtle, modern aesthetic but may require more maintenance.
- Durability: Given the high humidity levels in bathrooms, it’s essential to select paints that are specifically designed for moisture resistance. Look for products labeled as bathroom or kitchen paints, which often contain mildew inhibitors to prevent mold growth.
- Material of the Vanity: The material of the bathroom vanity influences the type of paint you can use. For instance, wooden vanities may require primer and a specific type of paint to ensure proper adhesion and finish, while laminate surfaces may need special paints designed for plastics.
- Trends and Personal Style: Personal style and current design trends should inform your choice, as the best paint combination reflects your tastes. Whether you lean towards classic neutrals, vibrant colors, or trendy pastels, ensure that your choice aligns with your personal aesthetic and the overall style of your home.
How Do Humidity and Light Exposure Impact Your Paint Selection?
Lastly, the paint composition is essential, as paints made for high-humidity environments often contain additives that help resist mildew and enhance adhesion, ensuring that the paint job lasts longer and remains aesthetically pleasing despite the bathroom’s challenging conditions.
Why Is Color Psychology Important in Bathroom Design?
Color psychology is important in bathroom design because colors can significantly influence mood, emotions, and even perceived space, making the selection of paint combinations crucial for creating a desirable environment.
According to a study published by the Institute for Color Research, people make a judgment about an environment within 90 seconds, and between 62% to 90% of that judgment is based on color alone. This emphasizes the role that color plays in shaping our experiences and perceptions in spaces like bathrooms, which are often associated with relaxation and rejuvenation.
The underlying mechanism involves how colors affect our physiological and psychological states. For instance, softer colors like blues and greens are known to evoke feelings of calmness and serenity, while brighter colors like yellows can stimulate feelings of happiness and energy. This means that choosing the best paint combination for a bathroom vanity not only enhances the aesthetic appeal but also influences how individuals feel when using the space. The interplay of light, color, and texture can also make a small bathroom feel larger or more inviting, further underscoring the importance of thoughtful color selection in design.
What Are the Most Effective Color Combinations for a Bathroom Vanity?
- White and Navy Blue: This classic combination offers a crisp, clean look while adding depth and sophistication. The stark contrast between white and navy makes the vanity a striking focal point in the bathroom.
- Soft Gray and Blush Pink: A soft gray paired with blush pink creates a serene and inviting environment. This combination is perfect for those seeking a modern yet feminine touch, balancing cool and warm tones beautifully.
- Charcoal and Gold: Charcoal gray brings a modern edge, while gold accents add a touch of luxury. This pairing is ideal for contemporary bathrooms looking for a bold statement without overwhelming the space.
- Turquoise and White: A vibrant turquoise with crisp white evokes a fresh and coastal vibe, perfect for creating a cheerful atmosphere. This combination works well in both traditional and modern settings, providing a sense of tranquility.
- Black and White: The timeless black and white combination offers a bold and elegant look that never goes out of style. This contrast can be used to create a striking vanity that emphasizes clean lines and sophisticated design.
- Beige and Sage Green: A soft beige paired with sage green brings a natural and earthy feel to the bathroom. This combination is soothing and works well with natural wood accents, making it ideal for creating a spa-like retreat.
- Cream and Dark Brown: Cream tones combined with dark brown create a warm and inviting atmosphere, perfect for rustic or traditional bathrooms. This pairing adds richness and depth while maintaining a cozy feel.
Which Neutral and Soft Shades Create a Calming Bathroom Atmosphere?
The best paint combinations for creating a calming bathroom atmosphere typically involve neutral and soft shades.
- Soft Gray: This versatile shade can create a serene ambiance while allowing for a modern touch. It pairs well with white cabinetry and can be accented with darker hardware for an elegant contrast.
- Light Beige: A warm light beige offers a subtle earthiness that evokes a sense of comfort. It works beautifully with natural wood finishes and can complement various decorative styles, from rustic to contemporary.
- Pale Blue: This color brings a refreshing feel reminiscent of the sky and water, promoting tranquility. When used on bathroom vanities, it harmonizes with white or light-colored tiles for a cohesive look.
- Soft Sage Green: A muted green can evoke feelings of nature and relaxation, making it ideal for a bathroom retreat. It pairs nicely with light woods and can enhance the overall brightness of the space.
- Dusty Rose: This subdued pink shade adds a touch of warmth and softness without overwhelming the senses. It can create a comforting atmosphere and works well with white or soft gray accents, making it a chic option for vanities.
How Can Bold Colors Transform the Aesthetic of Your Bathroom Vanity?
Bold colors can significantly enhance the aesthetic appeal of your bathroom vanity, creating a striking focal point in the space.
- Dark Navy Blue: This deep hue adds a touch of sophistication and elegance to your bathroom vanity. It pairs beautifully with gold or brass hardware, creating a luxurious contrast that elevates the overall design.
- Vibrant Emerald Green: Emerald green brings a refreshing, lively vibe to the bathroom, reminiscent of nature. It works well with white or light-colored countertops, providing a stunning visual balance that brightens up the space.
- Bold Charcoal Gray: Charcoal gray is a versatile color that offers a modern and chic look while remaining neutral enough to complement various decor styles. This color can create depth and drama, especially when paired with lighter elements like a white sink or backsplash.
- Bright Coral: A bright coral vanity offers an energetic pop of color that can energize the entire bathroom. It harmonizes well with soft pastels and natural wood accents, bringing warmth and vibrancy to the space.
- Classic Black: A black-painted vanity exudes timeless elegance and pairs well with almost any color scheme. It provides a striking contrast against lighter walls and fixtures, making it a perfect choice for a contemporary or minimalist bathroom design.
What Types of Paint Finishes Are Best for Durability in Bathroom Vanities?
The best paint finishes for durability in bathroom vanities include the following types:
- Satin Finish: Satin finish paint strikes a balance between matte and glossy, providing a soft sheen that is resistant to moisture and easy to clean. This finish is ideal for bathroom vanities as it can withstand humidity while still offering a stylish appearance.
- Semi-Gloss Finish: Semi-gloss paint has a higher sheen than satin, making it more durable and better suited for high-moisture areas. It repels water effectively, making it a popular choice for bathroom vanities where frequent cleaning is necessary.
- Gloss Finish: Gloss finish paint is the most reflective and durable option, offering excellent resistance to water and stains. Although it can show imperfections more easily, its tough surface makes it suitable for bathroom vanities that encounter heavy use and moisture exposure.
- Oil-Based Paint: Oil-based paints provide a hard, durable finish that is particularly resistant to moisture and wear. While they take longer to dry and require solvent for cleanup, their longevity and toughness make them a strong choice for bathroom vanities.
- Water-Based Acrylic Paint: Water-based acrylic paints are known for their fast-drying properties and ease of application. They are also resistant to yellowing and offer good durability, making them a practical option for bathroom vanities, especially in lighter colors.
How Do Different Paint Finishes Affect Maintenance and Cleaning?
The choice of paint finish significantly impacts maintenance and cleaning, especially in high-moisture areas like bathrooms.
- Matte Finish: This finish has a non-reflective surface that can hide imperfections well, but it tends to absorb moisture and stains more easily.
- Satin Finish: A satin finish offers a soft sheen that strikes a balance between durability and aesthetic appeal, making it easier to clean than matte finishes while resisting moisture effectively.
- Eggshell Finish: Eggshell provides a low-luster sheen that is more washable than matte, making it a good choice for bathroom vanities where some scrubbing might be necessary.
- Semigloss Finish: This finish has a noticeable shine, providing excellent moisture resistance, making it ideal for bathroom environments as it can withstand frequent cleaning without damage.
- Gloss Finish: The highest sheen available, gloss finishes are extremely durable and easy to wipe down, making them perfect for high-traffic or moisture-prone areas like bathroom vanities.
Matte finishes are desirable for their aesthetic qualities but require careful maintenance to avoid stains, making them less practical for bathrooms. Satin finishes combine beauty and functionality, offering a surface that withstands humidity while remaining relatively easy to clean, making them popular for vanities. Eggshell finishes provide a slightly more durable option than matte, striking a balance between washability and a soft look suitable for vanity applications. Semigloss finishes are excellent for bathrooms as they can handle humidity and cleaning tools, ensuring longevity and a polished appearance. Finally, gloss finishes deliver the highest level of durability and cleanliness, making them exceptionally suitable for areas that demand both performance and style.
What Is the Ideal Sheen for Enhancing a Bathroom’s Visual Appeal?
Choosing the right sheen for a bathroom vanity can significantly enhance its visual appeal and longevity. The ideal sheen not only complements your design aesthetic but also withstands the challenges of a humid environment.
-
Semi-Gloss Finish: Widely recommended for bathroom vanities, a semi-gloss finish reflects light effectively, making colors appear more vibrant. It is easy to clean, resisting moisture and mildew, which are common in bathrooms.
-
Satin Finish: If a softer, less reflective look is desired, satin offers a chic alternative. It provides a smooth appearance with moderate durability. Satin finishes can beautifully balance between elegance and practicality, making it suitable for various styles.
-
Matte Finish: While not as practical in high-moisture areas, matte finishes can add a sophisticated touch. These are best used in well-ventilated bathrooms or paired with protective sealants to enhance durability.
Consider the overall color palette and style of your bathroom when selecting sheen levels. Ensuring that the chosen sheen coordinates with other elements, such as tiles and fixtures, will create a cohesive and visually appealing space.
What Current Trends Influence Bathroom Vanity Paint Combinations?
Current trends in bathroom vanity paint combinations are influenced by a variety of factors that enhance both aesthetics and functionality.
- Bold Colors: Many homeowners are opting for bold and vibrant colors to make a statement in their bathrooms. Shades like deep navy, emerald green, or even rich burgundy can create a striking contrast against lighter walls or countertops, adding character to the space.
- Two-Tone Designs: The two-tone vanity trend involves using different colors on the upper and lower sections of a vanity. This approach not only adds depth and visual interest but also allows for more personalization, letting homeowners express their individual style by contrasting a lighter color with a darker tone.
- Natural Finishes: Paint combinations that mimic natural materials, such as wood stains or stone-like textures, are increasingly popular. These finishes bring warmth and a sense of nature into the bathroom, creating a calming atmosphere that complements contemporary or rustic designs.
- Pastel Hues: Soft pastel colors, like blush pink, mint green, or light lavender, are making a comeback as they offer a fresh and airy feel. These shades can brighten up smaller bathrooms and provide a soothing environment, aligning with the trend of creating spa-like retreats at home.
- Matte vs. Glossy: The choice between matte and glossy finishes can significantly affect the look of a bathroom vanity. Matte paints provide a modern, understated elegance while hiding imperfections, whereas glossy finishes create a sleek look and are easier to clean, making them practical for high-moisture areas.
- Accent Colors: Using an accent color to highlight specific features or hardware, such as knobs or handles, is a trend that adds a playful touch. This approach allows for creative expression while maintaining a cohesive overall color scheme, making it easy to refresh the look without a complete renovation.
Which Color Palettes Are Popular in Modern Bathroom Design?
The best paint combinations for bathroom vanities often reflect current trends in modern design.
- Soft Neutrals: These colors include shades like beige, taupe, and soft greys that create a calm and soothing atmosphere.
- Bold Dark Colors: Deep shades such as navy blue, charcoal, or forest green can add a dramatic flair while making the space feel more intimate.
- Pastel Hues: Light and airy colors like mint green, blush pink, or baby blue can bring a refreshing and cheerful vibe to the bathroom.
- Monochromatic Schemes: Using varying shades of one color, such as different tones of grey or blue, can create a sophisticated and cohesive look.
- Contrasting Pairings: Combining a bold color with a lighter shade, like dark navy with crisp white, can create striking visual interest and highlight design features.
Soft neutrals are popular for their versatility and ability to complement a variety of decor styles, making the bathroom feel more spacious and serene. These colors also provide a timeless backdrop for accessories and accents.
Bold dark colors are increasingly favored for their ability to create a luxurious and modern atmosphere. They can make a statement and are often used in combination with metallic fixtures for added elegance.
Pastel hues are ideal for those looking to evoke a light and airy feel in their bathrooms. These soft colors can brighten up the space and are particularly appealing in smaller bathrooms where natural light is limited.
Monochromatic schemes work well for creating a sleek and modern aesthetic. By using different shades of the same color, it allows for depth and interest without overwhelming the senses.
Contrasting pairings can make a bathroom feel more dynamic and visually appealing. By using a bold color alongside a lighter shade, it enhances architectural details and fixtures, helping them stand out while creating a balanced look.
How Can Vintage Inspirations Be Incorporated into Bathroom Vanity Colors?
Classic white with accents is a staple in vintage decor, offering a clean canvas that allows for personalization through colorful accents. This combination is versatile and can easily adapt to different styles, from shabby chic to traditional.
Muted earth tones bring warmth and a sense of nature into the bathroom, reflecting the earthy colors often found in vintage designs. These shades can create a cozy atmosphere and pair well with wooden elements or vintage-inspired tiles.
Two-tone combinations not only add visual interest but also pay homage to traditional cabinetry styles often seen in vintage homes. This approach allows for creativity while maintaining a cohesive look that honors the past.
What Essential Steps Should Be Taken Before Painting a Bathroom Vanity?
Before painting a bathroom vanity, several essential steps should be taken to ensure a successful and lasting finish.
- Remove Hardware: Take off all handles, knobs, and hinges from the vanity to prevent paint from getting onto these fixtures, which can lead to a messy finish. This also allows for easier access to all surfaces of the vanity during the painting process.
- Clean the Surface: Thoroughly clean the vanity with a suitable cleaner to remove dirt, grime, and oils that may affect paint adhesion. A mixture of warm water and mild soap or a degreasing cleaner is often ideal for this step.
- Sand the Surface: Lightly sand the vanity surface using fine-grit sandpaper to create a rough texture that helps the paint adhere better. This step is crucial for achieving a smooth finish and should be followed by wiping away any dust created during sanding.
- Prime the Vanity: Apply a primer suited for the material of the vanity, especially if it’s made of laminate or has a glossy finish. Priming helps seal the surface and provides a better base for the paint, enhancing durability and color accuracy.
- Choose the Right Paint: Select a high-quality paint that is moisture-resistant and suitable for bathroom use, such as acrylic or enamel. The best paint combination for a bathroom vanity typically involves a semi-gloss or satin finish, which offers both durability and ease of cleaning.
- Test Paint Color: Before committing to a color, test a small section of the vanity with the chosen paint to see how it looks under different lighting conditions. This will help ensure that you are satisfied with the color before applying it to the entire surface.
- Protect Surrounding Areas: Use painter’s tape to cover edges and surrounding areas to protect them from paint splatter. Additionally, lay down drop cloths or plastic sheets on the floor to catch any drips or spills during the painting process.
How Critical Is Surface Preparation to Achieve a Professional Finish?
Surface preparation is crucial for achieving a professional finish when painting, particularly for pieces like bathroom vanities where moisture resistance and durability are essential.
- Cleaning: Thoroughly cleaning the surface removes dirt, grease, and soap scum that can prevent paint adhesion. Use a degreaser or a mixture of water and vinegar to ensure the surface is completely free of contaminants.
- Sanding: Sanding the surface smooths out any imperfections and creates a texture that helps the paint adhere better. For bathroom vanities, using a fine-grit sandpaper ensures that the surface is both smooth and ready for paint without damaging the underlying material.
- Priming: Applying a primer is essential, especially for surfaces that may be stained or where the paint’s color needs to be uniform. A good primer will seal the surface, improve adhesion, and prevent any bleed-through of the old color, ensuring a professional finish.
- Repairing Imperfections: Filling in any cracks, dents, or scratches with a suitable filler is necessary for a flawless appearance. After the filler dries, sanding it smooth ensures that the surface is even before applying paint.
- Testing Paint Combinations: Before committing to a paint color or combination, testing small samples on the vanity can help determine the best match for your bathroom’s aesthetic. This step allows you to see how different paints interact with light and surrounding decor, ensuring the final choice is ideal.
What Tools and Techniques Are Recommended for a Successful Paint Job?
For a successful paint job on a bathroom vanity, several tools and techniques are essential to ensure a smooth finish and durability.
- High-Quality Paint: Using a high-quality paint specifically designed for bathroom environments is crucial. These paints often contain mildew-resistant properties and are formulated to withstand moisture and humidity, ensuring that the finish lasts longer and resists peeling or chipping.
- Primer: Applying a primer before painting is recommended, especially if you’re working with a raw or previously stained surface. Primer helps the paint adhere better, provides a more uniform surface, and can enhance the final color, preventing any discoloration from the vanity’s original material.
- Paintbrushes and Rollers: Utilizing the right brushes and rollers is key to achieving an even coat. A high-quality synthetic brush is ideal for detailed areas and edges, while a foam roller can provide a smooth finish on larger flat surfaces, reducing the appearance of brush strokes.
- Sandpaper: Sanding the vanity before painting is important for creating a smooth surface for the paint to adhere to. Fine-grit sandpaper can help smooth out any imperfections, and a quick sanding between coats can enhance the overall finish.
- Drop Cloths and Tape: To protect surrounding areas and achieve clean lines, using drop cloths and painter’s tape is essential. Drop cloths prevent paint splatters on floors or countertops, while tape around edges ensures sharp, professional-looking paint lines.
- Sealant or Topcoat: After painting, applying a sealant or topcoat can provide an extra layer of protection against moisture and wear. This is particularly important in a bathroom setting, as it helps maintain the integrity of the paint job over time.
- Ventilation Equipment: Ensuring proper ventilation while painting is vital for safety and to promote faster drying times. Using fans or opening windows can help disperse fumes and humidity, leading to a better outcome for the paint application.