

")

")


[ad_1]
On this article, we’ll stroll thru learn how to combine ShadCn into React apps. Discover ways to arrange a brand new React mission, set up and configure ShadCn, and benefit from its options. Whether or not you’re a novice or an skilled developer, uncover insights to streamline your building with ShadCn in a React software.
You’ll be able to take a look at your entire supply code on GitHub.
What’s ShadCn?
ShadCn is a flexible library that gives quite a lot of utilities and elements to toughen your React programs. It’s designed to simplify the improvement procedure, toughen software potency, and create a extra user-friendly revel in. ShadCn is constructed on most sensible of Tailwind CSS and Radix UI, taking into consideration top customizability and seamless integration with Tailwind’s utility-first manner.
Must haves for ShadCn Set up
Prior to you get started with ShadCn set up, be sure that a well-prepared atmosphere. Have a foundational working out of JavaScript and React.js, with Node.js put in for your device. Familiarity with CSS and HTML is advisable for efficient ShadCn utilization. Since ShadCn integrates with Tailwind CSS, a elementary working out of Tailwind may also be useful.
Surroundings Up a New React Software
To start up your mission, get started by means of putting in a brand new React software. To do that, run the next command for your terminal:
npm create vite@newest
Then identify the mission, and make a choice your language (ideally TypeScript, as ShadCn works out of the field with TypeScript).

Then transfer into your mission folder and run the set up command:
npm set up
After all, get started up your dev server by means of operating the command:
npm run dev

Surroundings Up Tailwind CSS
To customise ShadCn elements, you’ll wish to set up and configure Tailwind CSS. Tailwind is a utility-first CSS framework that works seamlessly with ShadCn, permitting you to simply regulate and magnificence the elements to suit your mission’s necessities. To put in Tailwind, run the command:
npm set up -D tailwindcss postcss autoprefixer
npx tailwindcss init -p
Then paste the next into your index.css document:
@import "tailwindcss/base";
@import "tailwindcss/elements";
@import "tailwindcss/utilities";
After that, head over in your tsconfig.json document and regulate the trails:
    "baseUrl": ".",
    "paths": {
      "@/*": ["./src/*"]
    }
Through including the baseUrl and paths sections beneath compilerOptions, the changed tsconfig.json document allows trail answer for imports beginning with @/, which maps to the ./src/ listing for your mission.
After all, set up nodes for your mission, to forestall trail mistakes:
npm i -D @varieties/node
Then regulate your vite.config.ts:
import trail from "trail"
import react from "@vitejs/plugin-react"
import { defineConfig } from "vite"

export default defineConfig({
  plugins: [react()],
  unravel: {
    alias: {
      "@": trail.unravel(__dirname, "./src"),
    },
  },
})
Updating the vite.config.ts document with the trail answer configuration guarantees that your software can unravel the trails as it should be, permitting you to import modules the use of the outlined aliases. This step is vital for a clean building revel in and to keep away from any import mistakes associated with trail answer.
Putting in and Configuring ShadCn
Together with your React software arrange, it’s time to put in ShadCn. You’ll be able to do that the use of npm with the next command:
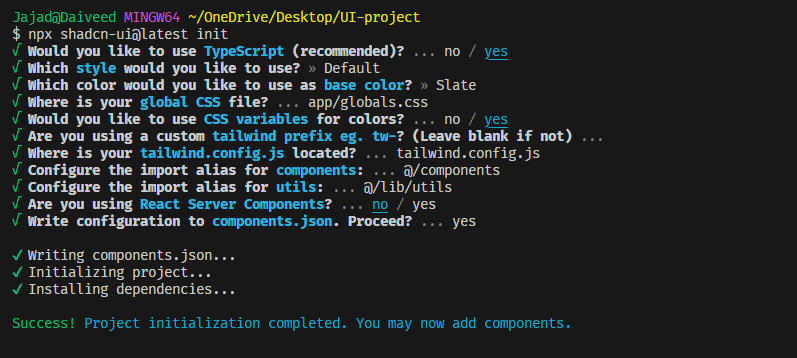
npx shadcn-ui@newest init
The suggested brings up a few choices for you to choose between.
The use of ShadCn for your React Software
After the a success set up and configuration of ShadCn, you’ll now start the use of it for your React software. For example, let’s use the hover-card part. Head over to the Shadcn medical doctors and snatch the suggested for the hover-card:
npx shadcn-ui@newest upload hover-card
Then import it into your app and use it:
import {
  HoverCard,
  HoverCardContent,
  HoverCardTrigger,
} from "@/elements/ui/hover-card";

export default serve as App() {
  go back (
    <div className="flex justify-center  items-center h-screen">
      <HoverCard>
        <HoverCardTrigger>First Shadcn Part</HoverCardTrigger>
        <HoverCardContent>My first of many elements</HoverCardContent>
      </HoverCard>
    </div>
  );
}
This yields the outcome proven under.

Modifying a Shadcn part
To edit a ShadCn part, you’ll leverage the ability of Tailwind CSS to customise its look and behaviour. For example, you’ll use Tailwind to edit the semblance of the hover-card part by means of passing types by way of the classname prop:
<HoverCard>
  <HoverCardTrigger className=" rounded-xl text-white py-2 px-4 bg-slate-500 ">
    First Shadcn Part
  </HoverCardTrigger>
  <HoverCardContent className=" font-bold text-slate-500 w-max">
    My first of many elements
  </HoverCardContent>
</HoverCard>
This makes the part seem as proven under.
Conclusion
Incorporating ShadCn into your React programs doesn’t wish to be an advanced procedure. With a transparent working out of the must haves, a operating React software, and the correct configuration, you’re effectively for your approach. ShadCn’s vast number of utilities and elements make it a very good device for boosting your React programs, simplifying the improvement procedure, and making your programs extra environment friendly and user-friendly.
[ad_2]


