

")

")


[ad_1]
In case you are making plans to begin a weblog or exhibit your merchandise on a website online, you could have two primary choices. It’s good to code the entirety from scratch the usage of HTML, CSS, and JavaScript, growing databases and interfaces to control your content material. This, then again, can also be difficult if you are now not a seasoned programmer. A extra environment friendly selection is to make use of a Content material Control Device (CMS), which gives you the gear to control your content material and design your website online without problems.
There are a lot of CMSs to be had, each and every with its strengths. WordPress, the preferred CMS, is understood for its user-friendly interface and huge plugin ecosystem. Joomla and Drupal be offering extra tough platforms for advanced web pages, despite the fact that they require some technical experience. For newbies, Squarespace and Wix are perfect for growing visually horny web pages without having to code.
Alternatively, those CMSs are frequently tied to the presentation layer, proscribing your content material’s achieve to the platform they serve. If you wish to have your content material to achieve audiences via more than a few channels like cell apps, good units, or voice assistants, conventional CMSs would possibly fall quick. The trendy internet extends past web pages to incorporate cell and IoT units, smartwatches, and in-car leisure techniques.
What Is Headless CMS?
Input the sector of headless CMS. A headless CMS takes a unique manner, isolating the content material control from the content material presentation. Believe it as a conductor, orchestrating your content material supply to more than a few platforms with out being tied to a unmarried tool.
A headless CMS is a back-end content material repository gadget that facilitates content material garage, amendment, and supply by way of a RESTful API (Software Programming Interface) or GraphQL. It is named ‘headless’ as it decouples the ‘head’ (the front-end or the presentation layer) from the ‘frame’ (the back-end or the content material repository).
A headless CMS brings a number of advantages to the desk. It provides builders the liberty to make use of their most popular tech stack for front-end building, fostering distinctive and adapted consumer studies. It helps omnichannel content material supply, a essential consider as of late’s multi-device international. But, it is not with out its demanding situations. The absence of a visible front-end would possibly make it much less intuitive for non-technical customers.
It additionally calls for a talented building staff to construct the buyer aspect, and sure options like search engine optimization and preview capability would possibly require further effort to put into effect. In spite of those demanding situations, a headless CMS, with its flexibility and flexibility, stands as a powerful instrument in the proper palms.
Construction a Headless CMS
Now that we have now navigated the panorama of CMS, it is time to get our palms grimy and dive into the guts of this newsletter: construction a headless CMS the usage of TypeScript and OceanBase.
Why this actual tech stack, it’s possible you’ll ask?
Let’s get started with TypeScript. It is a superset of JavaScript that introduces static typing, a characteristic that JavaScript historically lacks. Static typing complements code reliability, predictability, and maintainability, making TypeScript an impressive a part of our stack to construct a powerful headless CMS.
You’ll have come throughout weblog posts hailing JavaScript because the “most well liked back-end language for internet building.” However if truth be told, natural JavaScript is seldom used for back-end building. Extra frequently than now not, builders lean against TypeScript, JavaScript’s statically typed sibling. The cause of this choice lies in TypeScript’s distinctive options that support code reliability and maintainability, making it a extra appropriate selection for back-end building.
Subsequent up is OceanBase, my collection of database for many of my initiatives. As an enterprise-grade, high-performance relational database, OceanBase supplies a powerful spine for the headless CMS. Its excessive scalability and reliability make certain that our content material control gadget can maintain huge quantities of information and site visitors, making it a competent selection for large-scale packages.
In any case, I’ve selected Specific.js to construct the API server. Specific is a versatile Node.js internet software framework that gives a powerful set of options for internet and cell packages. Its simplicity and versatility make it a great selection for the CMS mission, permitting us to construct tough APIs with minimum trouble.
The codebase of the mission has been uploaded to this GitHub repo. You’ll be able to clone and mess around with it, or deploy it with GitPod and notice it paintings in motion.
Putting in the Venture
Sooner than we commence, make certain that you could have the next put in in your device:
First, let’s initialize our mission. Open your terminal, navigate for your desired listing, and run the next command to create a brand new Node.js mission:
$ mkdir oceanbase-typescript && cd oceanbase-typescript
$ npm init -y
This may increasingly create a brand new listing to your mission and initialize a brand new Node.js software within it.
Subsequent, let’s set up the essential dependencies. We’re going to want categorical for our server, TypeScript for writing our code, and a few different applications:
$ npm set up categorical typescript ts-node nodemonOn this mission, we’re going to use TypeORM because the Object-Relational Mapping (ORM) to glue our mission with OceanBase. TypeORM helps all kinds of databases, together with MySQL, Postgresql, and MongoDB. Since TypeORM doesn’t but have a driving force for OceanBase, and OceanBase is suitable with MySQL, we’re going to use the MySQL driving force for our OceanBase connection.
To make use of TypeORM and the MySQL driving force, we wish to set up them in our mission. Run the next command:
$ npm set up typeorm mysqlNow, let’s create an src/index.ts document within the root listing of our mission. This would be the access level of our software. Here is a elementary setup for our Specific server:
res.ship(‘Hi International!’);
});
app.pay attention(port, () => {
console.log(`Server is working on port ${port}`);
});” data-lang=”software/typescript”>
import categorical from 'categorical';

const app = categorical();
const port = procedure.env.PORT || 3000;

app.get("https://feeds.dzone.com/", (req, res) => {
    res.ship('Hi International!');
});

app.pay attention(port, () => {
    console.log(`Server is working on port ${port}`);
});
To run the server, we will use ts-node at the side of nodemon to verify our server restarts on every occasion we make adjustments. Upload a get started script for your bundle.json:
"scripts": {
    "get started": "nodemon --watch 'src/**/*.ts' --exec 'ts-node' src/index.ts",
    // ... different scripts
}
Now, you’ll get started your server through working:
You will have to see the console log Server is working on port 3000. Now, make a GET request to the server at http://localhost:3000, you will have to see “Hi International!” displayed.

That is it! You have got now arrange a elementary TypeScript and categorical.js mission. Within the subsequent segment, we will connect with our OceanBase database and get started construction the CMS functionalities.
Connection to OceanBase
Our CMS will encompass weblog posts, tags, and customers. Each and every of those corresponds to an entity in our software. Let’s create each and every of those entities.
Create the next information within the src/entity listing:
Person.tsBlogPost.tsTag.ts
Let’s get started with Person.ts. A consumer in our CMS may have an ID, a reputation, and a listing of weblog posts they have authored. This is how you’ll outline this entity:
import { Entity, PrimaryGeneratedColumn, Column } from "typeorm"

@Entity()
export magnificence Person {

    @PrimaryGeneratedColumn()
    identity: quantity

    @Column()
    firstName: string

    @Column()
    lastName: string

    @Column()
    age: quantity

}
Subsequent, we will outline the Tag entity in Tag.ts. A tag may have an ID, a reputation, and a listing of weblog posts that experience this tag.
import {
    Entity,
    PrimaryGeneratedColumn,
    Column,
    ManyToMany,
} from "typeorm";
import { BlogPost } from "./BlogPost";

@Entity()
export magnificence Tag {

    @PrimaryGeneratedColumn()
    identity: quantity;

    @Column()
    identify: string;

    @ManyToMany(() => BlogPost, blogPost => blogPost.tags)
    blogPosts: BlogPost[];
}
In any case, we will outline the BlogPost entity in BlogPost.ts. A weblog put up may have an ID, a name, a slug (for the URL), the content material of the put up, a connection with the writer, and a listing of tags.
import {
    Entity,
    PrimaryGeneratedColumn,
    Column,
    ManyToMany,
    JoinTable
} from "typeorm";
import { Tag } from "./Tag";

@Entity()
export magnificence BlogPost {

    @PrimaryGeneratedColumn()
    identity: quantity;

    @Column()
    name: string;

    @Column()
    content material: string;

    @Column()
    writer: string;

    @Column()
    excerpt: string;

    @Column({
        distinctive: true
    })
    slug: string;

    @Column({
        sort: 'date'
    })
    publishDate: Date;

    @Column({
        sort: 'enum',
        enum: ['DRAFT', 'PUBLISHED', 'ARCHIVED'],
        default: 'DRAFT'
    })
    standing: string;

    @ManyToMany(() => Tag, tag => tag.blogPosts, {
        cascade: true
    })
    @JoinTable()
    tags: Tag[];
}
Now that we’ve got arrange our entities, your next step is to glue our software to the OceanBase database. For this, we will be able to create a DataSource object that may maintain the relationship.
Let’s take a look on the src/data-source.ts document:
import "reflect-metadata"
import { DataSource } from "typeorm"
import { Person } from "./entity/Person"
import {Tag} from './entity/Tag'
import { BlogPost } from "./entity/BlogPost"

require('dotenv').config()

export const AppDataSource = new DataSource({
    sort: "mysql",
    host: procedure.env.OB_HOST,
    port: Quantity(procedure.env.OB_PORT),
    username: procedure.env.OB_USER,
    password: procedure.env.OB_PASSWORD,
    database: procedure.env.OB_DB,
    synchronize: true,
    logging: false,
    entities: [User, Tag, BlogPost],
    migrations: [],
    subscribers: [],
}).initialize()
We first import the essential modules and entities. Then, we use the dotenv bundle to load atmosphere variables from a .env document. That is the place we will retailer our OceanBase connection main points.
Subsequent, we create a brand new DataSource object. This object is configured to hook up with a MySQL database, which is suitable with OceanBase. We offer it with the essential connection main points:
host: The host the place your OceanBase cluster is working.port: The port to hook up with.usernameandpassword: The credentials to authenticate with the database.database: The identify of the database you wish to have to hook up with.
Finally, we specify the entities that we created previous. Those are the tables that TypeORM will create in our OceanBase database.
Now, anyplace we wish to engage with the database in our software, we will import this AppDataSource and use it. This manner, we make certain that our software is at all times the usage of the similar database connection.
Be mindful to switch the placeholders within the .env document together with your exact OceanBase connection main points. The .env document will have to glance one thing like this:
OB_HOST=your-oceanbase-host
OB_PORT=your-oceanbase-port
OB_USER=your-oceanbase-username
OB_PASSWORD=your-oceanbase-password
OB_DB=your-oceanbase-database
With this setup, our software is now able to retailer and retrieve information from OceanBase. Within the subsequent segment, we will get started construction the API endpoints for our CMS.
Putting in CRUD Movements for the CMS
The core of our CMS would be the CRUD (Create, Learn, Replace, Delete) movements. Those movements will permit us to control our content material, together with growing weblog posts, including tags, and retrieving posts. On this segment, we will be able to create a number of modules to maintain those movements.
Upload a Tag
The primary module we will be able to create is addTag.ts, which is able to permit us so as to add new tags to our CMS. This module imports the AppDataSource and Tag entity and exports an asynchronous serve as addTag that takes a tag identify as a parameter.
import { AppDataSource } from "../data-source";
import { Tag } from "../entity/Tag";

export async serve as addTag(identify: string) {
    const dataSource = look ahead to AppDataSource;
    const tagRepository = dataSource.supervisor.getRepository(Tag);

    const newTag = new Tag();
    newTag.identify = identify;

    const outcome = look ahead to tagRepository.save(newTag);

    go back outcome;
}
This serve as first waits for the AppDataSource to initialize, then fetches the repository for the Tag entity. It creates a brand new Tag example, assigns the supplied identify to it, and saves this new tag to the repository. The serve as then returns the results of this operation.
Create a Publish
Subsequent, we will create createPost.ts, which is able to let us create weblog posts. This module is very similar to addTag.ts, however it additionally handles the advent of tags related to the put up.
import { AppDataSource } from "../data-source";
import { BlogPost } from "../entity/BlogPost";
import { Tag } from "../entity/Tag";

export async serve as createPost(name: string, content material: string, writer: string, slug: string, publishDate: Date, standing: string, tagNames: string[]) {
    const dataSource = look ahead to AppDataSource;
    const postRepository = dataSource.supervisor.getRepository(BlogPost);
    const tagRepository = dataSource.supervisor.getRepository(Tag);

    const tags = [];
    for (const tagName of tagNames) {
        let tag = look ahead to tagRepository.findOne({ the place: { identify: tagName } });
        if (!tag) {
            tag = new Tag();
            tag.identify = tagName;
            tag = look ahead to tagRepository.save(tag);
        }
        tags.push(tag);
    }

    const newPost = new BlogPost();
    newPost.name = name;
    newPost.content material = content material;
    newPost.writer = writer;
    newPost.slug = slug;
    newPost.publishDate = publishDate;
    newPost.standing = standing;
    newPost.tags = tags;

    go back look ahead to postRepository.save(newPost);
}
This serve as takes a number of parameters: name, content material, writer, slug, publishDate, standing, and tagNames. It initializes the AppDataSource and fetches the repositories for BlogPost and Tag. It then creates a brand new Tag for each and every tag identify supplied, if it does not exist already, and saves it to the Tag repository.
A brand new BlogPost is then created with the supplied parameters and the array of Tag circumstances. The put up is stored to the BlogPost repository and the serve as returns the results of this operation.
Get All Posts
The getAllPosts.ts module permits us to retrieve all weblog posts from our CMS. It exports an asynchronous serve as getAllPosts that fetches and returns all posts from the BlogPost repository.
import { AppDataSource } from "../data-source";
import { BlogPost } from "../entity/BlogPost";

export async serve as getAllPosts() {
    const dataSource = look ahead to AppDataSource;
    go back look ahead to dataSource.supervisor.getRepository(BlogPost).in finding();
}
In a similar way, the getAllTags.ts module exports an asynchronous serve as getAllTags that fetches and returns all tags from the Tag repository.
import { AppDataSource } from "../data-source";
import { Tag } from "../entity/Tag";

export async serve as getAllTags() {
    const dataSource = look ahead to AppDataSource;
    go back look ahead to dataSource.supervisor.getRepository(Tag).in finding();
}
Get a Publish through Slug
The getPostBySlug.ts module exports an asynchronous serve as getPostBySlug that fetches and returns a put up in response to its slug.
import { AppDataSource } from "../data-source";
import { BlogPost } from "../entity/BlogPost";

export async serve as getPostBySlug(slug: string) {
    const dataSource = look ahead to AppDataSource;
    go back look ahead to dataSource.supervisor.getRepository(BlogPost).findOne({the place: {slug}});
}
Get All Posts through Tag
The getPostsByTag.ts module exports an asynchronous serve as getPostsByTag that fetches and returns all posts related to a selected tag.
import { AppDataSource } from "../data-source";
import { BlogPost } from "../entity/BlogPost";
import { Tag } from "../entity/Tag";

export async serve as getPostsByTag(tagName: string) {
    const dataSource = look ahead to AppDataSource;
    const tagRepository = dataSource.supervisor.getRepository(Tag);
    const tag = look ahead to tagRepository.findOne({ the place: { identify: tagName } });

    if (!tag) {
        throw new Error(`No tag discovered with the identify ${tagName}`);
    }

    go back look ahead to dataSource.supervisor.getRepository(BlogPost).in finding({ the place: { tags: tag } });
}
This serve as takes an tagName as a parameter. It initializes the AppDataSource and fetches the repository for Tag. It then searches for a tag with the supplied identify. If no such tag is located, an error is thrown. If the tag is located, the serve as fetches and returns all BlogPost entities related to this tag from the BlogPost repository.
With those information, we have now arrange the fundamental CRUD operations for our CMS. Those operations let us create, retrieve, and organize weblog posts and tags in our CMS, using the ability of TypeScript and OceanBase.
Putting in the API Server in Specific
The Specific.js framework will maintain the HTTP requests and responses for our CMS. Within the src/index.ts document, we commence through uploading the essential modules and purposes:
import categorical, { Request, Reaction , NextFunction} from 'categorical';
import { AppDataSource } from './data-source';
import { addTag } from './modules/addTag';
import { createPost } from './modules/createPost';
import { getAllPosts } from './modules/getAllPosts';
import { getAllTags } from './modules/getAllTags';
import { getPostBySlug } from './modules/getPostBySlug';
import { getPostsByTag } from './modules/getPostsByTag';
Subsequent, we create an Specific software and set the port to 3000. We additionally use the categorical.json() middleware to parse incoming JSON payloads:
const app = categorical();
const port = 3000;

app.use(categorical.json());
We then outline a number of routes for our CMS:
GET /posts: This path fetches all weblog posts from the CMS and sends them within the HTTP reaction.
app.get('/posts', async (req: Request, res: Reaction) => {
    const posts = look ahead to getAllPosts();
    res.json(posts);
});
POST /posts: This path creates a brand new weblog put up. It expects the put up main points to be supplied within the HTTP request frame.
app.put up('/posts', async (req: Request, res: Reaction, subsequent: NextFunction) => {
    take a look at {
        const { name, content material, writer, slug, publishDate, standing, tagNames } = req.frame;
        look ahead to createPost(name, content material, writer, slug, publishDate, standing, tagNames);
        res.sendStatus(201);
    } catch (error) {
        subsequent(error);
    }
});
POST /tags: This path creates a brand new tag. It expects the tag identify to be supplied within the HTTP request frame.
app.put up('/tags', async (req: Request, res: Reaction, subsequent: NextFunction) => {
    take a look at {
        const { identify } = req.frame;
        look ahead to addTag(identify);
        res.sendStatus(201);
    } catch (error) {
        subsequent(error);
    }
});
GET /tags: This path fetches all tags from the CMS and sends them within the HTTP reaction.
app.get('/tags', async (req: Request, res: Reaction, subsequent: NextFunction) => {
    take a look at {
        const tags = look ahead to getAllTags();
        res.json(tags);
    } catch (error) {
        subsequent(error);
    }
});
GET /posts/:slug: This path fetches a weblog put up in response to its slug and sends it within the HTTP reaction.
app.get('/posts/:slug', async (req: Request, res: Reaction, subsequent: NextFunction) => {
    take a look at {
        const { slug } = req.params;
        const put up = look ahead to getPostBySlug(slug);
        if (put up) {
            res.json(put up);
        } else {
            res.sendStatus(404);
        }
    } catch (error) {
        subsequent(error);
    }
});
GET /posts/tag/:tagName: This path fetches all weblog posts related to a selected tag and sends them within the HTTP reaction.
app.get('/posts/tag/:tagName', async (req: Request, res: Reaction, subsequent: NextFunction) => {
    take a look at {
        const { tagName } = req.params;
        const posts = look ahead to getPostsByTag(tagName);
        res.json(posts);
    } catch (error) {
        subsequent(error);
    }
});
We additionally upload an error dealing with middleware to catch any mistakes that would possibly happen all over the dealing with of requests:
app.use((error: Error, req: Request, res: Reaction, subsequent: NextFunction) => {
    console.error(error);
    res.standing(500).json({ error: 'Interior server error' });
});
In any case, we commence the Specific server and upload match listeners to maintain sleek shutdowns:
app.pay attention(port, () => {
    console.log(`Server is working on port ${port}`);
});

procedure.on('SIGINT', async () => {
    const conn = look ahead to AppDataSource;
    look ahead to conn.shut();
    console.log('Database connection closed');
    procedure.go out(0);
});

procedure.on('unhandledRejection', (reason why, promise) => {
    console.log('Unhandled Rejection at:', promise, 'reason why:', reason why);
    procedure.go out(1);
});
That is it! With those steps, we have now arrange the API server for our CMS the usage of Specific.js, TypeScript, and OceanBase.
Trying out the API
Now that we’ve got our API server all arrange, it is time to check it out. We will be able to use the VS Code plugin Thunder Consumer to make HTTP requests to our server and test its responses.
Kind the next command to begin the server.
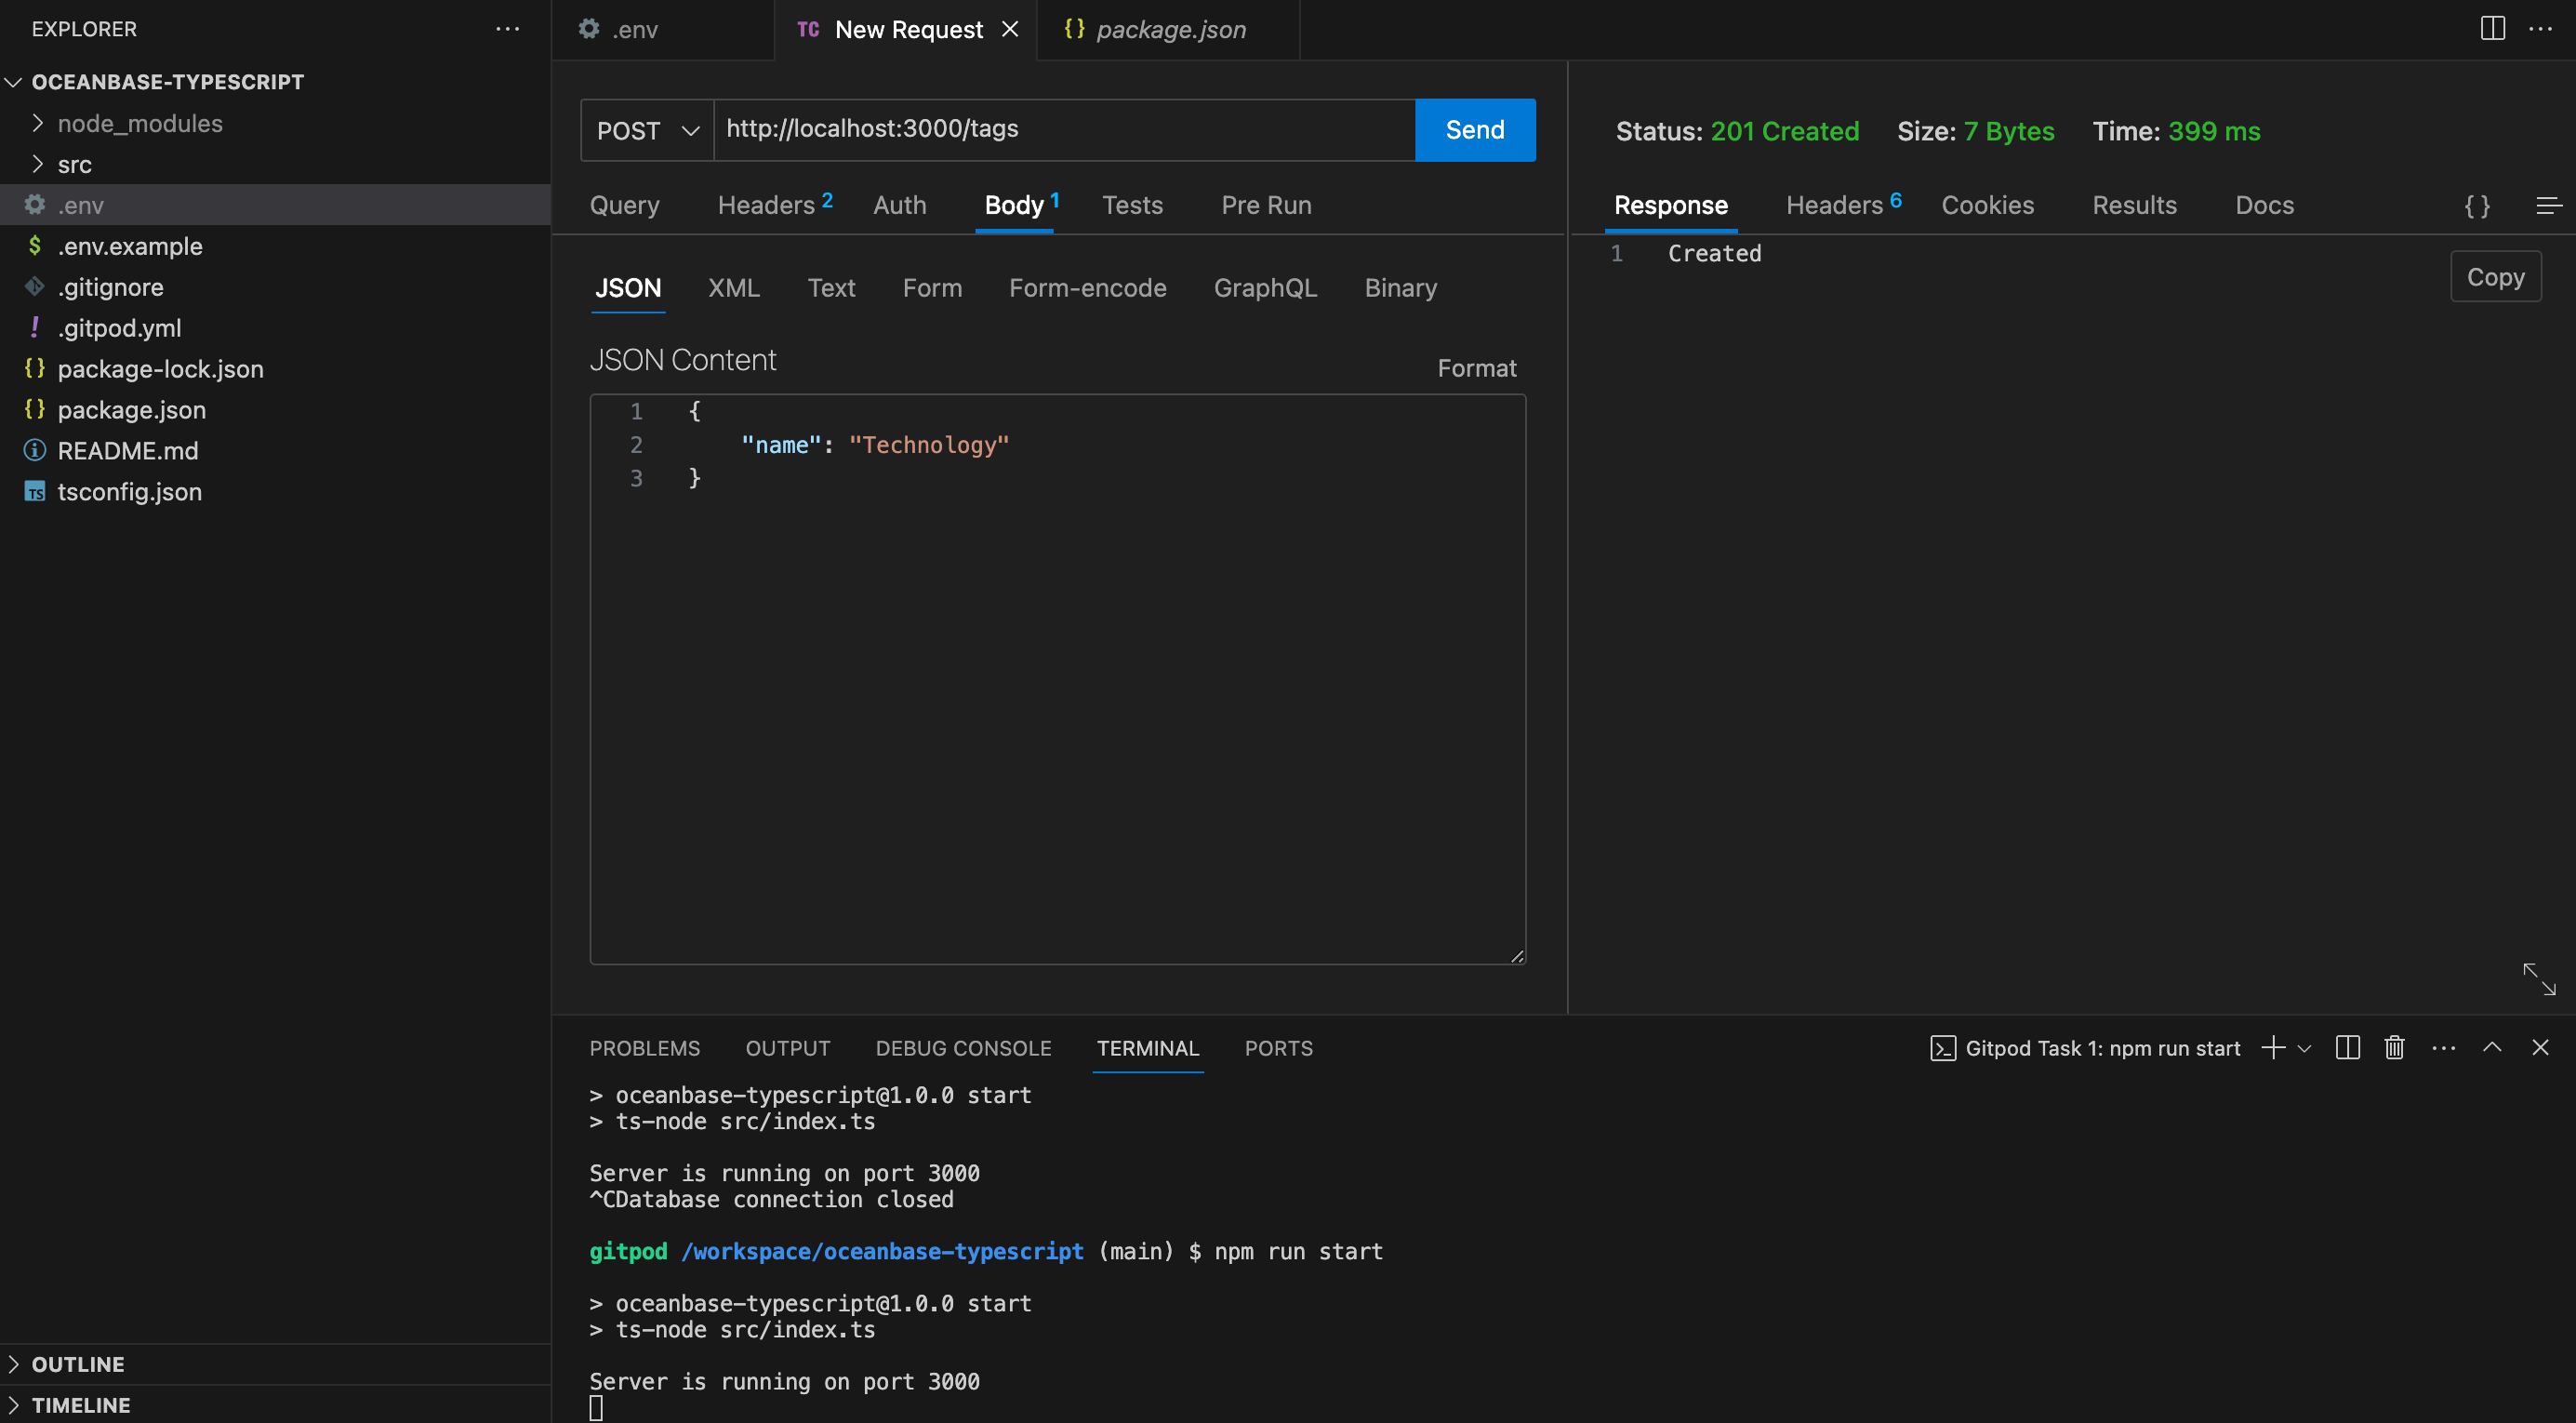
Let’s get started through trying out the POST /tags endpoint that we created so as to add new tags to our CMS. Open Postman and create a brand new request. Set the request sort to POST and the URL to http://localhost:3000/tags. Within the request frame, choose uncooked and JSON and enter a brand new tag identify as follows:
Click on on “Ship”. If the entirety is operating as it should be, you will have to obtain a 201 Created standing code.
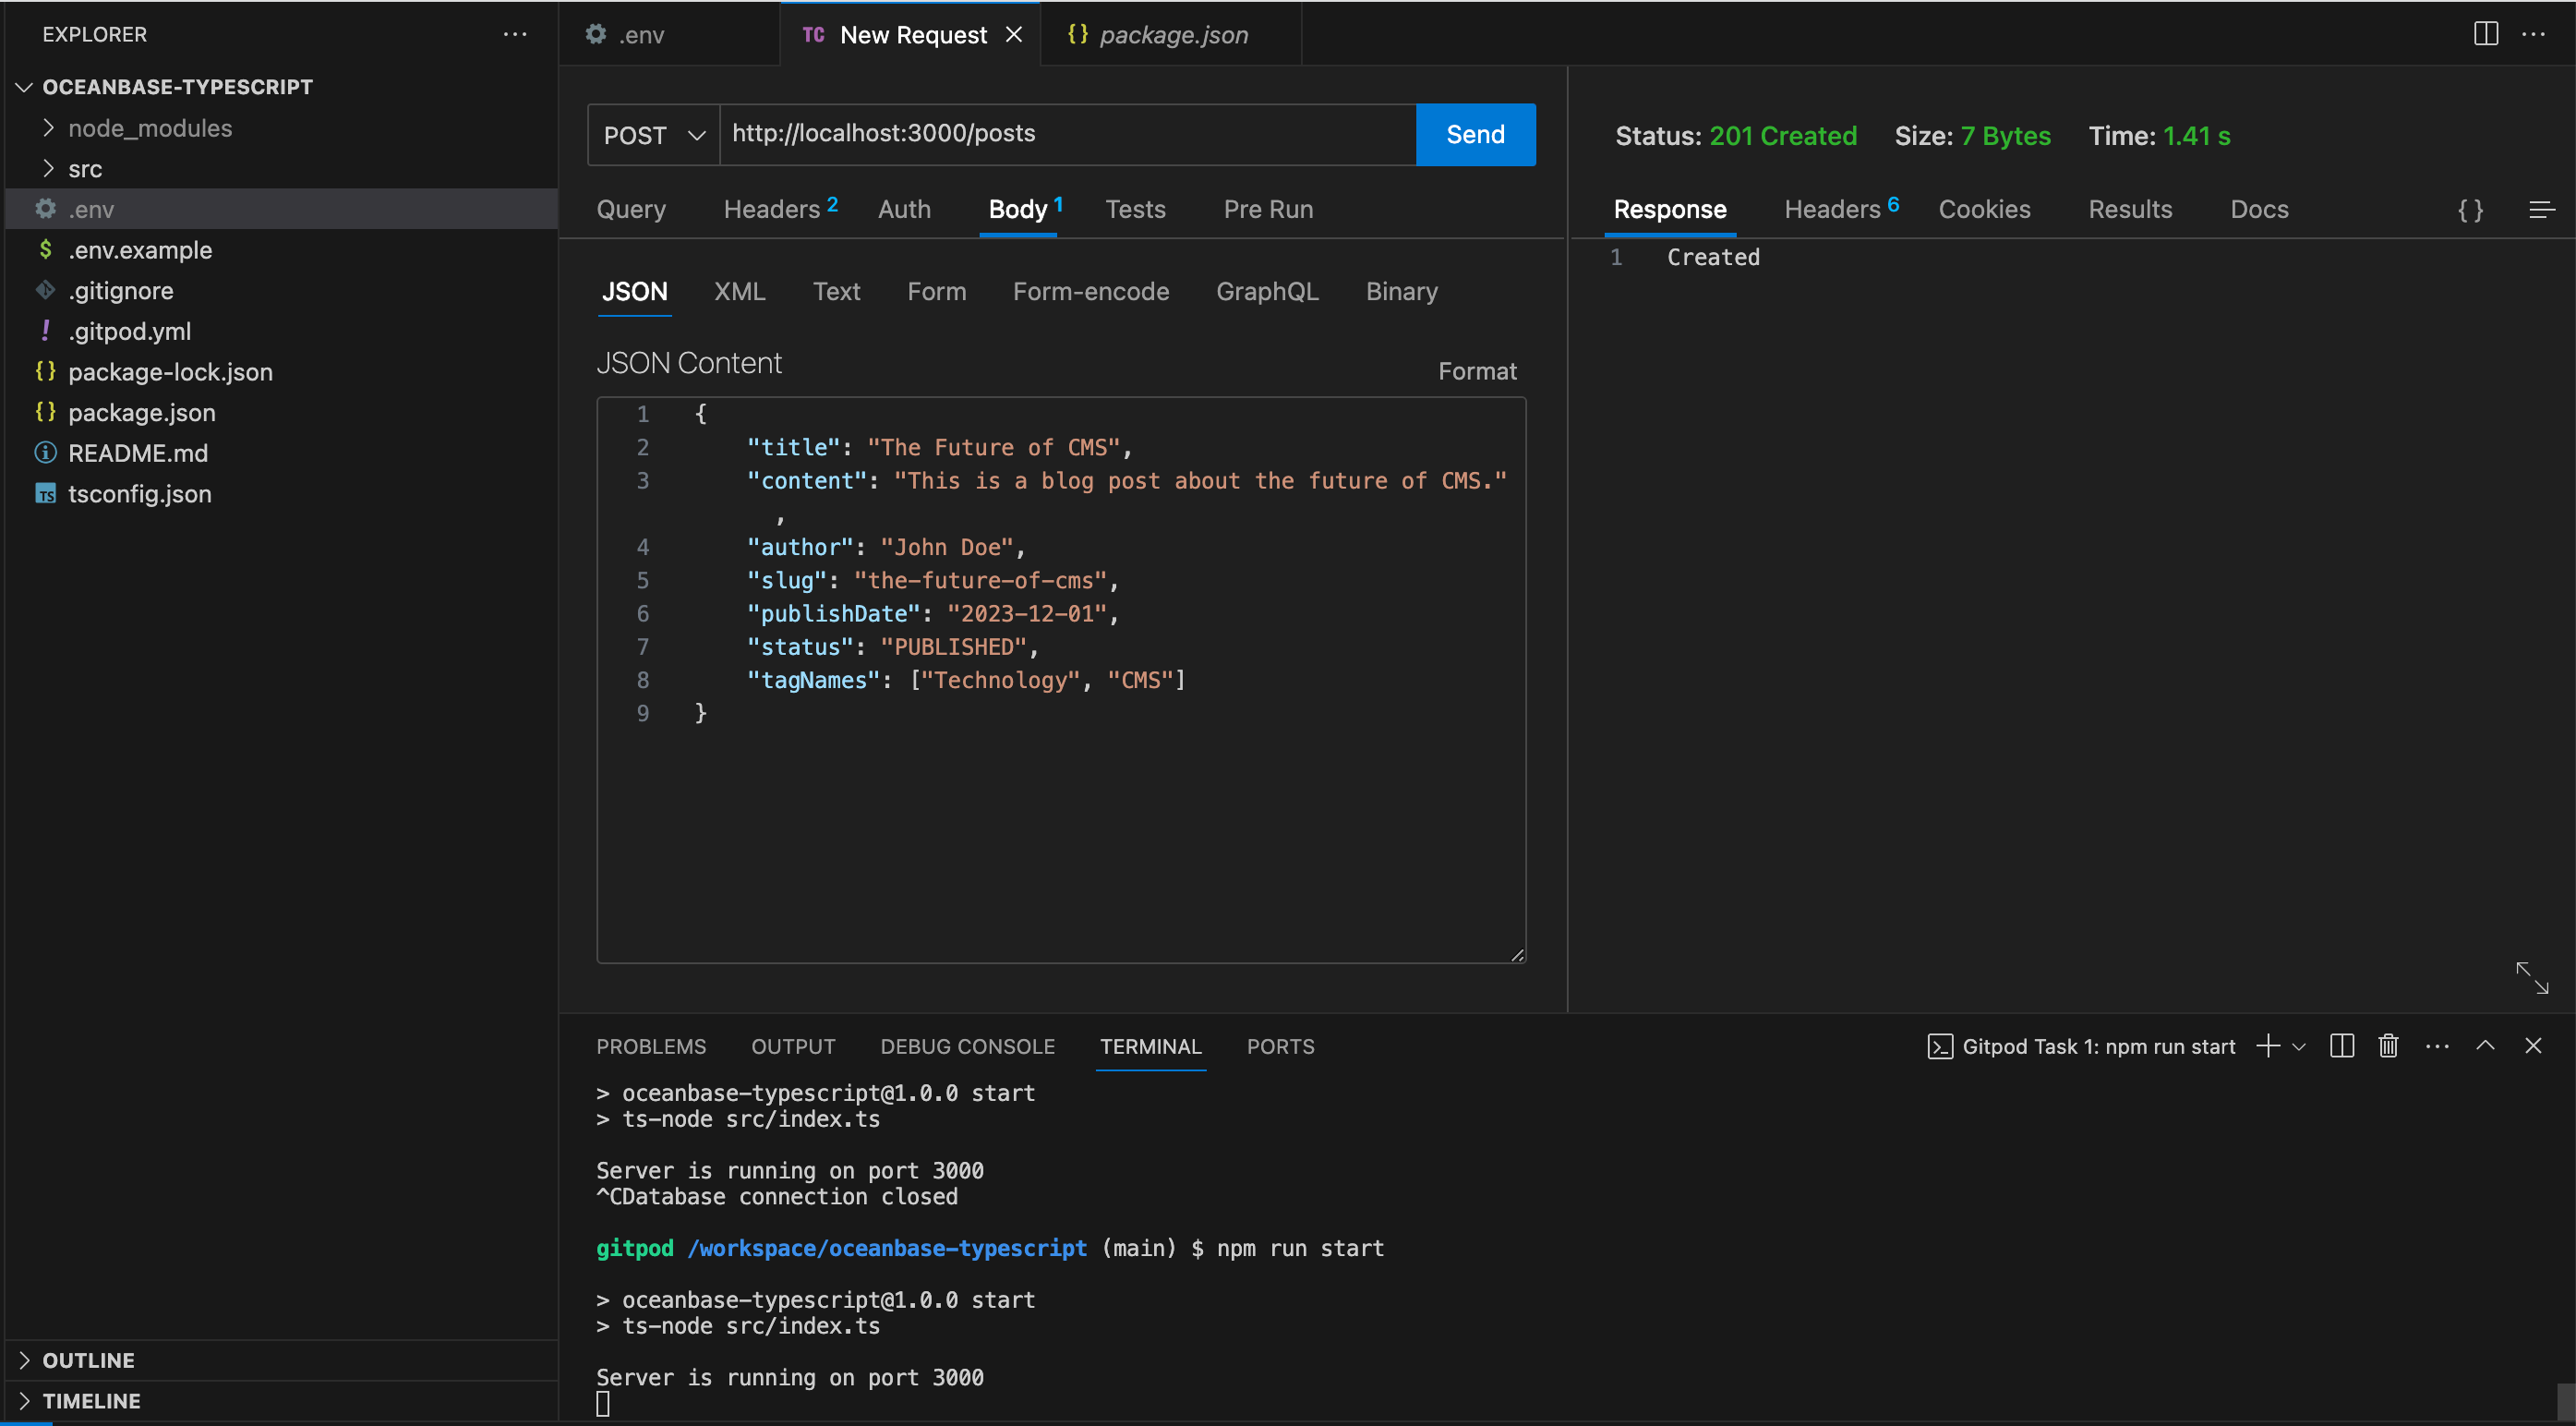
Subsequent, let’s check the POST /posts endpoint. Create a brand new POST request to http://localhost:3000/posts. Within the request frame, enter a brand new weblog put up with name, content material, writer, slug, put up date, standing, and an array of tag names:
{
    "name": "The Long term of CMS",
    "content material": "It is a weblog put up about the way forward for CMS.",
    "writer": "John Doe",
    "slug": "the-future-of-cms",
    "publishDate": "2023-12-01",
    "standing": "PUBLISHED",
    "tagNames": ["Technology", "CMS"]
}
Click on on “Ship”. You will have to obtain a 201 Created standing code.
Now, let’s check the GET /posts endpoint. Create a brand new GET request to http://localhost:3000/posts and click on on “Ship”. You will have to obtain a 200 OK standing code and a listing of all weblog posts within the reaction frame.
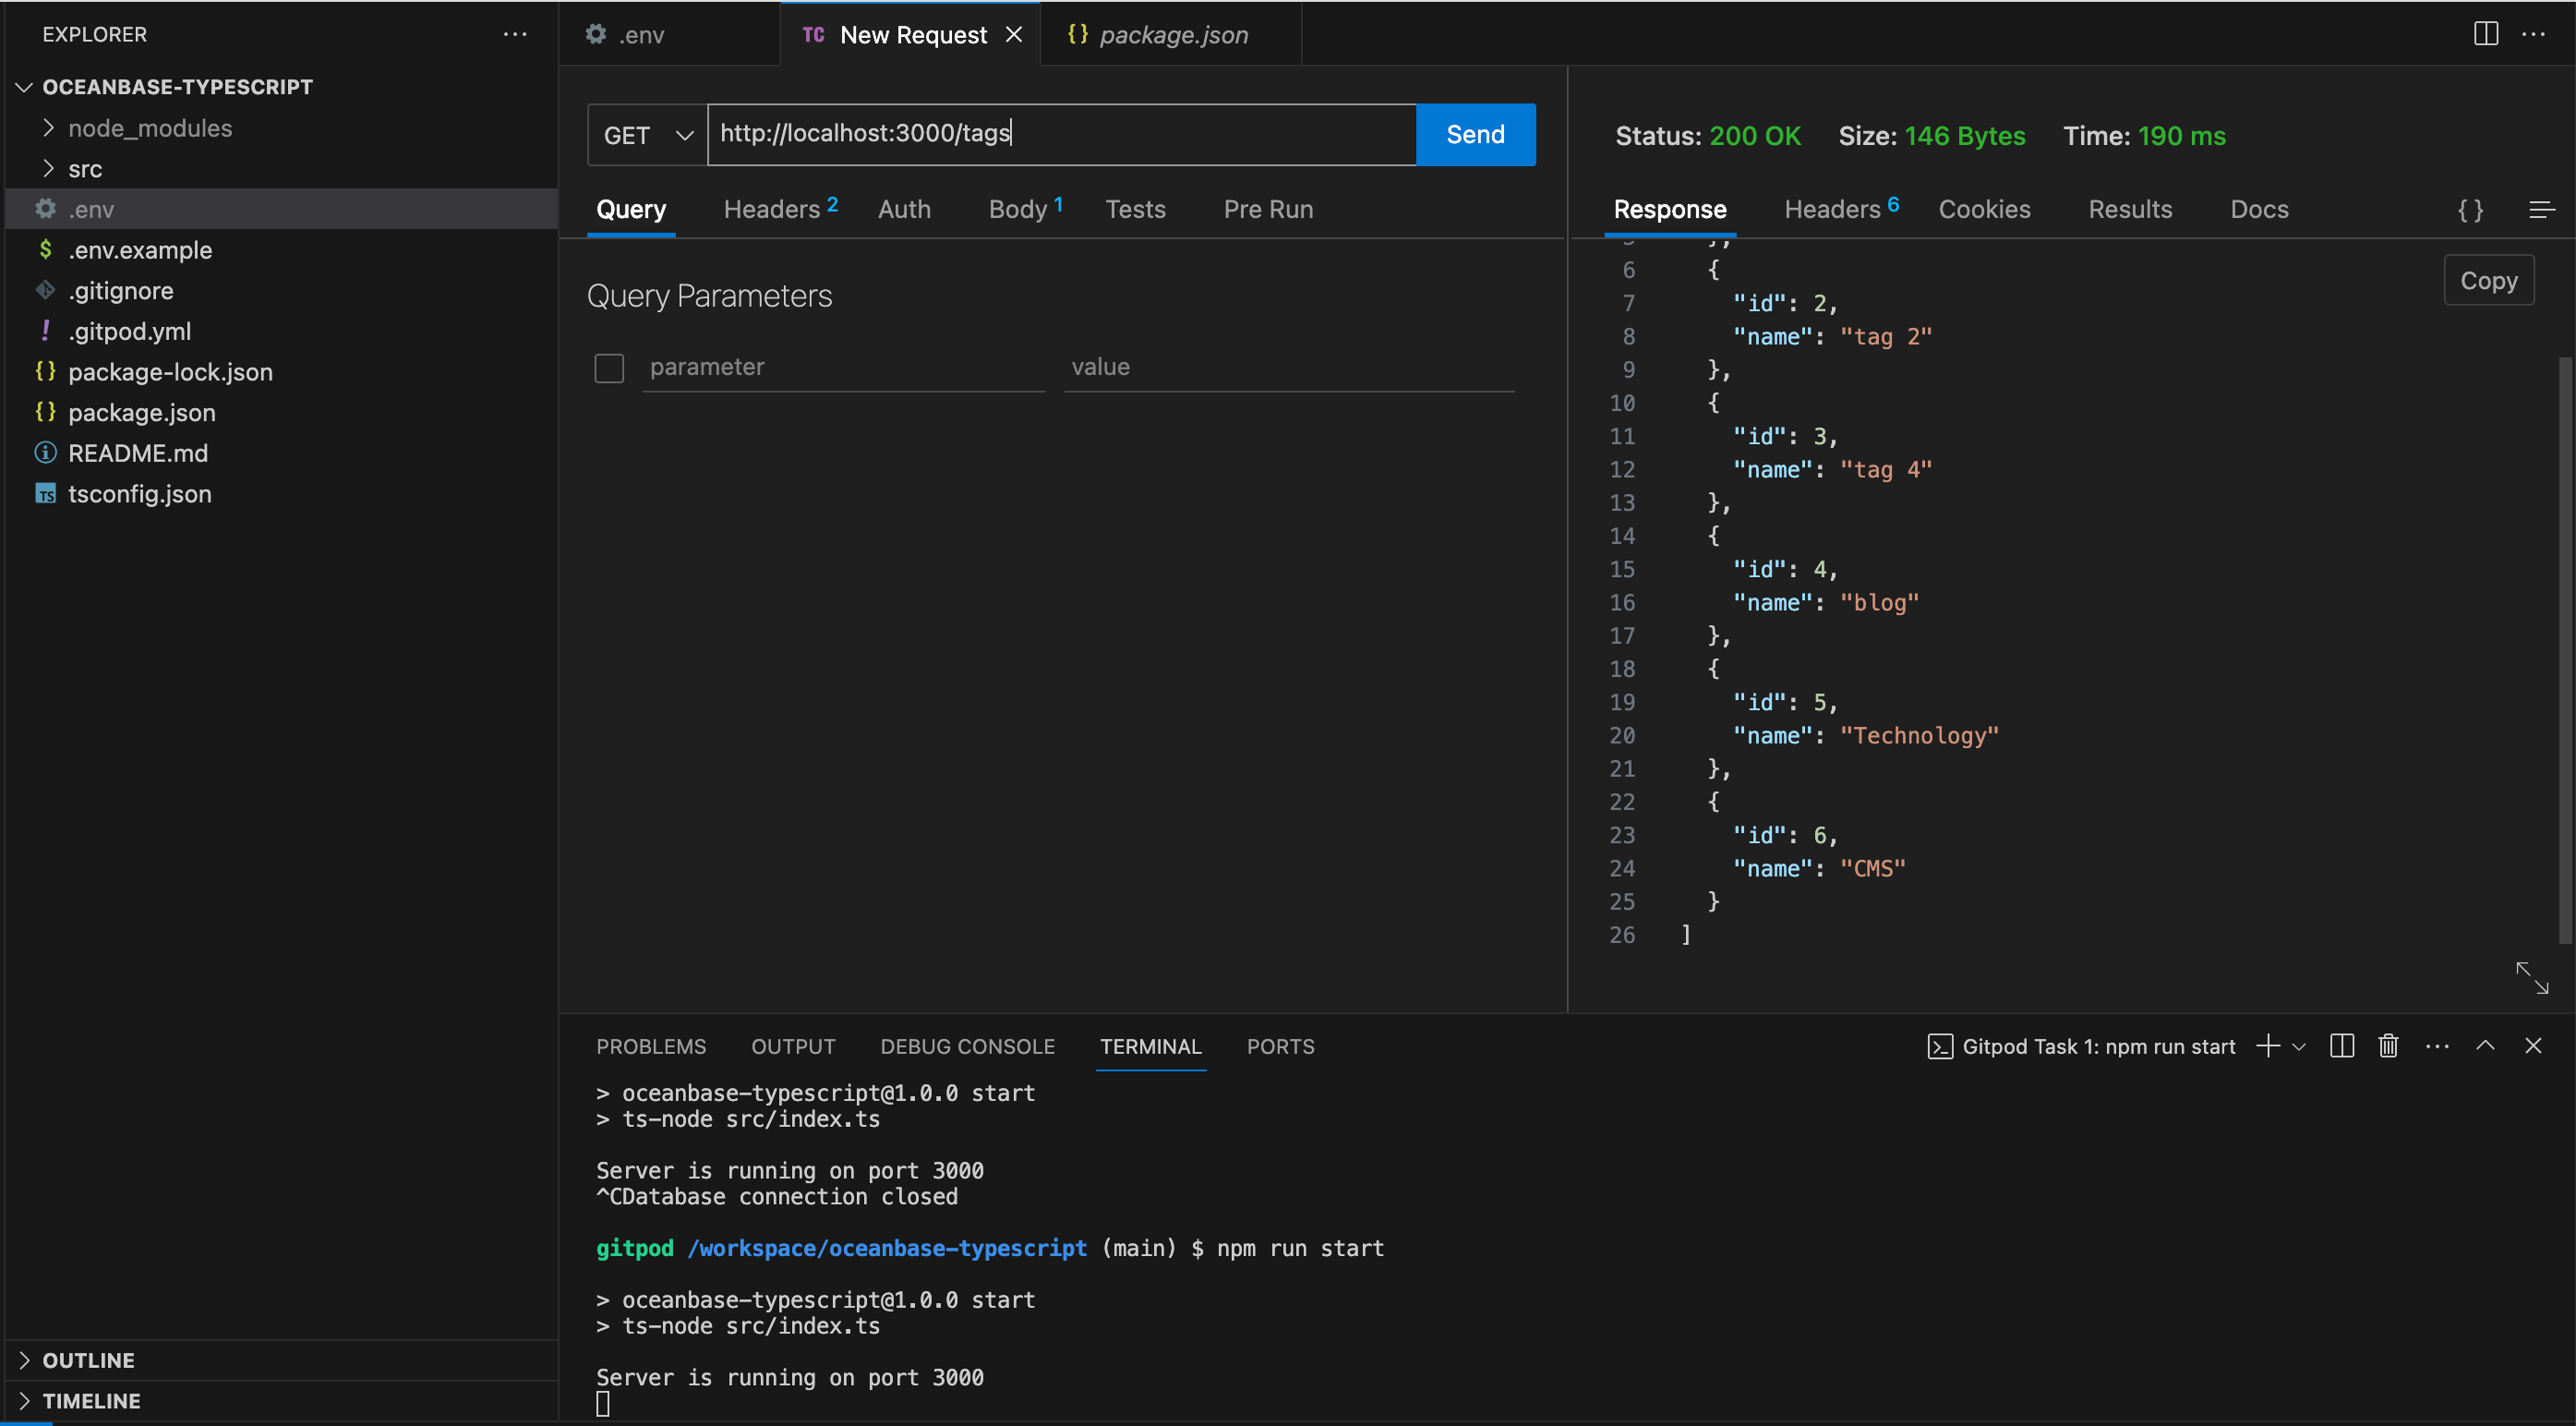
In a similar way, check the GET /tags endpoint through growing a brand new GET request to http://localhost:3000/tags. You will have to obtain a 200 OK standing code and a listing of all tags within the reaction frame.
To check the GET /posts/tag/:tagName endpoint, create a brand new GET request to http://localhost:3000/posts/tag/Era. You will have to obtain a 200 OK standing code and a listing of all weblog posts related to the tag “Era”.
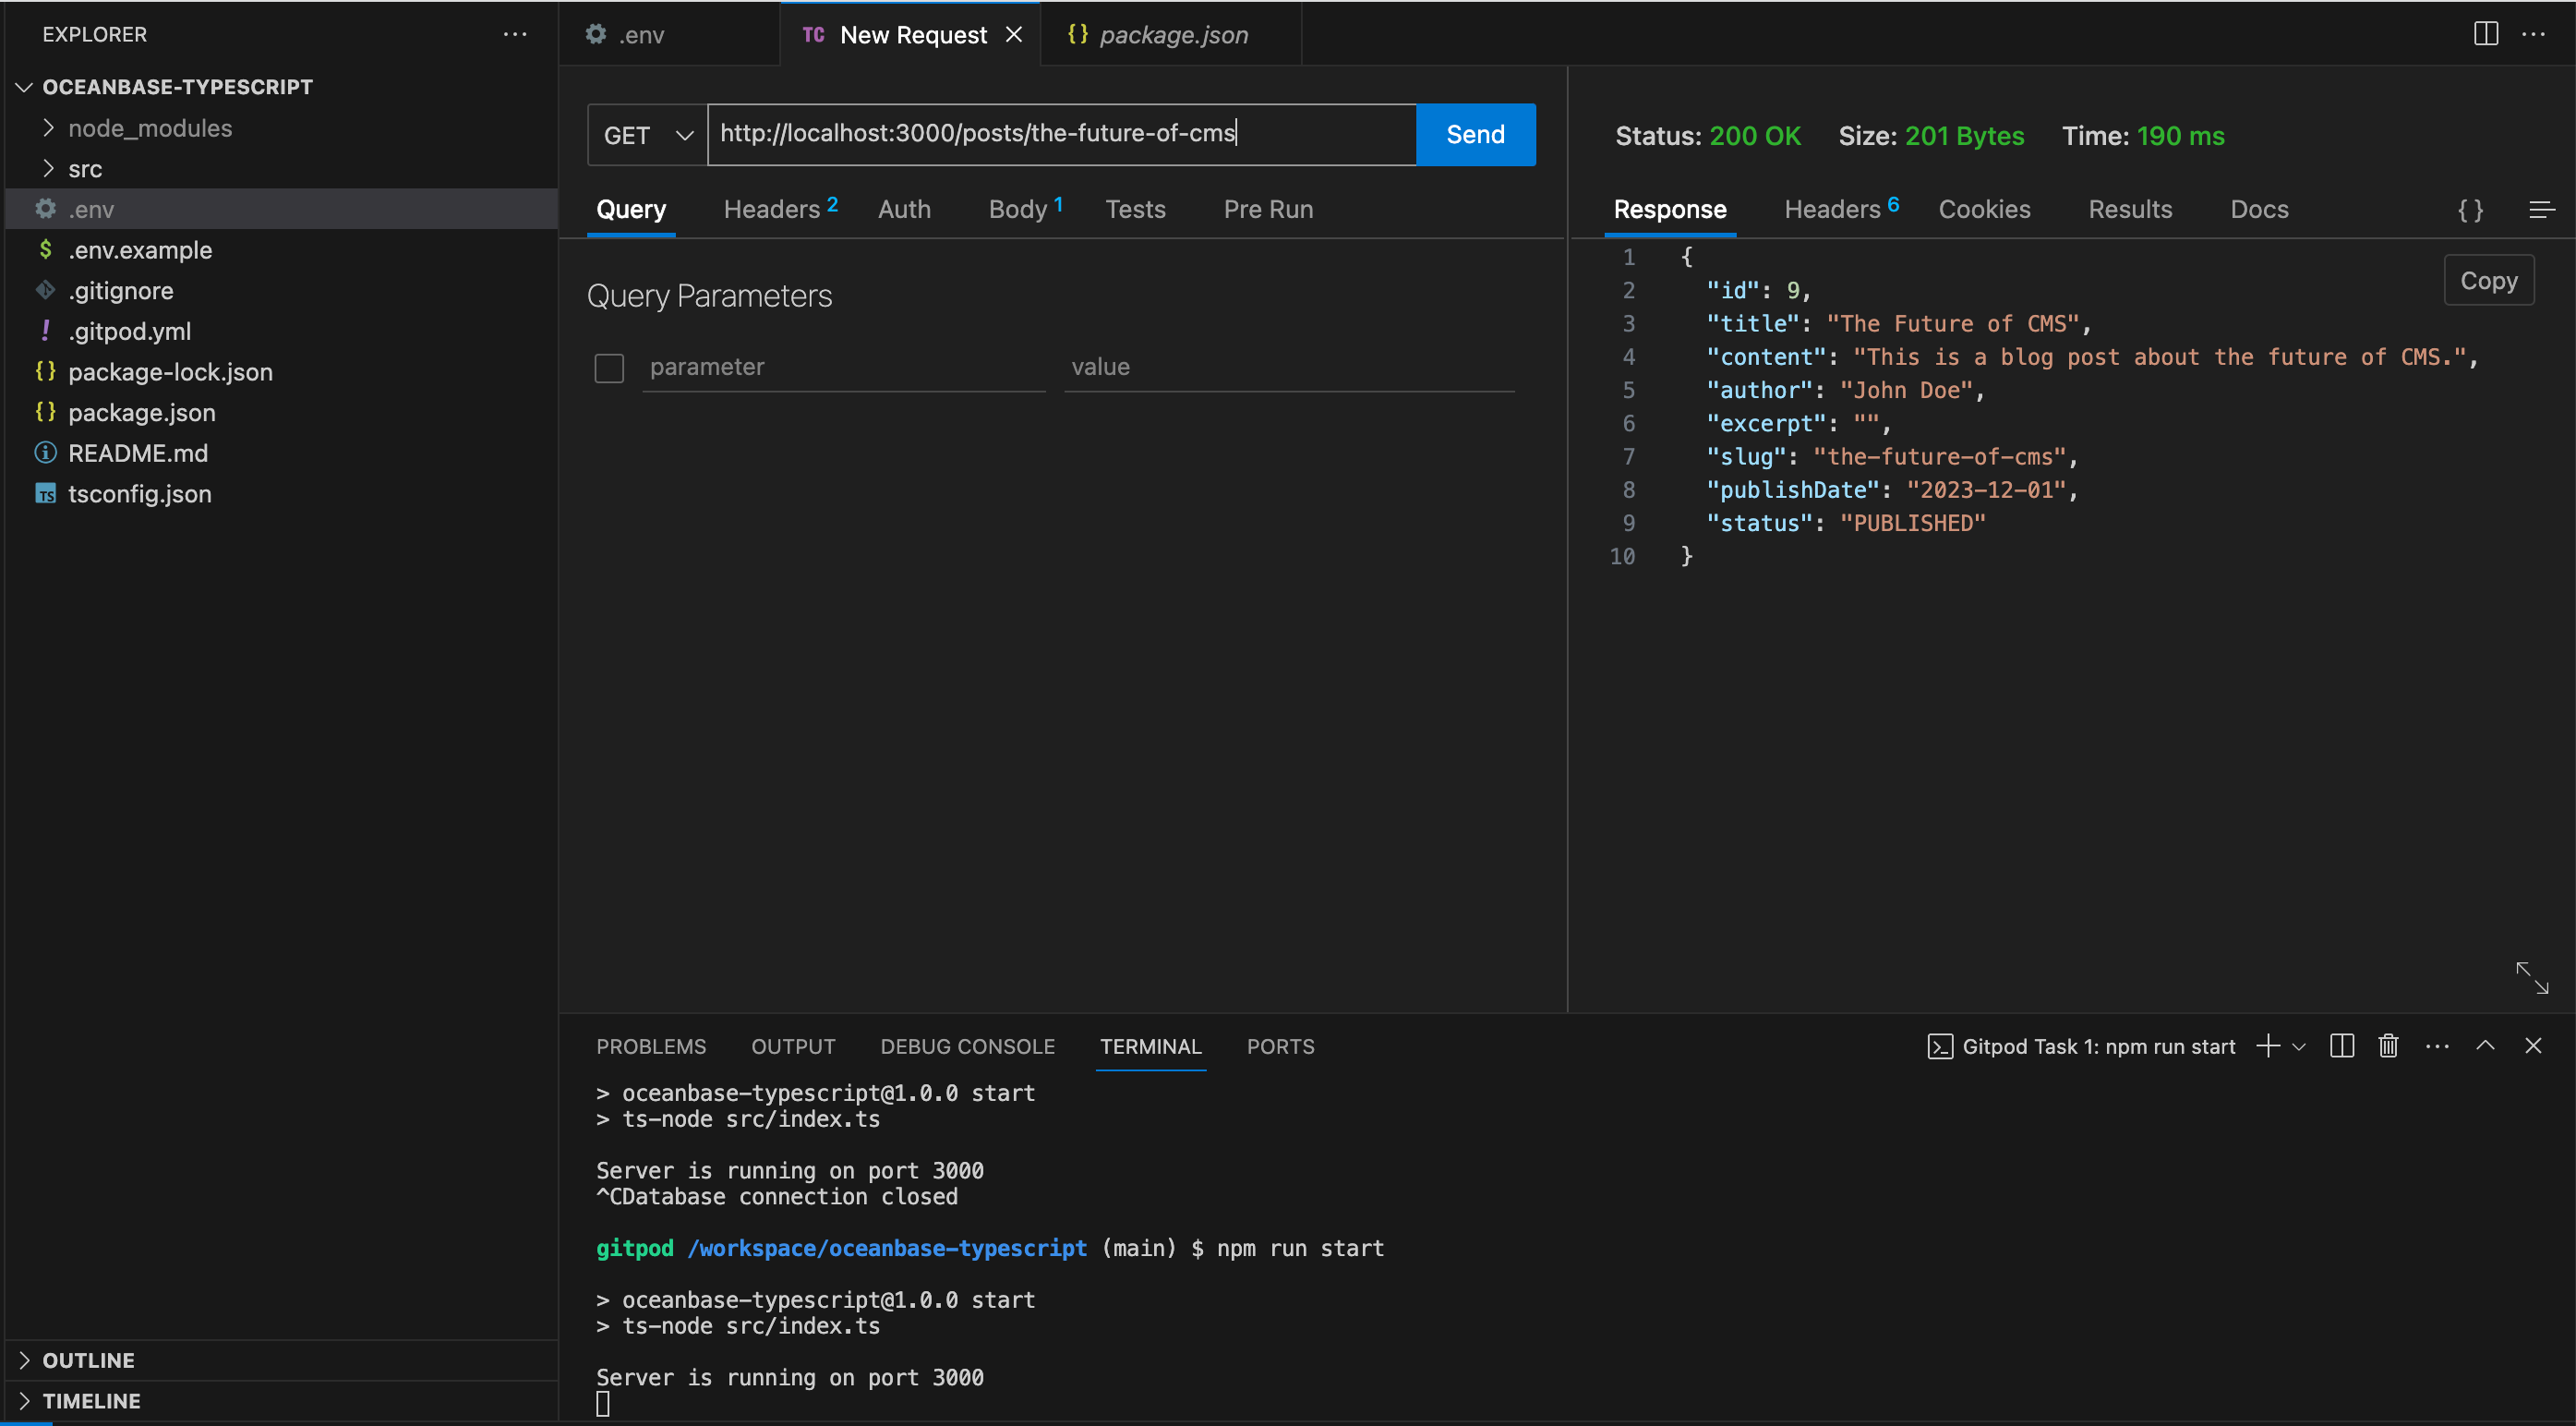
In any case, to check the GET /posts/:slug endpoint, create a brand new GET request to http://localhost:3000/posts/the-future-of-ai. You will have to obtain a 200 OK standing code and the main points of the weblog put up with the slug “the-future-of-ai”.
Congratulations! If your entire requests returned the predicted responses, your API server is operating as anticipated. You have got effectively constructed a headless CMS the usage of TypeScript and OceanBase and supplied it with a powerful API server the usage of Specific.js.
Conclusion
Construction a headless CMS would possibly appear to be a frightening job, however as we have now observed on this educational, with the proper gear and a cast construction, it is fully achievable. The usage of TypeScript and OceanBase, we have now created a versatile and scalable CMS that may serve content material on various platforms.
OceanBase, a dispensed, high-performance relational database, served because the spine of our CMS. Its excessive scalability and compatibility with MySQL made it a very good selection for initiatives like this. OceanBase now not handiest treated huge quantities of information successfully but in addition supplied reliability, making sure that our CMS can maintain large-scale packages.
TypeScript’s static typing enhanced our code’s reliability, predictability, and maintainability, making it an impressive best friend in our quest to construct a powerful, headless CMS. Specific.js, a light-weight and versatile Node.js internet software framework, enabled us to construct a graceful API server with minimum trouble.
This information served as an illustration of ways you’ll use OceanBase in a TypeScript mission. It is a testomony to OceanBase’s versatility and robustness, proving that it may be a very good selection for a variety of packages, from small initiatives to large-scale venture answers.
Be mindful, the adventure does not finish right here. There is a plethora of extra options and improvements you’ll upload for your CMS. From incorporating consumer authentication to including a entrance finish to have interaction together with your CMS, the probabilities are never-ending. With OceanBase because the spine of your mission, you’ll be assured that your CMS will be capable of maintain no matter you throw at it.
Once more, you’ll in finding the supply code of the mission in this GitHub repo. The repo will also be a place to begin for some other TypeScript/OceanBase initiatives to your thoughts.
[ad_2]


