
[ad_1]
The React DevTools
is an important piece of device and is to be had as a browser extension for
Chrome,
Firefox, and
is able to being stressed as much as paintings with React app’s anyplace.
Some of the coolest options of the React DevTools is its profiling features.
There is a lot to the profiler, and we aren’t going to get into all of it on this
submit, however I believed I might display you ways you’ll get began the usage of the React
Profiler and keep away from a commonplace pitfall other folks run into when profiling their
programs.
I’ll be operating with
my bookshelf app which does a just right
process of strolling the road between sensible sufficient to be “actual global” however easy
sufficient not to require a large number of area particular wisdom to grasp. Really feel
loose to apply alongside if you want, or (even higher) apply alongside to your personal
venture.
First step is to remember to set up the React DevTools extension for the
browser you might be the usage of. I am the usage of Chrome, so I put in it
within the Chrome WebStore.
If it isn’t showing after you put in the extension, chances are you’ll want to shut
your browser DevTools panel and open them once more.
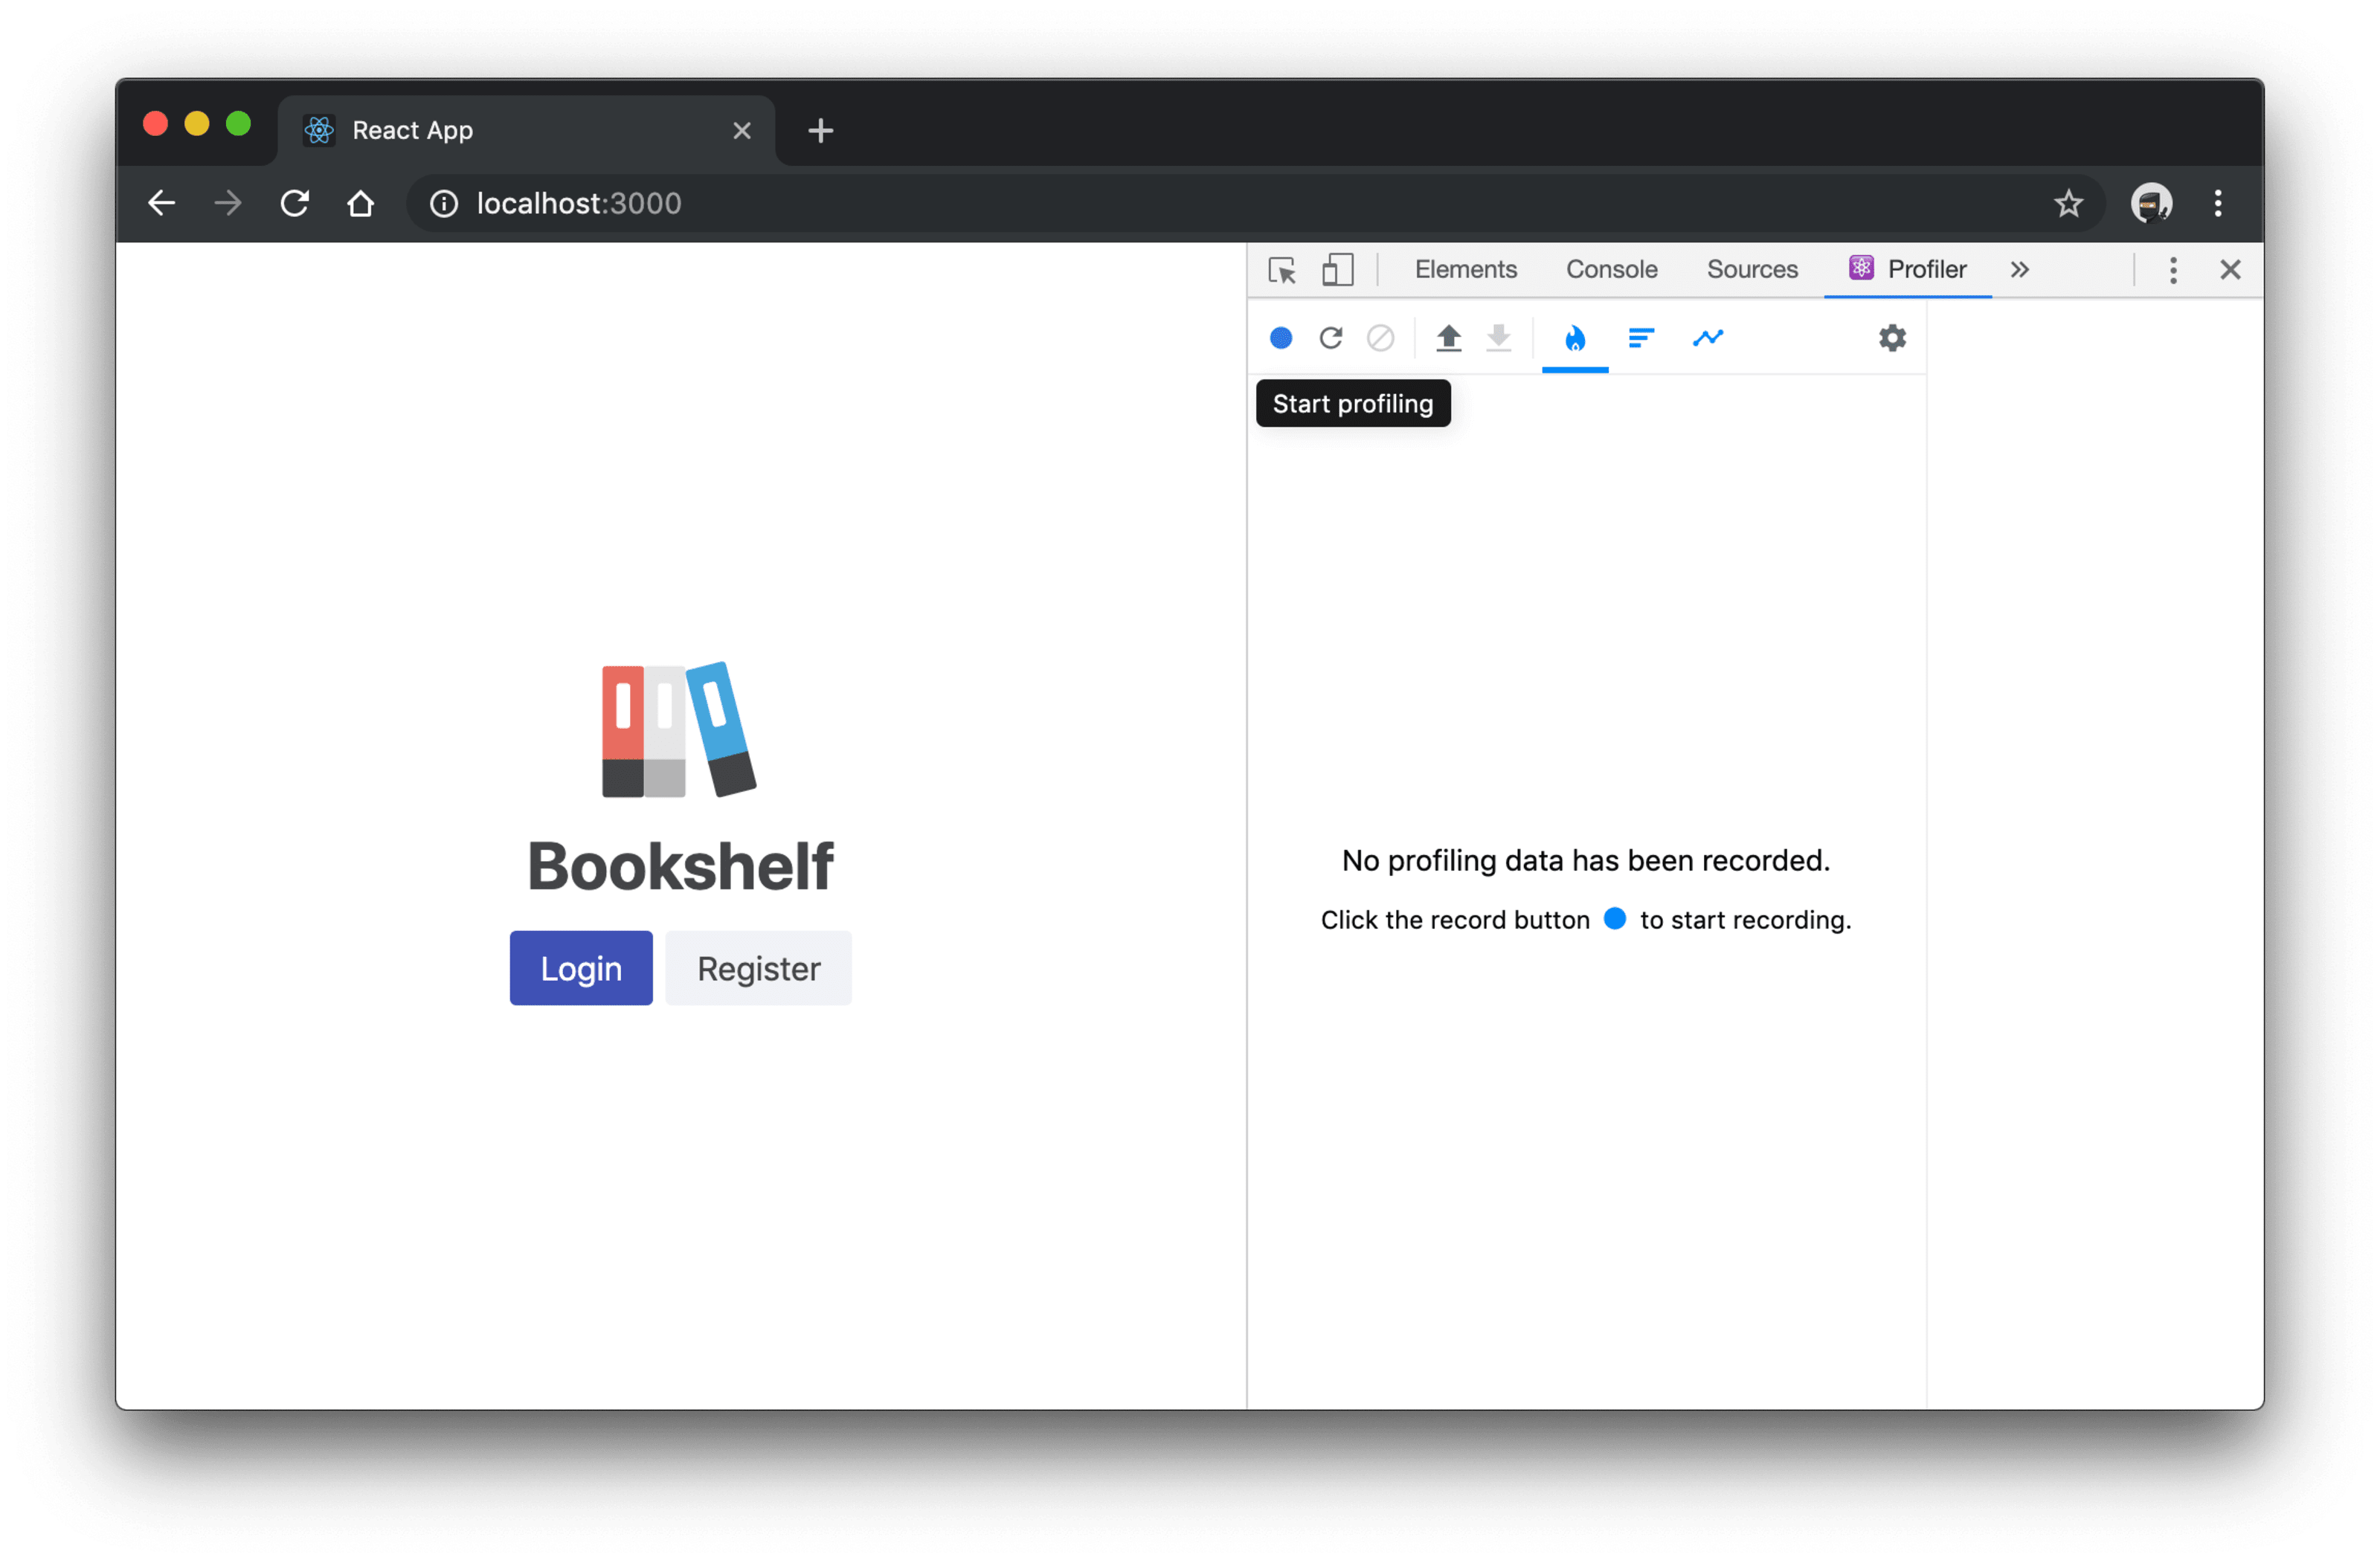
The bookshelf app makes use of react-scripts (due to create-react-app), so after
you may have put in the venture in the community, run npm run get started to get the construction
server operating. This will likely pull up the app to your browser at
http://localhost:3000:

Open the browser developer equipment by way of proper clicking anyplace at the web page and
clicking “Check up on.” Then choose the “⚛ Profiler” tab. That is the React
DevTools profiler and you’ll now click on the little blue circle to “Get started
profiling” the applying.
From right here pass forward and engage with the app a bit of. I’ll check in for a
new account. Then click on the little purple circle to “Prevent profiling.”

From right here you have got a couple of choices for exploring the information that the DevTools
amassed whilst you interacted with the app. The default view is the “Flamegraph
chart”, and there may be additionally the “Ranked chart.” Here is what the “Flamegraph chart”
looks as if (if you wish to see the “Ranked chart,” you will have to do that
your self 😜):

We will dive into inspecting these things in any other submit.
I wish to name out a major pitfall that you wish to have to keep away from when doing
efficiency measurements like profiling. At the moment we are measuring how our app
plays in advancement mode. Should you’ve been the usage of React for some time, you might be
most likely smartly mindful that it ships with a large number of development-time warnings to lend a hand
information you clear of problematic code and practices. This is among the issues I
love maximum about React, however that comes at a (steadily vital) efficiency value.
As a result of this, your efficiency measurements are tainted by way of React’s
development-time-only code (one thing your customers should never be operating).
So if you wish to get a correct dimension of your app’s manufacturing
efficiency, you will have to be sure you do your measurements at the manufacturing
model of your code (the code that your end-users shall be the usage of).
Construct and measure the manufacturing app
So let’s run the optimized manufacturing construct with npm run construct. Subsequent we’re going to run
npx serve -s construct to serve up the constructed model of the app on an HTTP server.
That are meant to get started the app on port 5000. So let’s pull that up and get started a
profiling consultation on that… Wait! Oh no! What is this?
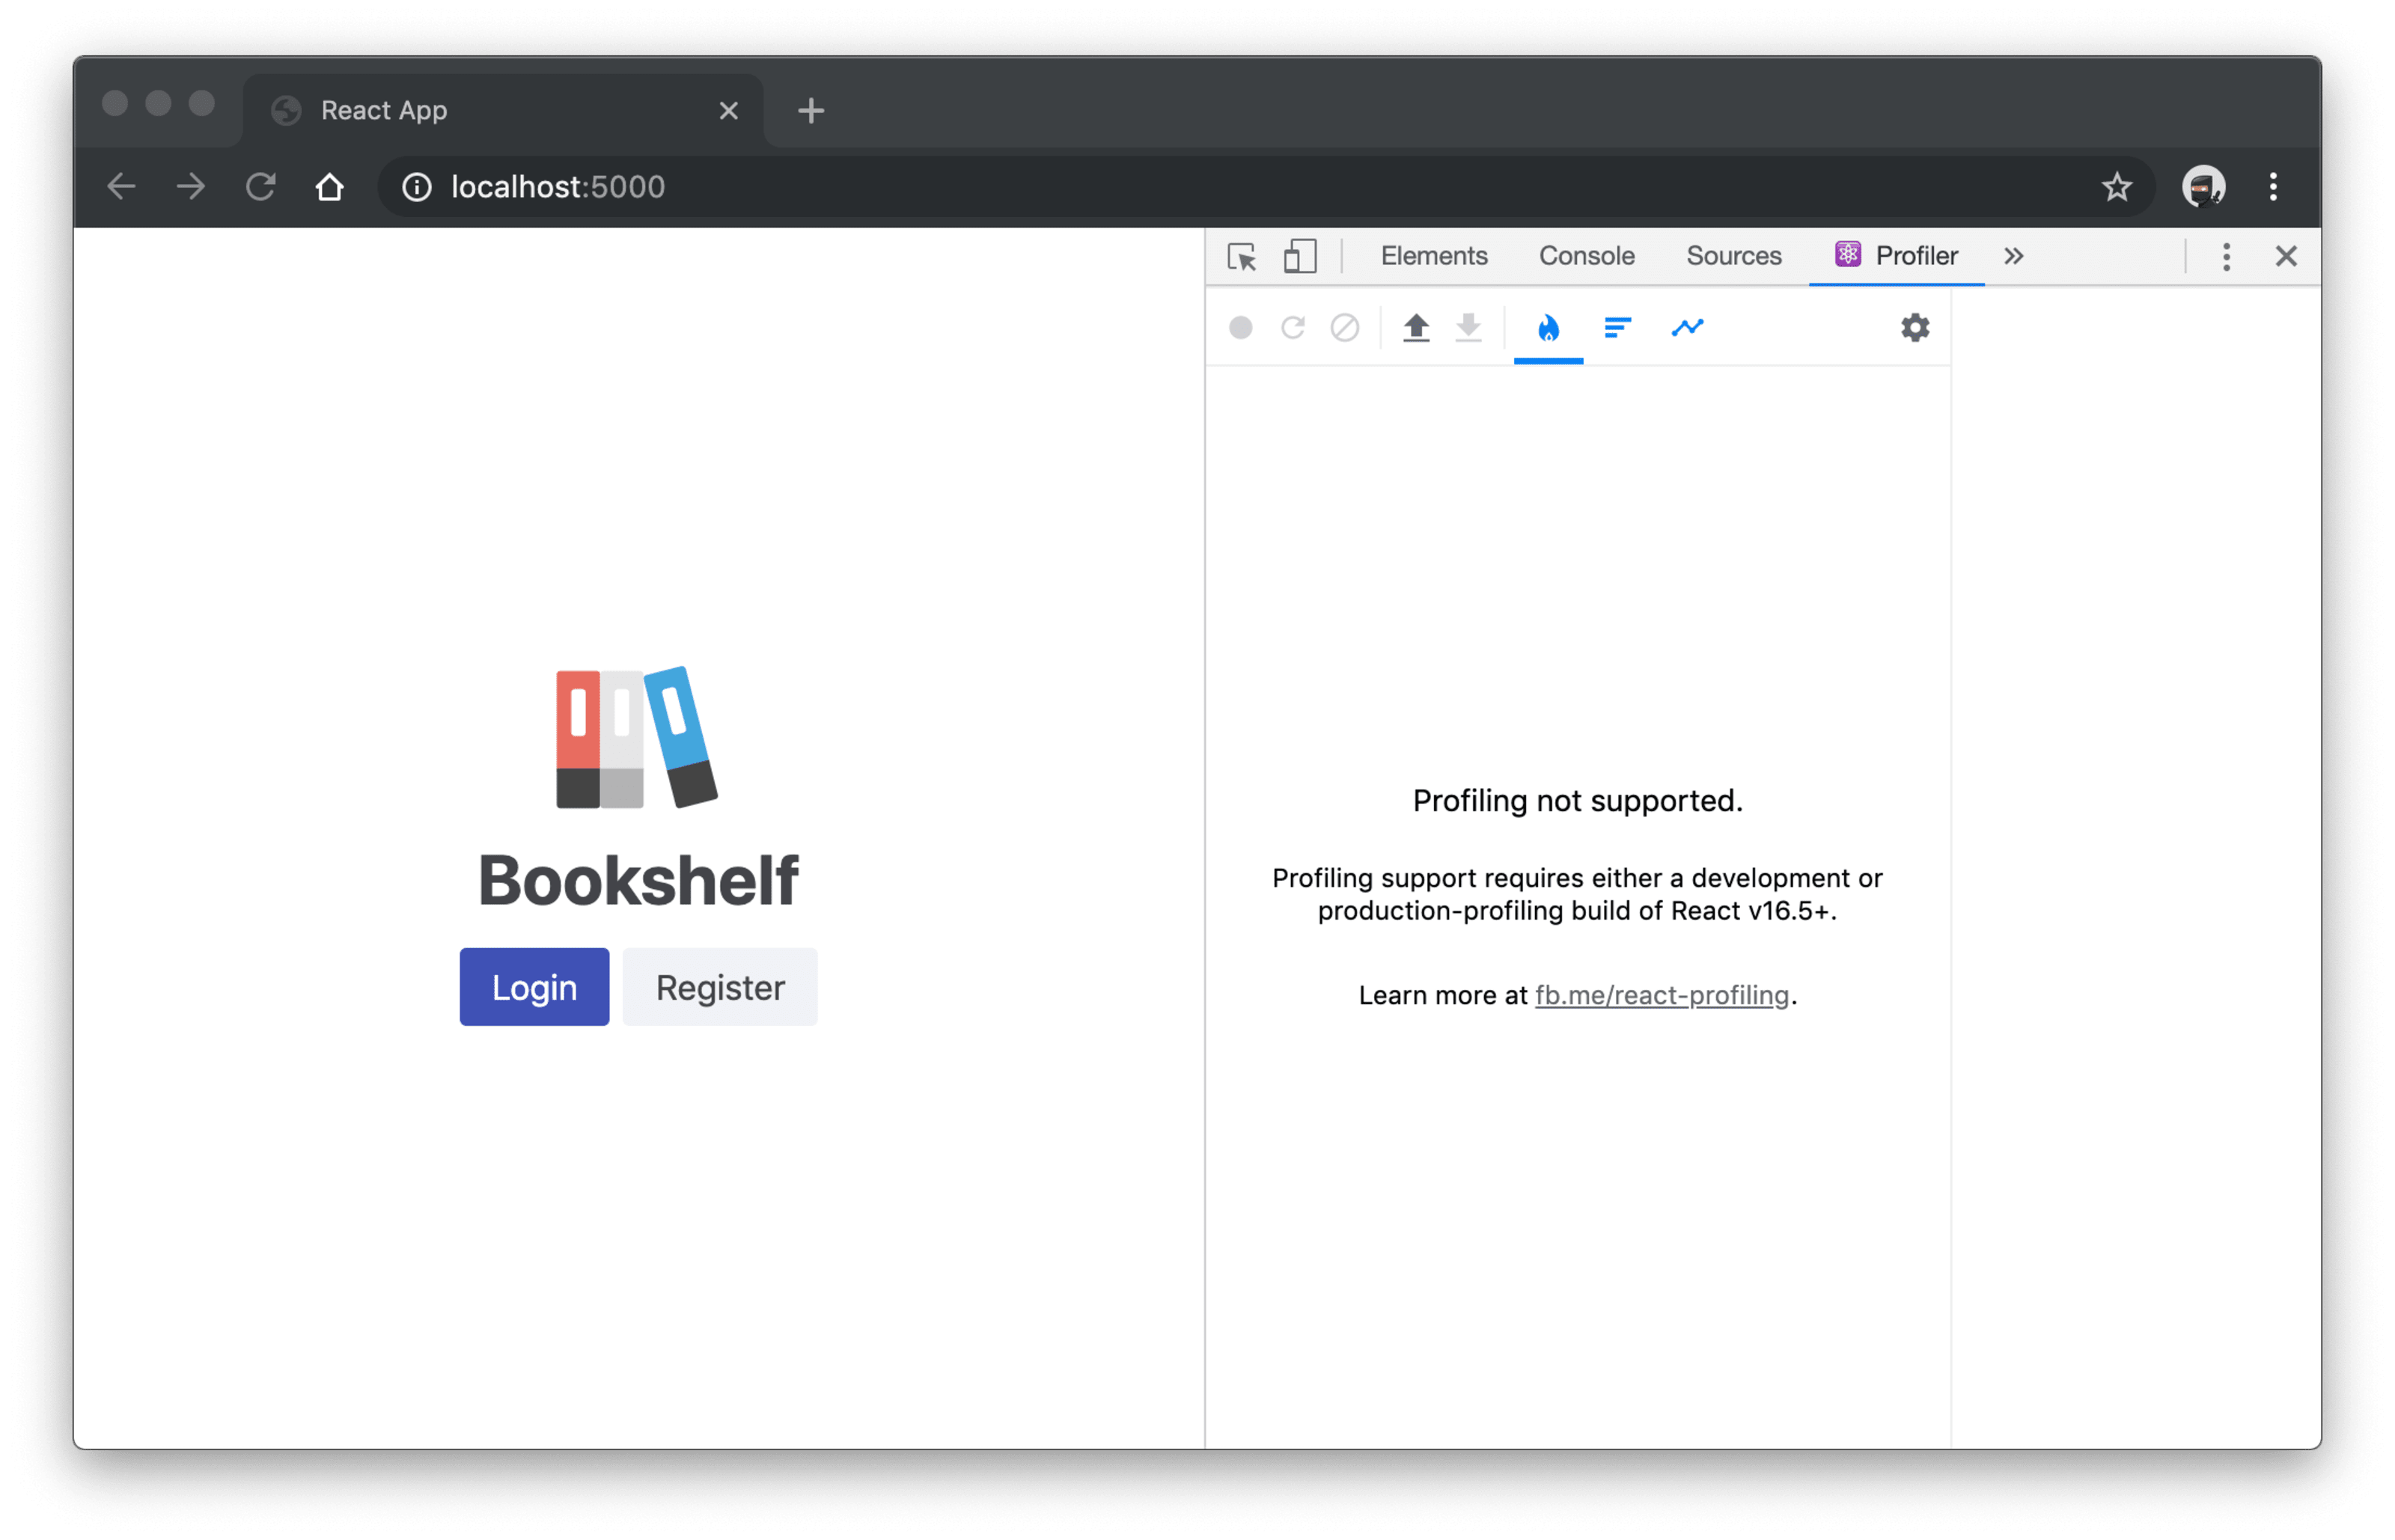
Profiling now not supported.
Profiling toughen calls for both a advancement or production-profiling construct
of React v16.5+.Be informed extra at facebook.me/react-profiling.
Because it seems, React has code in it that is particular to profiling and within the
passion of constructing your app as speedy as conceivable, they if truth be told take away that code
from the manufacturing construct of React. Thank you React! Excluding now what can we do?
Smartly, I suppose shall we pass to the connected gist by way of Brian! Or it’s worthwhile to proceed
studying and I will display you what to do.
NOTE: If you are the usage of create-react-app with react-scripts@>=3.2.0 then you definitely
can merely run npx react-scripts construct --profile and it’ll do all these things
for you
(due to Jacob) and
you’ll skip to the following pitfall. Differently, please learn on.
Replace the webpack config for production-profiling
As famous within the message, there is a manufacturing construct of React that gets rid of maximum
of the development-time useful code, however leaves the profiling code intact. It is
nonetheless a tiny bit slower, nevertheless it offers us the most productive thought of the way our elements are
acting in a manufacturing setting.
There are a couple of techniques to head about this, however the most simple is to replace the webpack
configuration to alias any import of positive modules to the profiling model of
that module. There are two such modules:
react-dom->react-dom/profilingscheduler/tracing->scheduler/tracing-profiling
Either one of those are React applications and want particular code for the profiler to paintings.
The way you pass about updating your webpack configuration will range in accordance with what
framework you might be the usage of (create-react-app, subsequent.js, gatsby.js, or your personal with
uncooked webpack). In our case, we are the usage of create-react-app and there may be now not an
formally supported solution to lengthen or alter the webpack configuration. Fortunately
for us, that is solely one thing we wish to do in the community, so we are going to do a
little spelunking in our node_modules.
So, if you are the usage of react-scripts@3.1.1 (or someplace round there), then you definitely
can open the webpack config right here:
./node_modules/react-scripts/config/webpack.config.js
Then find the code that appears like this and upload the famous traces:
// ... config ...
unravel: {
  // ... config ...
  alias: {
    // Improve React Local Internet
    // https://www.smashingmagazine.com/2016/08/a-glimpse-into-the-future-with-react-native-for-web/
    'react-native': 'react-native-web',
    'react-dom$': 'react-dom/profiling',
    'scheduler/tracing': 'scheduler/tracing-profiling',
  },
  // ... extra config ...
}
// ... extra config ...
Profile the production-profiling construct
Nice, now run npm run construct, then npx serve -s construct and let’s profile the
app once more! I will apply the similar registration steps I did closing time. Here is what
I got here out with:
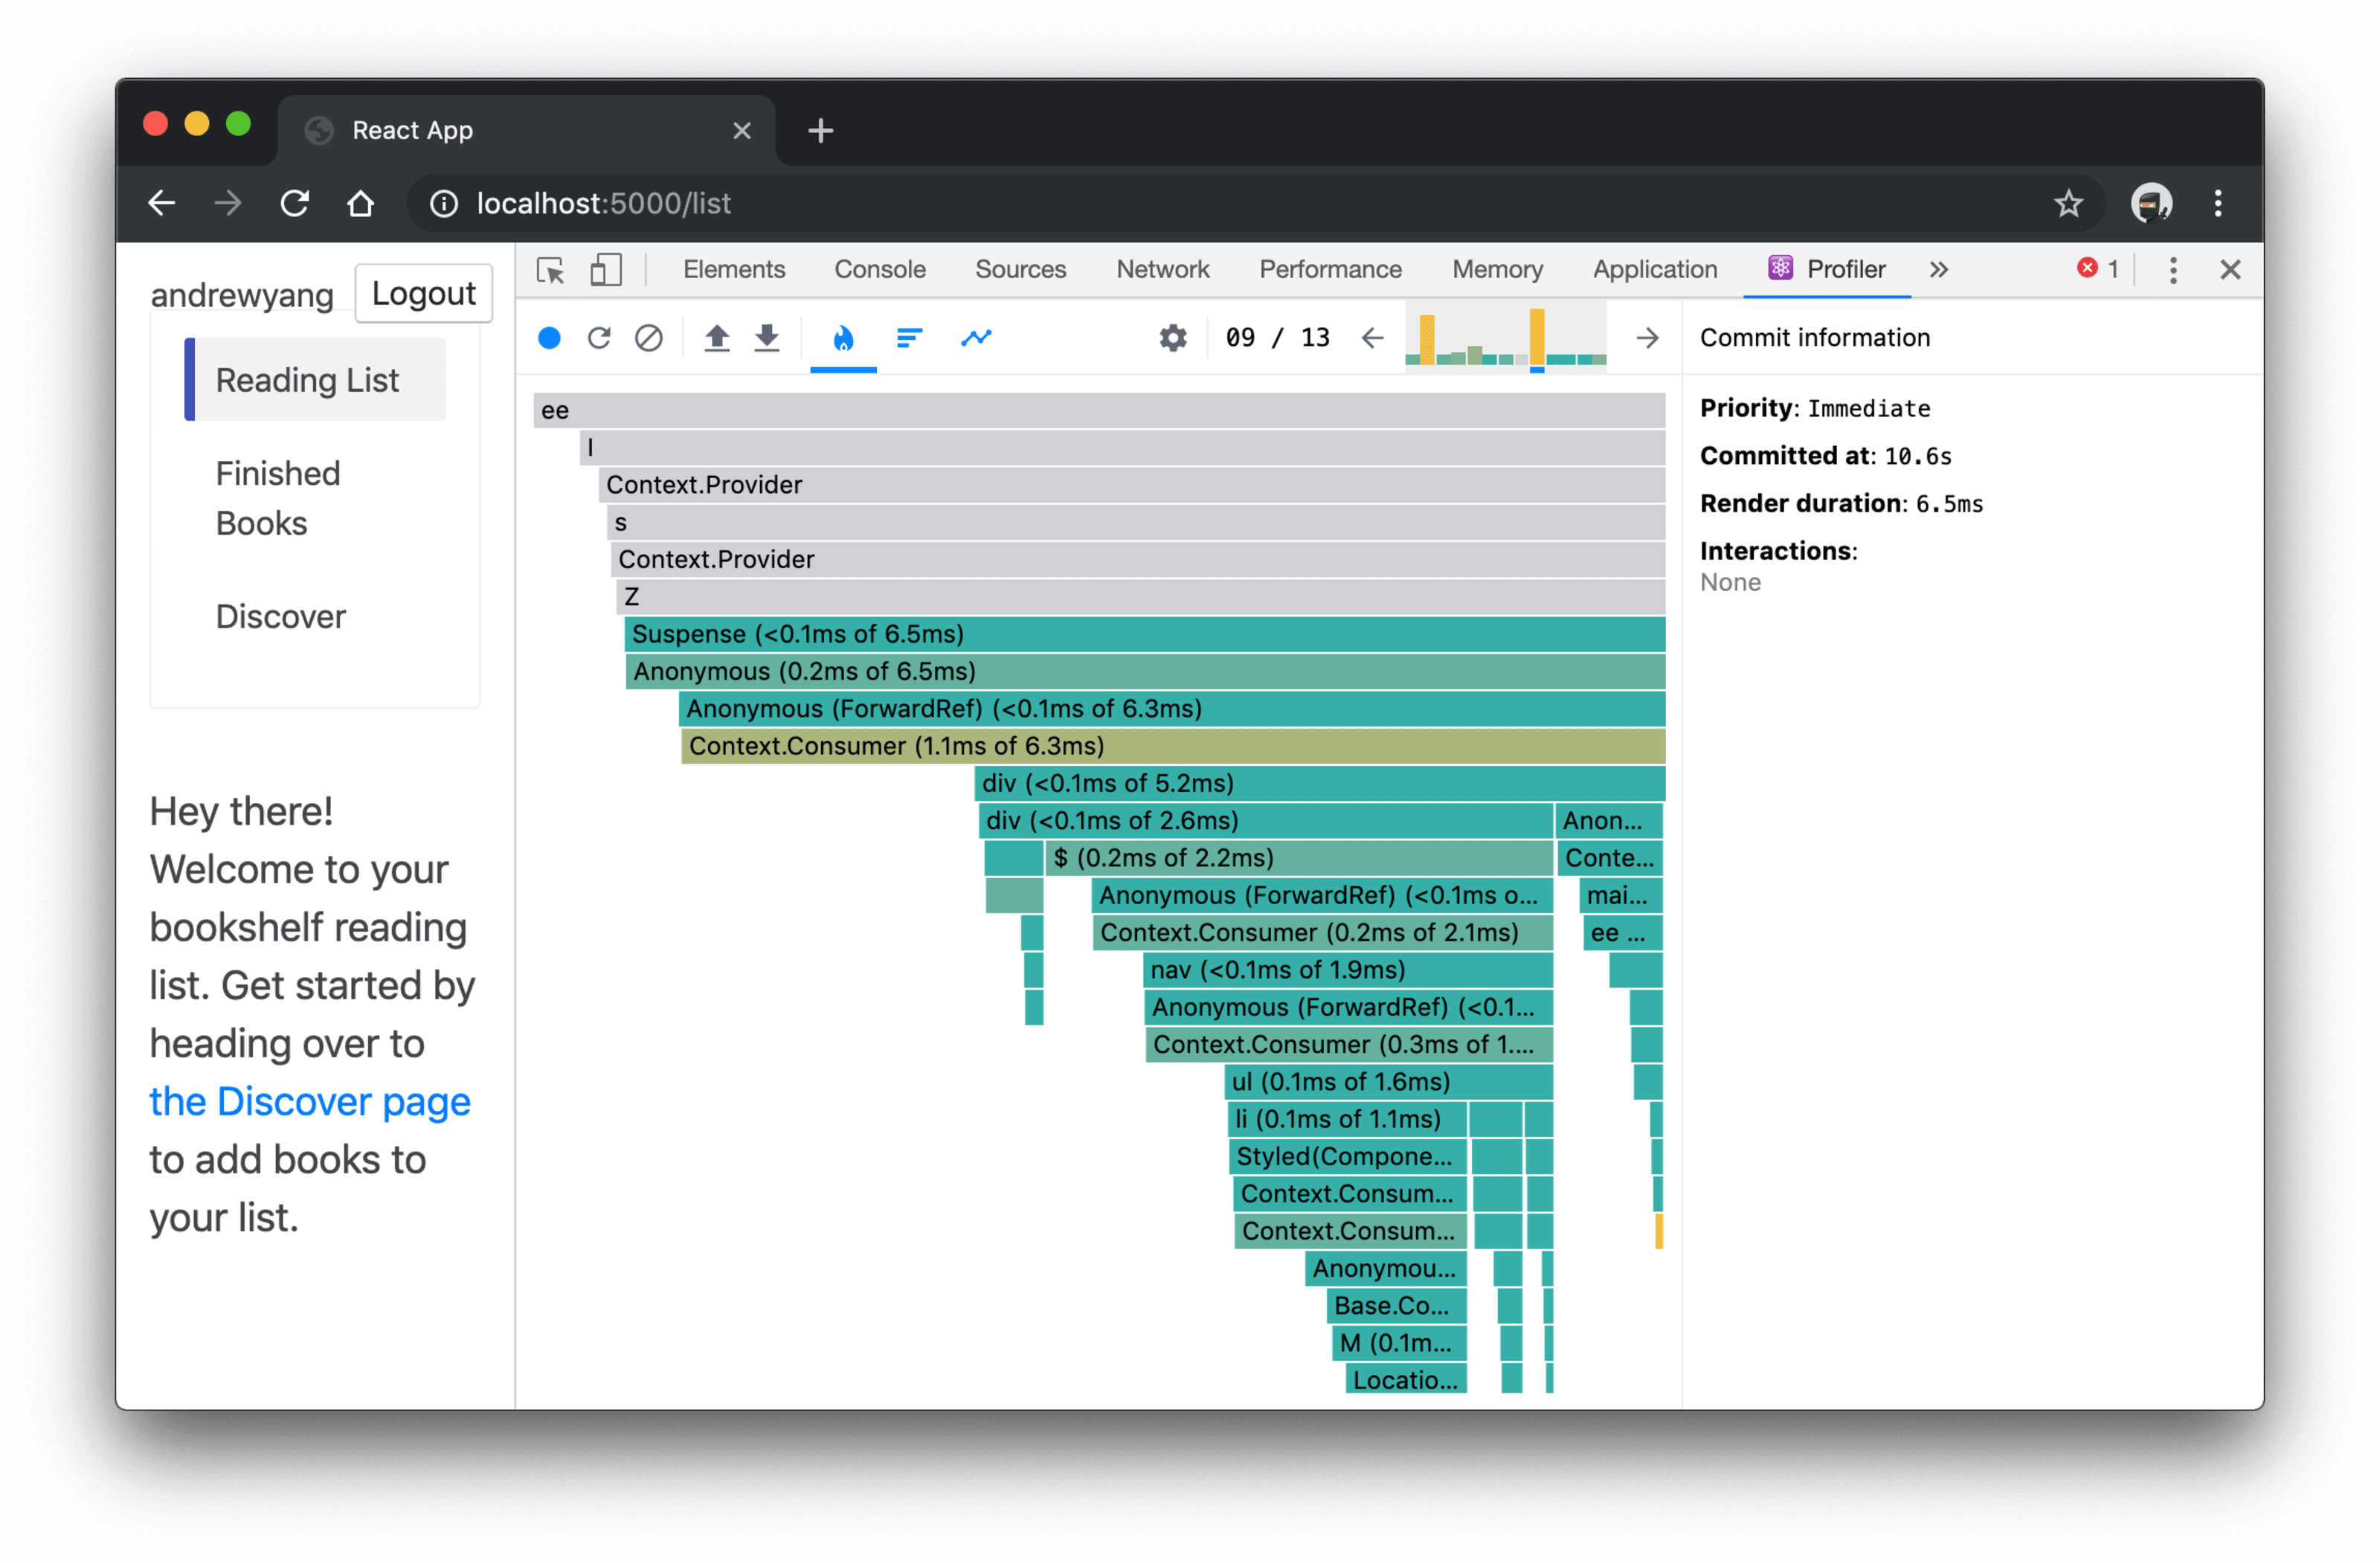
Great! You’ll be able to realize that this is similar interplay because the closing time (it is
rendering the web page after registration) and we went from 13.7ms to six.5ms. Great
development!
However uh oh, what is this Nameless element factor in all places? And now we have
were given an element known as ee any other known as Z? Huh? What is going on right here? Smartly,
as a result of we are construction our app for manufacturing, we are minifying our code to make
it quicker to load/parse which is a superb factor for our end-users, however a nasty factor
for our efficiency measuring as a result of it is exhausting for us to grasp which of those
elements is the perpetrator of our efficiency issues.
Disable serve as identify mangling
React is aware of what to name your elements in accordance with the identify assets of the
element:
serve as AwesomeAppComponent() {
  go back <div>Superior</div>
}
console.log(AwesomeAppComponent.identify) // <-- logs "AwesomeAppComponent"

magnificence LessAwesomeAppComponent extends React.Part {
  render() {
    go back <div>Much less Superior</div>
  }
}
console.log(LessAwesomeAppComponent.identify) // <-- logs "LessAwesomeAppComponent"
On the other hand, once we construct our code with an “uglifier” or a “minifier,” the instrument
adjustments the ones names in some way that makes our code paintings the similar because it did ahead of,
however scale back the filesize of our manufacturing JavaScript report which improves
efficiency:
serve as a() {
  go back <div>Superior</div>
}
console.log(a.identify) // <-- logs "a"

magnificence b extends React.Part {
  render() {
    go back <div>Much less Superior</div>
  }
}
console.log(b.identify) // <-- logs "b"
For this reason we are seeing those humorous names in our efficiency measurements. So
we want to disable this mangling characteristic.
Create React App makes use of a device known as Terser by means of
terser-webpack-plugin
to do the minification, so we merely want to replace the configuration to
maintain the serve as and sophistication names.
So in that very same webpack configuration report, scroll right down to the place the plugin is
configured and alter it like this:
// ... some config ...
new TerserPlugin({
  terserOptions: {
    // ... every other config ...
    mangle: {
      safari10: true,
    },
    keep_classnames: true,
    keep_fnames: true,
    // ... some extra config ...
  },
  // ... much more config ...
})
With keep_classnames and keep_fnames configured to true, now let’s check out
construction our app code and operating a profiling consultation all over again!

Maximum superb! Now now we have were given a profile consultation appearing us the names of all of
our elements and they are operating the usage of code that resembles the code our
end-users shall be operating a lot more carefully!
I ensure you that the majority of you studying this at the moment are creating your app
with a tool that is far more tough than the general public the usage of the app. There may be
no replace for making an attempt your app at the units that customers shall be the usage of. That
mentioned, you’ll get a significantly better thought of the particular efficiency of your app if
you throttle your CPU to simulate the enjoy of a few customers of your app.
So let’s do this. Click on at the Chrome DevTools “Efficiency” tab, then at the
equipment icon to turn settings, then at the CPU possibility, choose “6x slowdown.”

Now do the entire thing once more, and checkout the variation:

Phew! 31.8ms! That is relatively the slow-down! Be informed extra concerning the have an effect on of that
time at the person’s enjoy on this weblog submit titled
Rendering Efficiency.
This can be one thing price taking a look into! However we’re going to save that for any other weblog
submit 😉
We have now solely coated what you wish to have to do to get began correctly profiling a React
app, however confidently you may have realized sufficient to take a look at it out by yourself app and get started
exploring the efficiency implications of your app.
Additionally, if you want to dive a bit additional into the React DevTools,
this weblog submit at the react weblog can lend a hand.
Excellent success!
[ad_2]