
[ad_1]
I used to be one of the crucial first customers of Firebase again within the day. In reality, I spearheaded
their “torch program” for firebase advocates (this has been lengthy discontinued
and was once manner earlier than they have been purchased by way of Google). I used to be there once they introduced
Firebase website hosting. I have constructed a dozen or so small apps the use of Firebase for information
and/or authentication. However for one reason why or every other, I dropped off the firebase
bandwagon and attempted any other products and services that handled me exceedingly neatly.
However now I am again and I am excited to check out all that firebase now has to provide. In
explicit, I am taking part in round with remix and I have simply
added Firebase Firestore for information garage and wish to upload authentication.
Firebase Firestore + Firebase Authentication + Firebase Cloud Purposes simply
turns out like the easiest mixture. And whilst I have used
Netlify’s applications characteristic,
Firebase is a little of a unique animal. Breaking issues all the way down to their maximum
fundamental and completely essential parts is helping me get the fitting concept of the
abstractions I am operating with, so with out any more ado, this is your “Tremendous
easy begin to Firebase applications.”
Sooner than you get began, you’ll be able to want a GitHub account, a
Firebase account (simply use your Google account),
and a contemporary repository. As soon as you have got the task in the community for your laptop,
then you’ll be able to get started with the next steps:
Step 1: Create a Firebase task
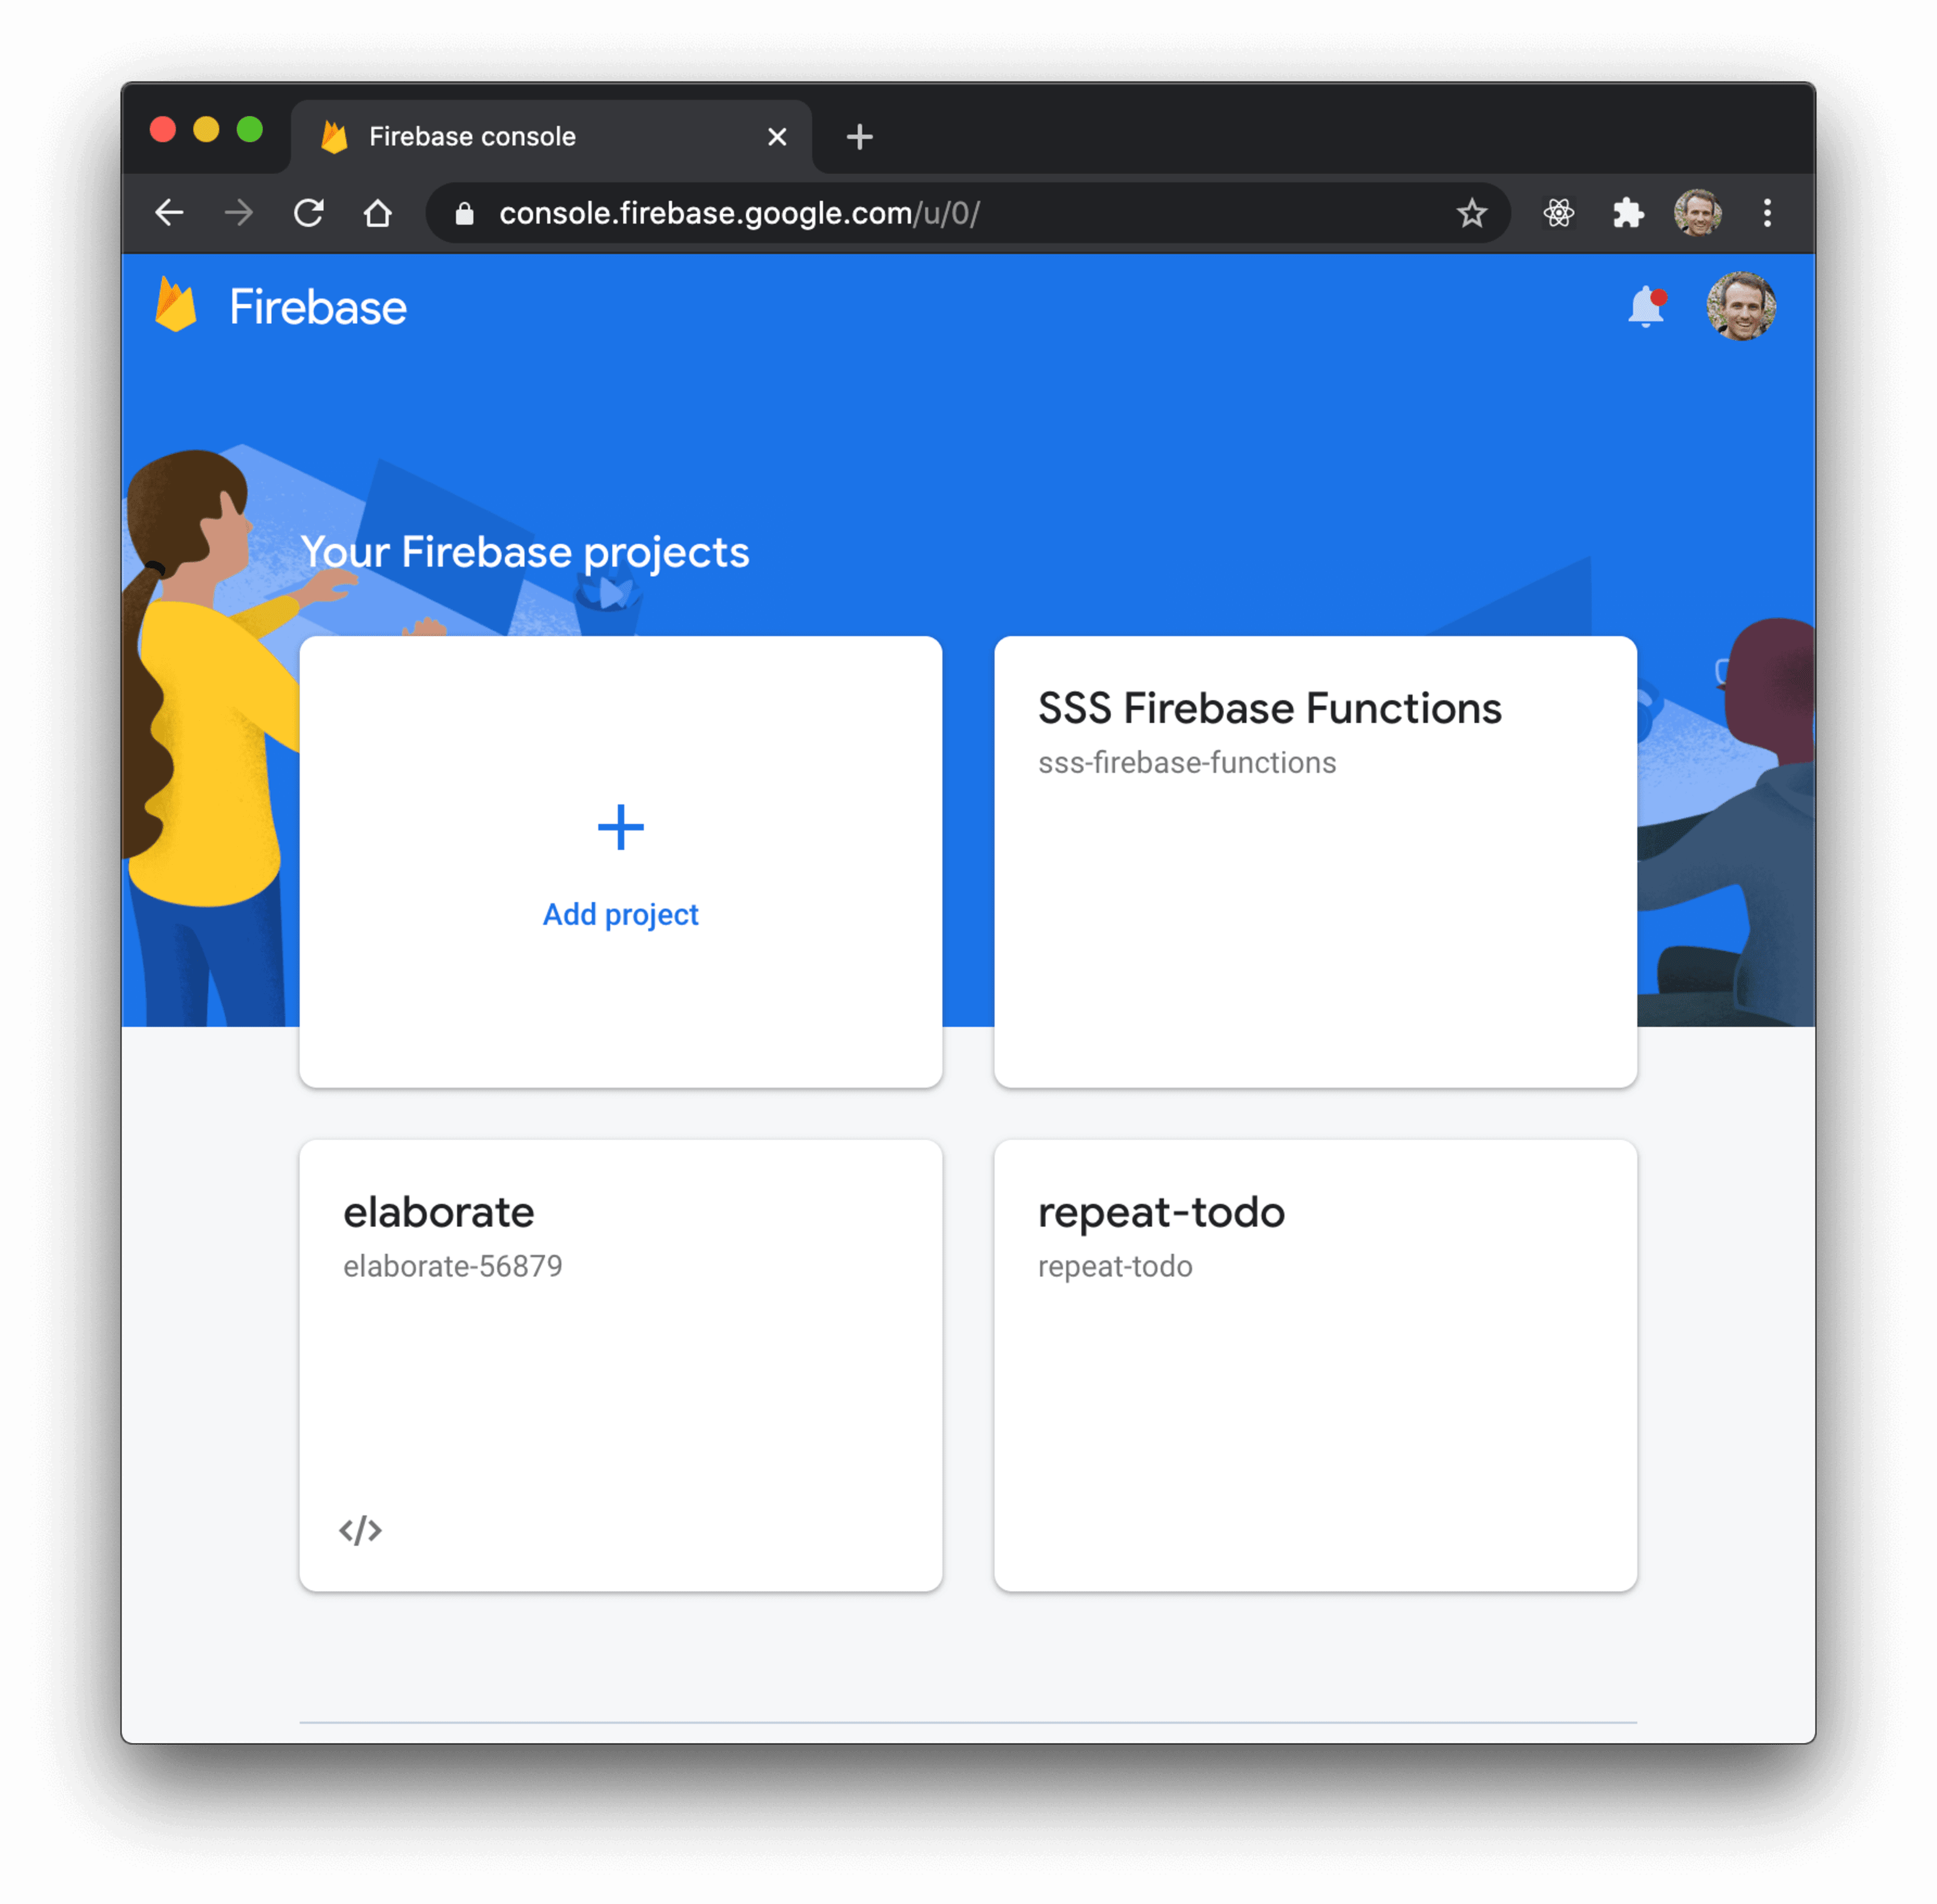
Cross to the firebase console and
create a brand new task. Apply the stairs there (your choice alternatives right here do not
topic).
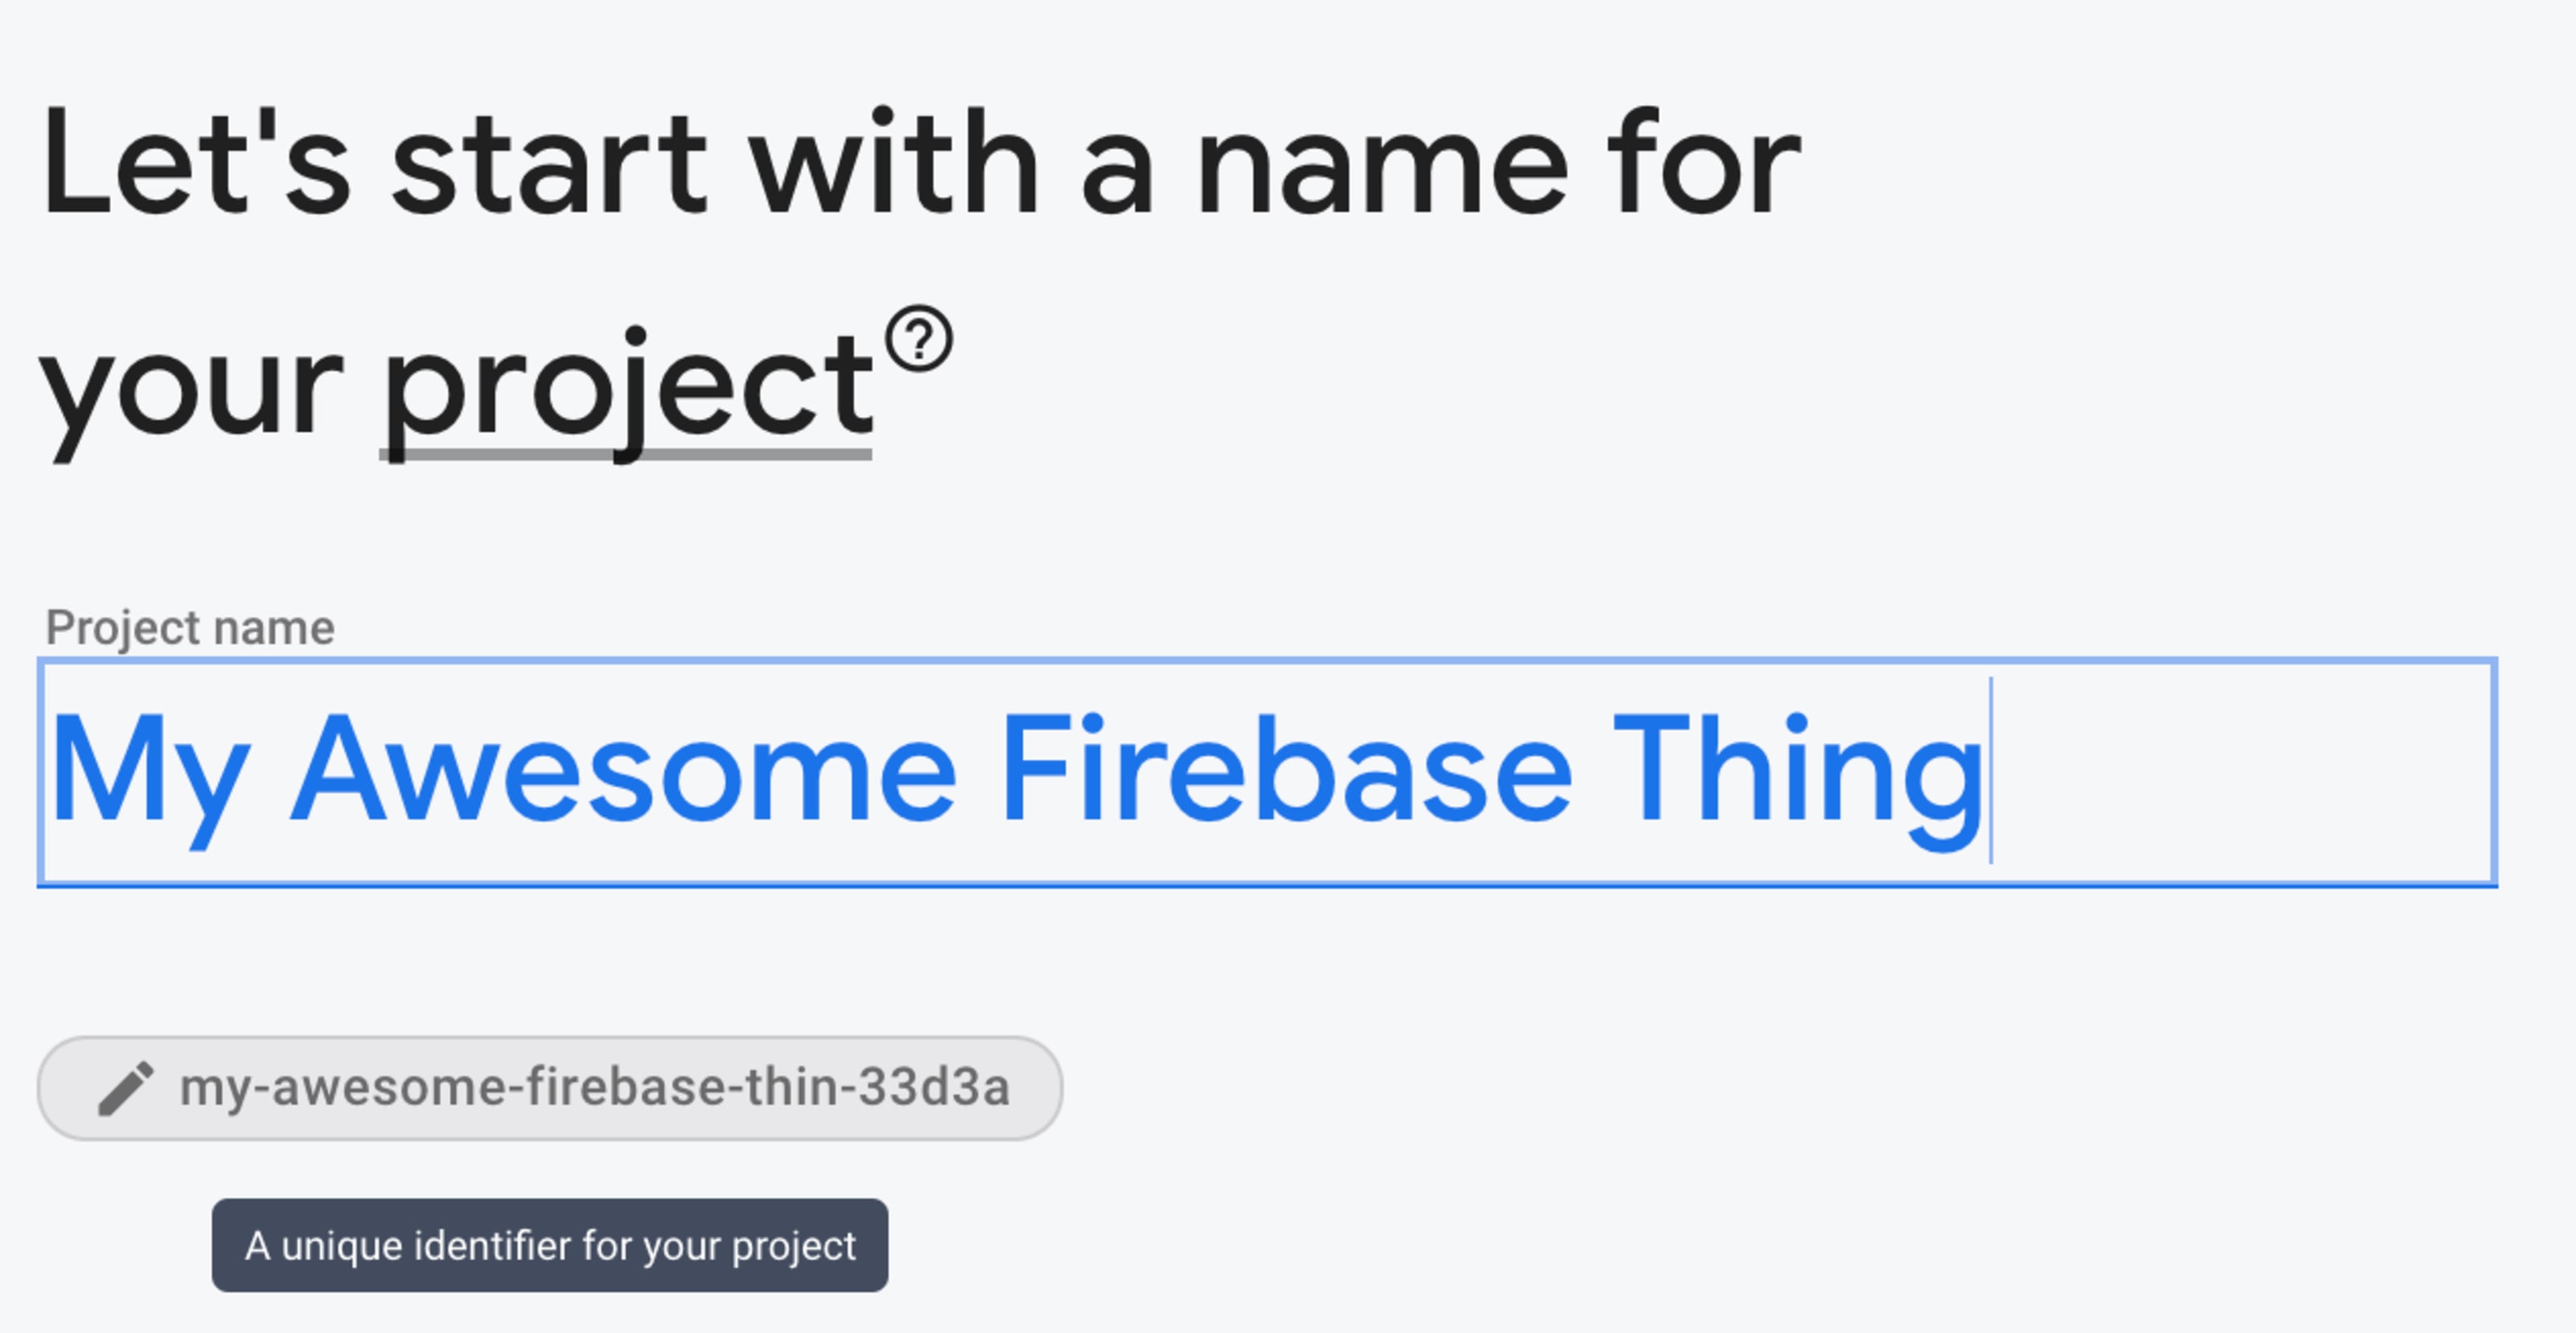
It is very important keep in mind the call of your task. You’ll be able to in finding it within the URL
after your task is created:
https://console.firebase.google.com/u/0/task/{your-project-id-is-here}/applicationsIt is generated whilst you give the task a reputation, and you’ll be able to exchange it at that
time as neatly:
Step 2: Create a firebase.json report
For firebase to acknowledge your task as a firebase task, it must have a
firebase.json report. I am certain there may be a lot of vital config that may move in
right here, however no config is wanted for this tremendous easy get started, so simply installed an
empty object:
{}
Step 3: Create a .firebaserc report
This report is the place you in truth affiliate your repository with the firebase
task (#spoileralert so whilst you run firebase deploy later, it is aware of which
task to deploy your code to).
Here is all you want in that report:
{
  "initiatives": {
    "default": "{your-project-id}"
  }
}
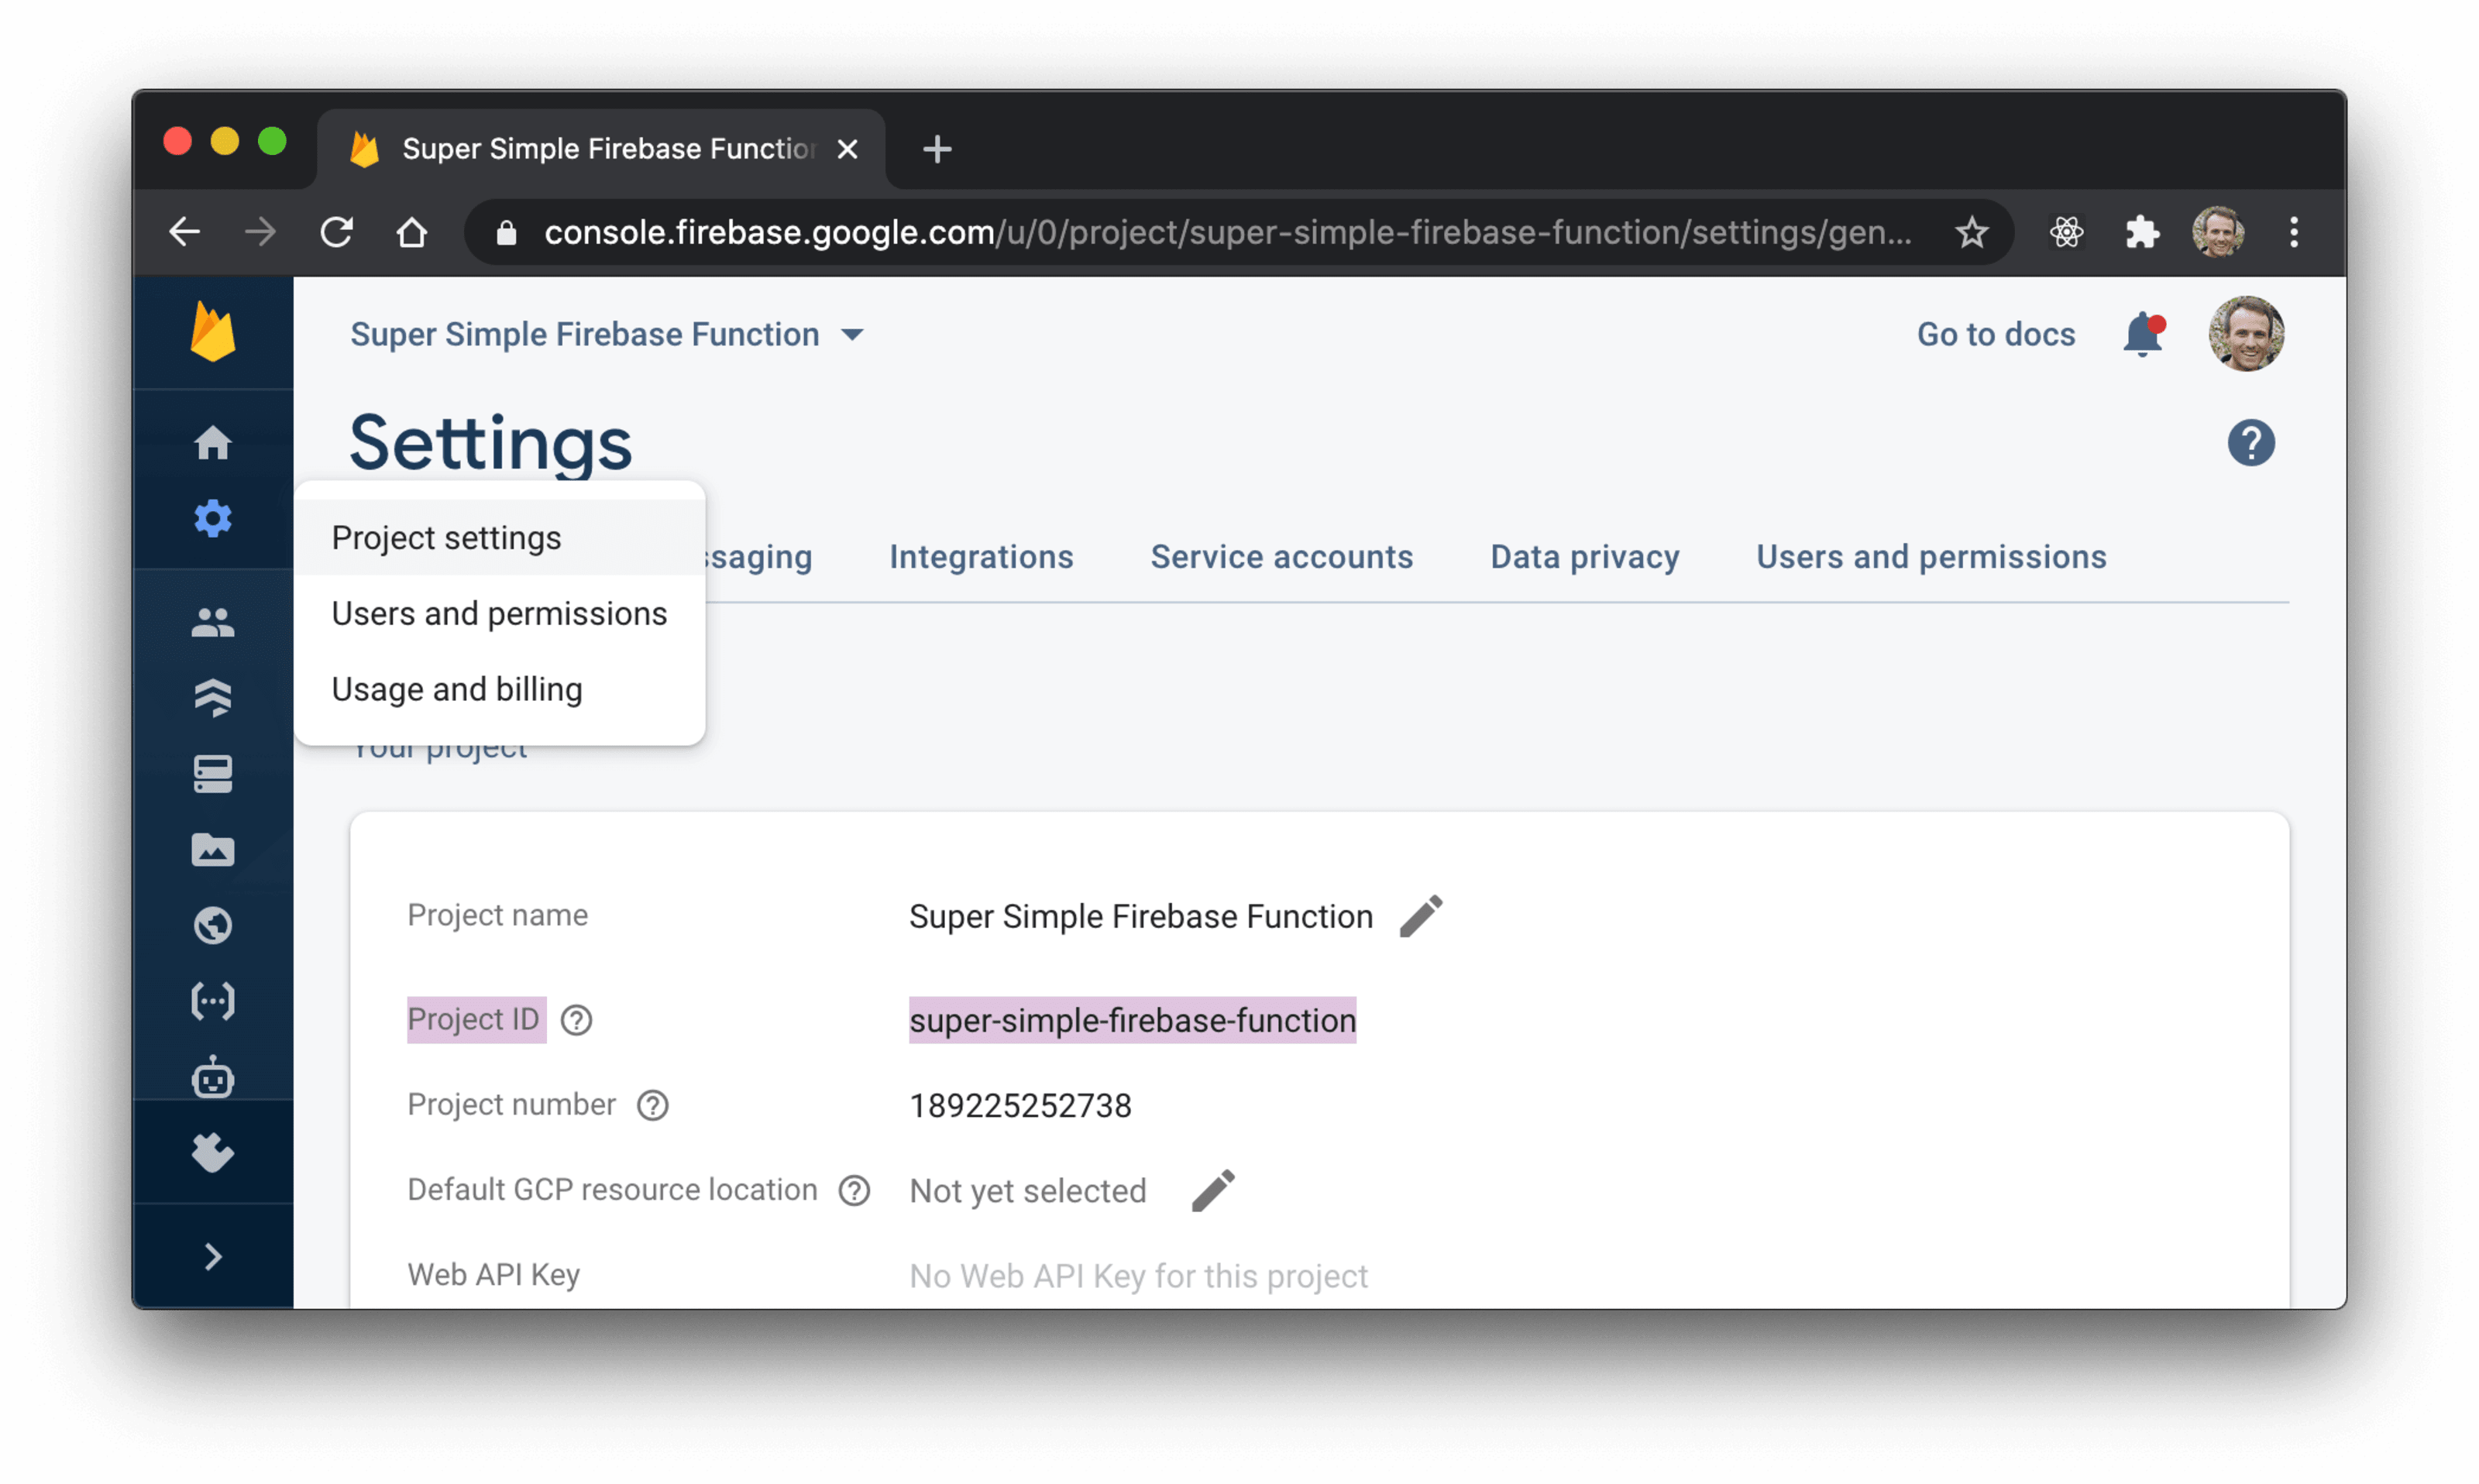
Be sure to exchange {your-project-id} to no matter your task ID is. Once more,
you’ll be able to get that from the URL of your task at the firebase console as
discussed above. You’ll be able to additionally get it out of your task’s settings web page:
Step 4: Create a applications/equipment.json report
Here is what you want in there:
{
  "engines": {
    "node": "12"
  },
  "dependencies": {
    "firebase-admin": "^9.3.0",
    "firebase-functions": "^3.11.0"
  }
}
firebase-admin and firebase-functions are required dependencies to run a
Firebase Cloud Serve as. You technically shouldn’t have to make use of firebase-admin however
should you shouldn’t have it put in, your serve as would possibly not deploy. We will use
firebase-functions subsequent.
engines.node could also be required so Firebase is aware of which edition of Node.js you
need your applications in.
Step 5: Upload .gitignore
Sooner than we set up those dependencies, let’s get .gitignore able to forget about
node_modules:
node_modules

# ignores a couple of log information firebase creates when working applications in the community
*.log
Step 6: Set up serve as dependencies
cd applications && npm set up
This must get all dependencies put in and it will generate a
package-lock.json report which you’ll be able to safely forget about for now (however you’re going to need
to devote it for your repository).
Step 7: Create a applications/index.js report
Now that you’ve dependencies put in, you’ll be able to create your first serve as.
Here is what you’ll be able to installed there:
const applications = require('firebase-functions')

module.exports = {
  hi: applications.https.onRequest((req, res) => {
    const matter = req.question.matter || 'Global'
    res.ship(`Hi ${matter}!`)
  }),
}
Each and every assets of that object you might be exporting might be a person serve as.
So with this, now we have a unmarried serve as known as hi.
Chances are you’ll understand people use this syntax:
exports.hi = applications.https.onRequest((req, res) => {})
Those are functionally identical. I simply occur to choose
module.exports = {}. However it does not make any substantive distinction.
Additionally this report does not have to be known as index.js, however should you exchange it to
one thing else, then you’ll be able to want to set that within the major box for your
equipment.json. More uncomplicated to only move with the index.js conference I say.
Step 8: Set up firebase-tools
To deploy in the community, you’ll be able to want to have firebase-tools put in so you’ll be able to use
the firebase CLI:
npm set up --global firebase-tools
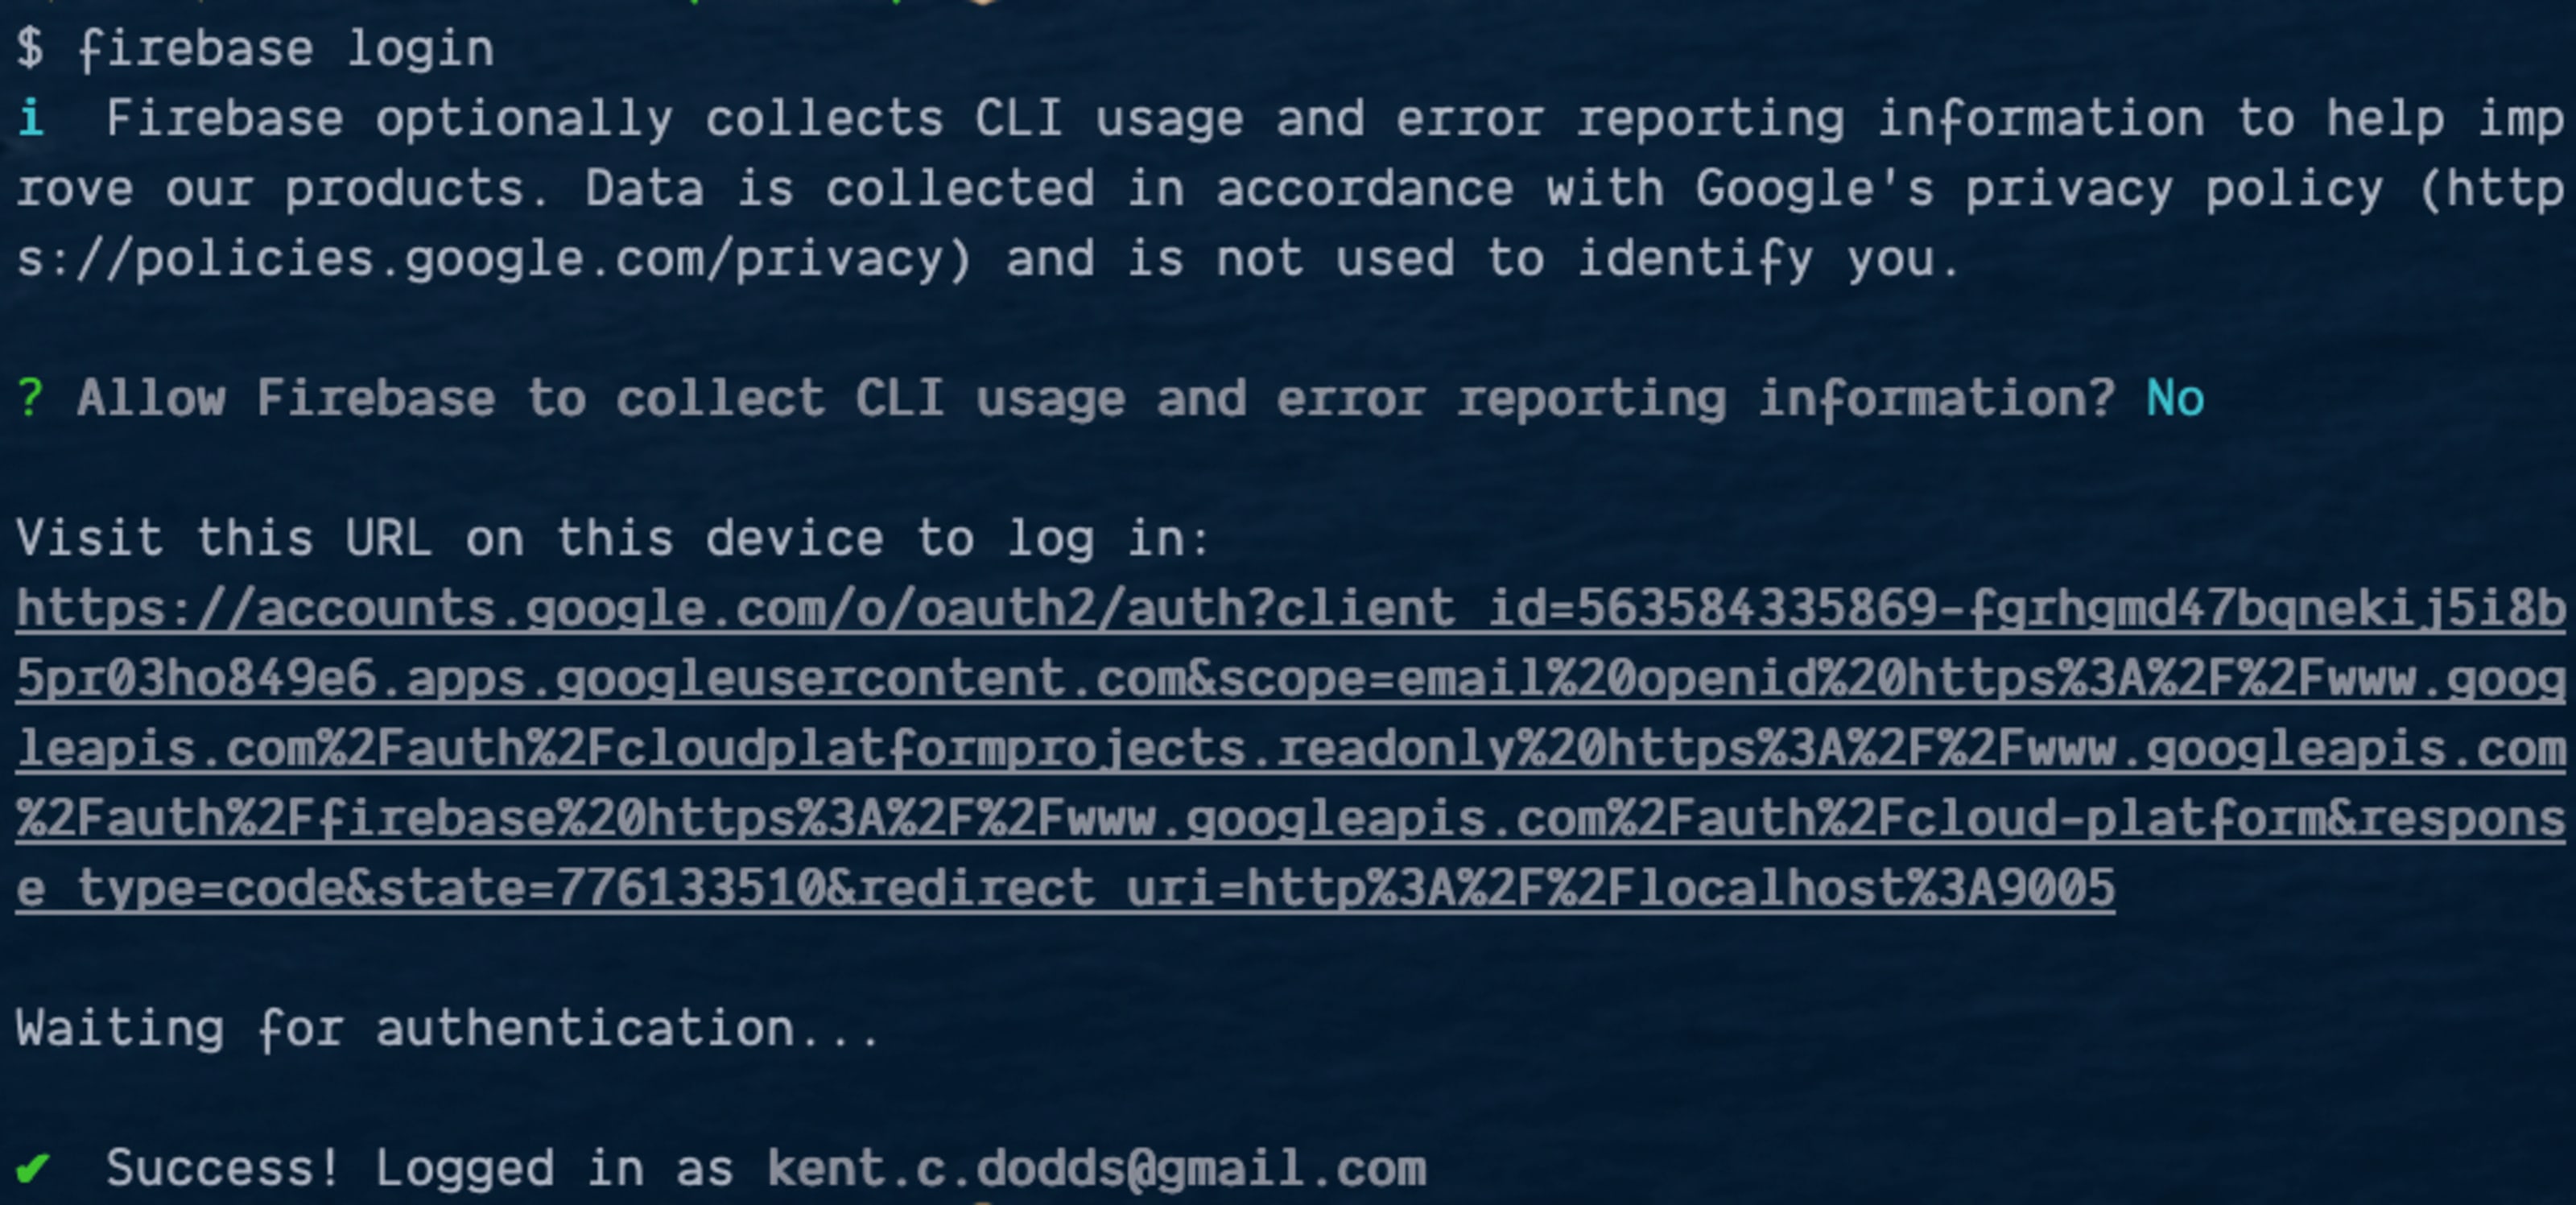
Now you’ll be able to login:
firebase login
That are meant to pop open your browser and will let you login together with your Google
account. Cross forward and login. When you find yourself performed, you’ll be able to be logged in in the community.
Step 9: Check in the community
Now that you are logged in, you’ll be able to check your firebase serve as earlier than deploying
it to manufacturing. You’ll be able to accomplish that with
firebase emulator which is
lovely candy.
From inside of your task listing, run the next command:
firebase emulators:get started
That does a number of stuff, however this is the vital output:
i  emulators: Beginning emulators: applications
... some beside the point stuff right here ...
✔  applications[hello]: http serve as initialized (http://localhost:5001/{your-project-id}/us-central1/hi).

┌───────────────────────────────────────────────────────────────────────┐
│ ✔  All emulators able! View standing and logs at http://localhost:4000 │
└───────────────────────────────────────────────────────────────────────┘

┌───────────┬────────────────┬─────────────────────────────────┐
│ Emulator  │ Host:Port      │ View in Emulator UI             │
├───────────┼────────────────┼─────────────────────────────────┤
│ Purposes │ localhost:5001 │ http://localhost:4000/applications │
└───────────┴────────────────┴─────────────────────────────────┘
  Different reserved ports: 4400, 4500
If you happen to open the Emulator UI, you’ll be able to see the emulator evaluation and you’ll be able to choose
the serve as logs:

If you happen to hit your serverless serve as in a browser you must see the output:

After which your logs will display that the serve as was once run:

Superior! So the serve as is operating! Directly to the next move.
Step 10: Deploy in the community (perhaps?)
Now you are prepared to deploy your serve as to the all over the world internet. From inside of your
task listing, run the next command:
firebase deploy
This may occasionally cause your serve as to be deployed…. However wait! What is this I see?
Error: HTTP Error: 400, Billing account for task '189225252738' is no longer discovered.
Billing should be enabled for activation of provider(s)
'cloudbuild.googleapis.com,containerregistry.googleapis.com' to continue.
What the? What is that even imply? Smartly, it seems that firebase may use an
development on this error message with directions on what to do subsequent as a result of
this section was once an actual ache truthfully. However here is what you want to do…
Step 11: Permit billing
So you’ll be able to return to the firebase console to your task and navigate to
“Utilization and billing” after which move to the “Main points & settings” tab:
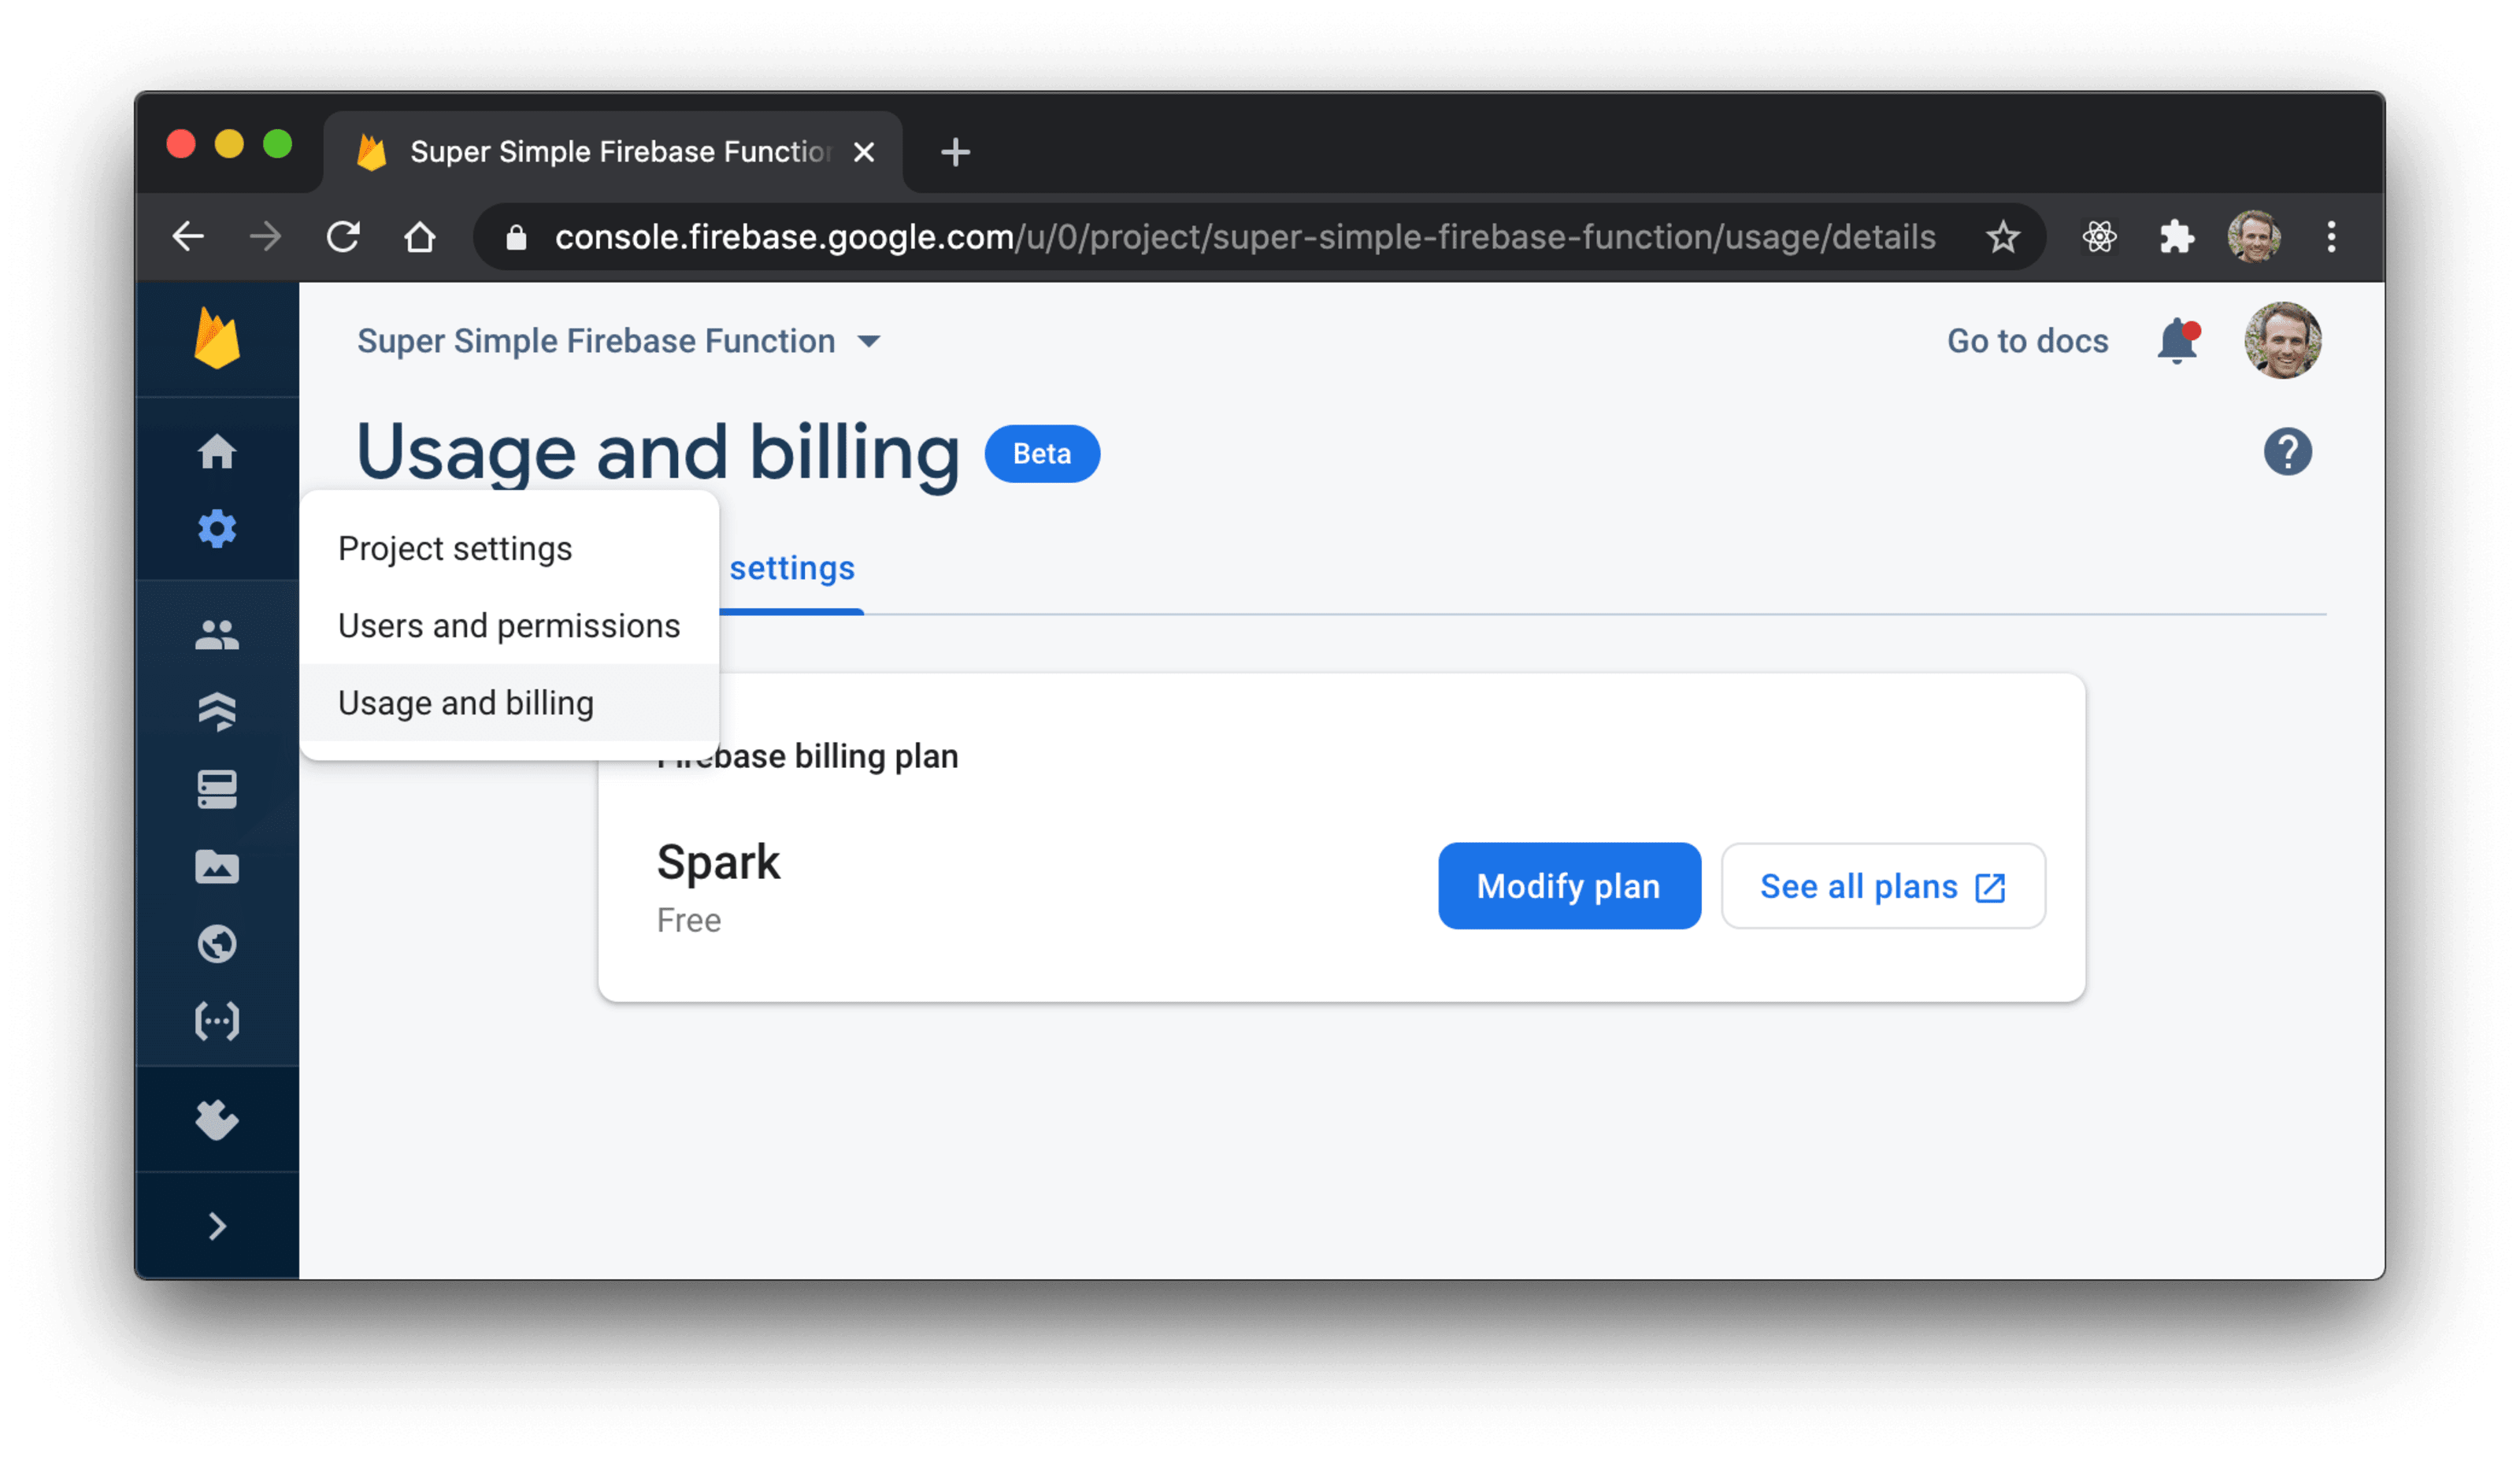
Then you’ll be able to click on “Adjust plan” after which “Choose plan” below “Blaze Pay as you
move”:

Do not be concerned, Firebase has a beneficiant unfastened tier and (I do not believe) you must be
charged for the rest till you in truth get started the use of the serve as so much. However at
this level it’ll have you ever arrange a billing account at
console.cloud.google.com/billing so
you’ll be able to have a bank card on report.
After getting that discovered, then you’ll be able to proceed to in truth deploy your
serve as.
Step 12: Deploy in the community (for actual now)
Now that your account is configured for billing, you’ll be able to attempt to deploy once more:
firebase deploy
It’ll take a little bit little bit of time, but if it is in the end completed, you must
get output like this:
=== Deploying to '{your-project-id}'...

i  deploying applications
i  applications: making sure required API cloudfunctions.googleapis.com is enabled...
i  applications: making sure required API cloudbuild.googleapis.com is enabled...
✔  applications: required API cloudbuild.googleapis.com is enabled
✔  applications: required API cloudfunctions.googleapis.com is enabled
i  applications: getting ready applications listing for importing...
i  applications: packaged applications (23.46 KB) for importing
✔  applications: applications folder uploaded effectively
i  applications: developing Node.js 12 serve as hi(us-central1)...
✔  applications[hello(us-central1)]: A hit create operation.
Serve as URL (hi): https://us-central1-{your-project-id}.cloudfunctions.web/hi

✔  Deploy entire!

Undertaking Console: https://console.firebase.google.com/task/{your-project-id}/evaluation
And should you hit the endpoint they provide you with there, you must be in a position get your
serve as’s output. For added amusing, our serve as handles offering a customized
matter, so should you upload ?matter=Bobpercent20Ross to the tip of that URL, you get a
great greeting. Hi there Bob Ross!

Step 13: Auto-deploy Firebase Cloud Purposes with GitHub Movements
I do not know about you, however I do not like deploying from my native system. I
choose a continual integration server to do this for me. Fortunately, our task
is a part of a GitHub repo and we will use GitHub movements to do that for us.
First, create a .github/workflows/deploy.yml report and put this in it:
call: deploy
on:
  push:
    branches:
      - major
jobs:
  major:
    runs-on: ubuntu-latest
    steps:
      - call: ⬇️ Checkout repo
        makes use of: movements/checkout@v2

      - call: ⎔ Setup node
        makes use of: movements/setup-node@v1
        with:
          node-version: 12

      - call: 📥 Obtain deps
        working-directory: applications
        run: npm set up

      - call: 🚀 Deploy
        run: npx firebase-tools deploy --token "$FIREBASE_TOKEN"
        env:
          FIREBASE_TOKEN: ${{ secrets and techniques.FIREBASE_TOKEN }}
Here is what this does whilst you push the major department (or grasp in case you are
nonetheless the use of grasp as your default department call):
- Clones the repo
- Installs Node v12
- Installs dependencies by means of
npmwithin theapplicationslisting - Deploys to firebase the use of
firebase-toolssimilar to we did
For that closing step it is doing a couple of issues in a different way:
- It is the use of
npxso we shouldn’t have to fret about putting in issues globally - It is the use of the
--tokenflag so we shouldn’t have to fret about logging in - It is exposing a
FIREBASE_TOKENatmosphere variable.
Let’s get that firebase token arrange.
Step 14: Create a Firebase token for CI
Run this:
firebase login:ci
This may occasionally take you in the course of the login procedure as soon as once more, whilst you’ve completed,
it’ll provide the token within the terminal output:
✔ Good fortune! Use this token to login on a CI server:
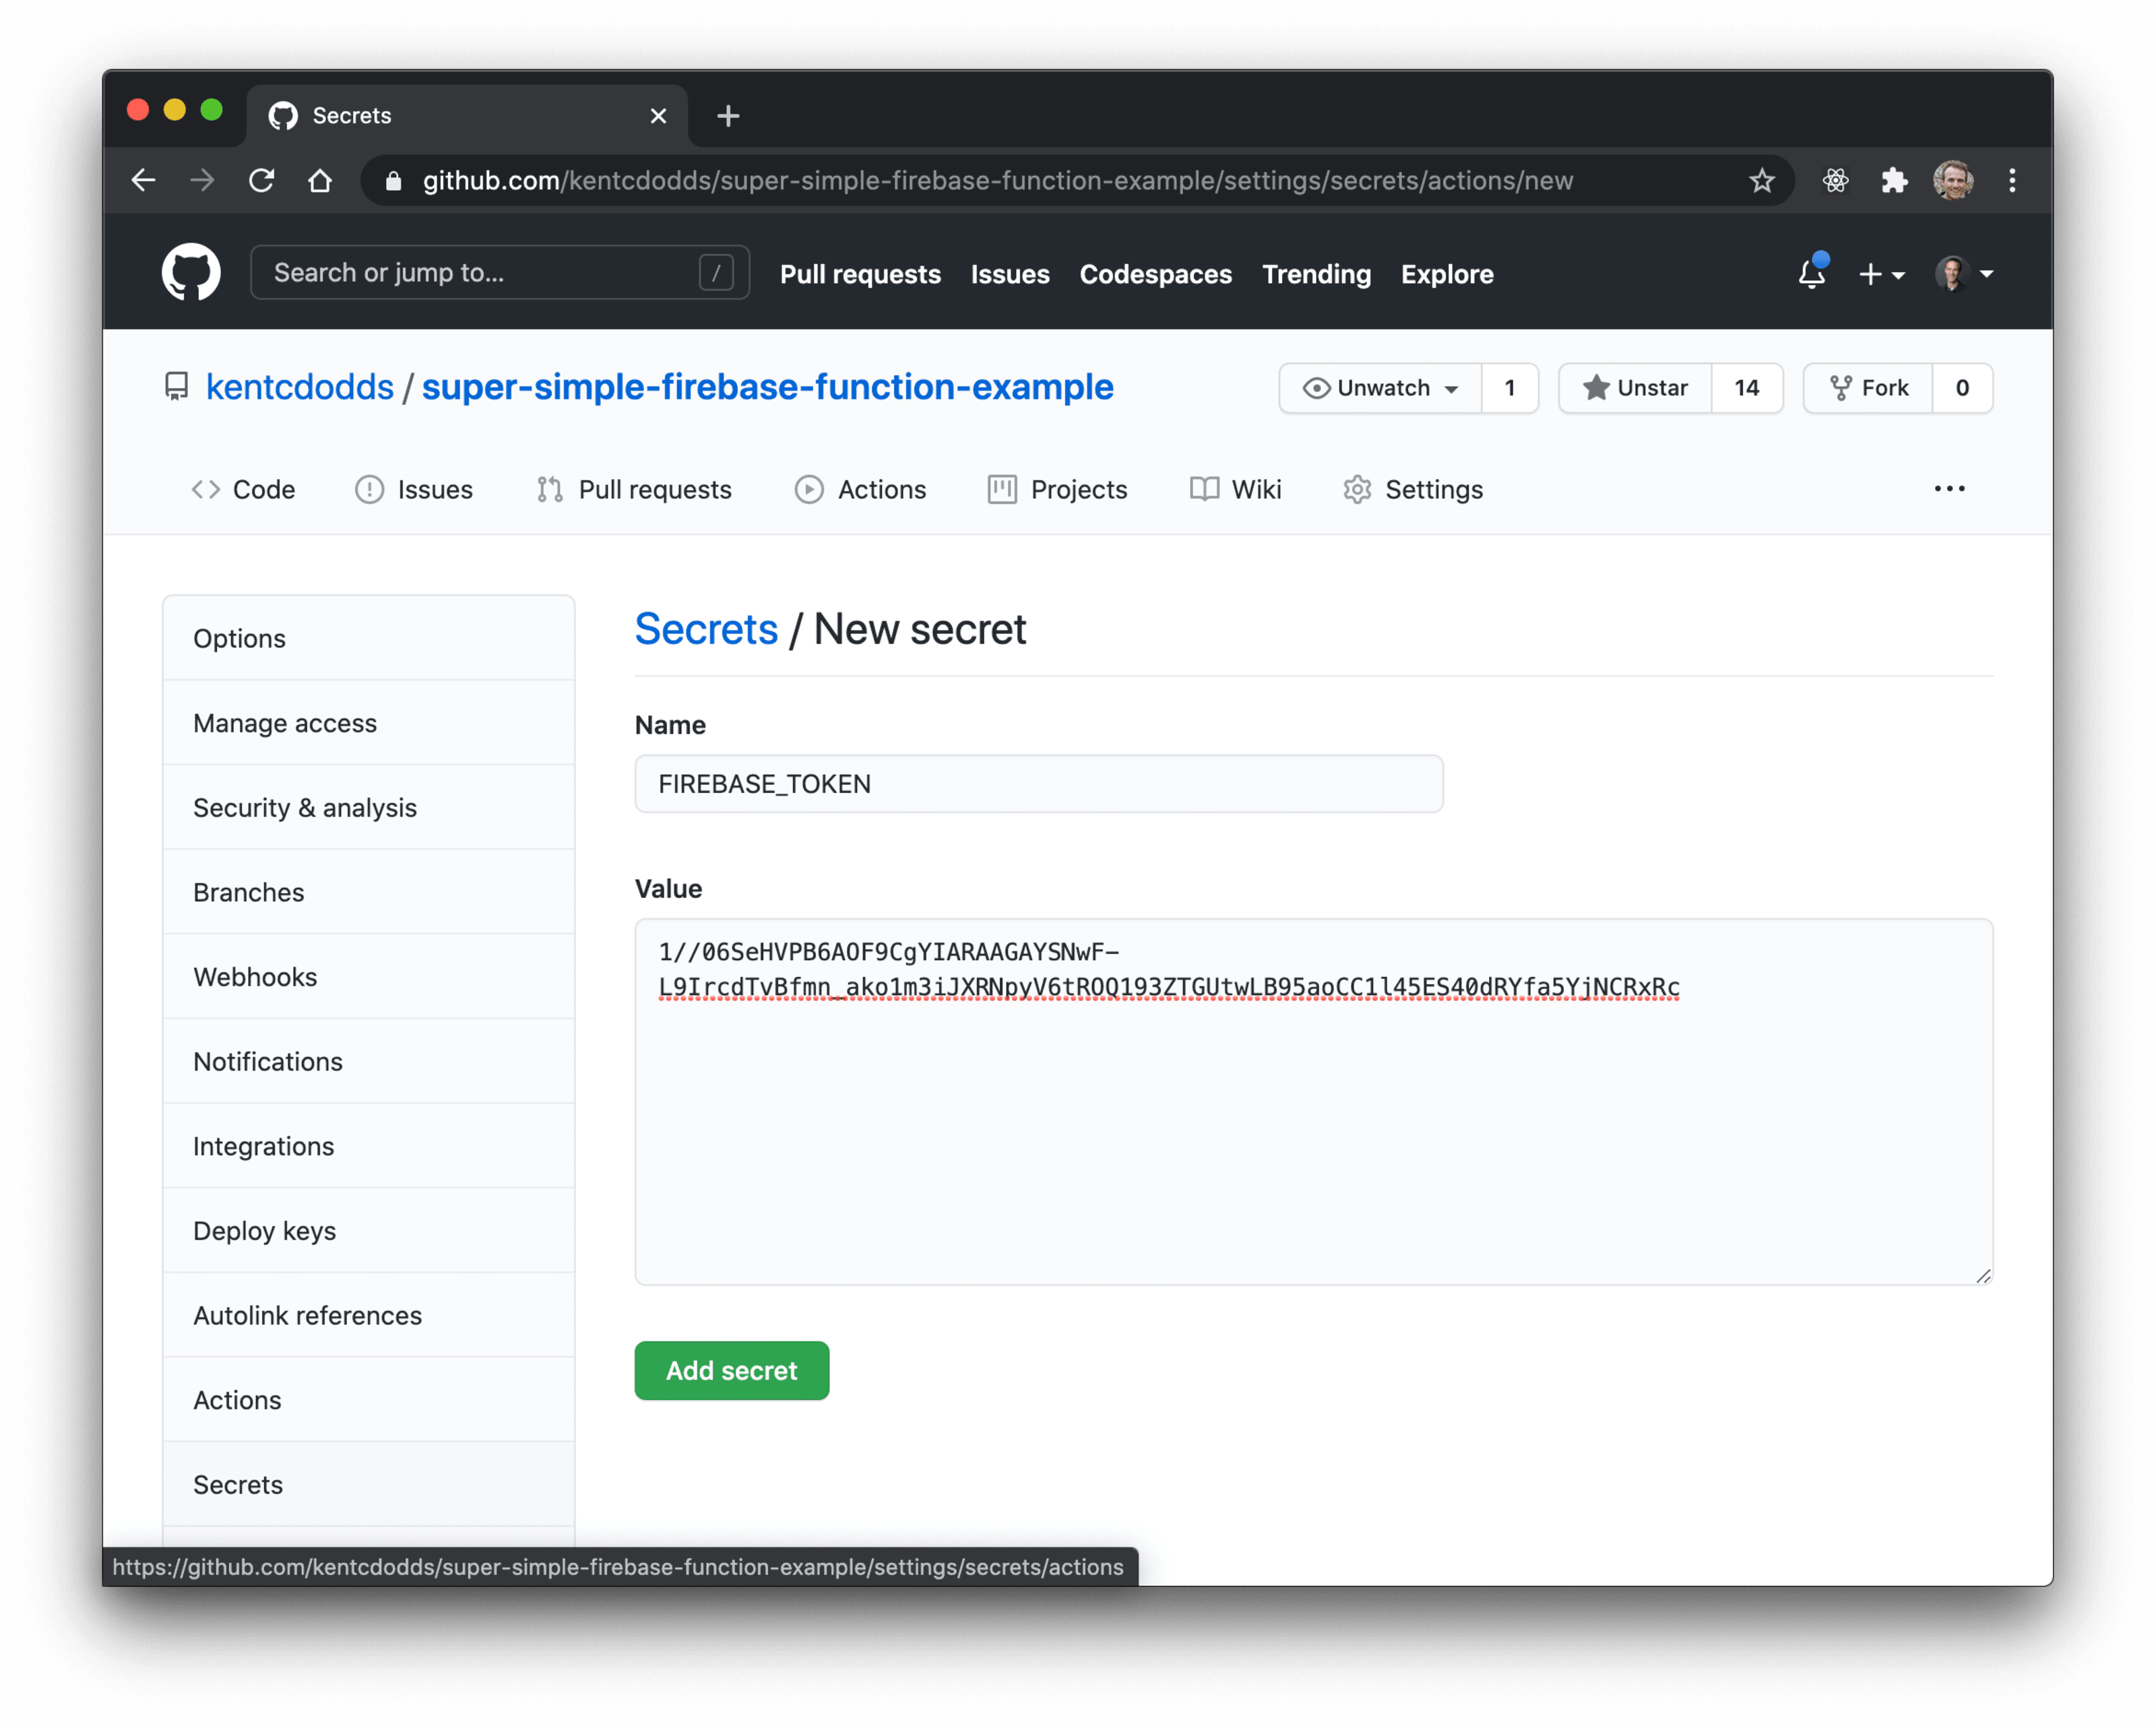
1//06SeHVPB6AOF9CgYIARAAGAYSNwF-L9IrcdTvBfmn_ako1m3iJXRNpyV6tROQ193ZTGUtwLB95aoCC1l45ES40dRYfa5YjNCRxRc
Instance: firebase deploy --token "$FIREBASE_TOKEN"
And do not even take a look at the use of that token, I have already revoked it 😜 Get your individual!
firebase logout --token 1//06SeHVPB6AOF9CgYIARAAGAYSNwF-L9IrcdTvBfmn_ako1m3iJXRNpyV6tROQ193ZTGUtwLB95aoCC1l45ES40dRYfa5YjNCRxRc
✔  Logged out token "1//06SeHVPB6AOF9CgYIARAAGAYSNwF-L9IrcdTvBfmn_ako1m3iJXRNpyV6tROQ193ZTGUtwLB95aoCC1l45ES40dRYfa5YjNCRxRc"
Step 15: Upload Firebase token to GitHub secrets and techniques
Nice, now you’ll be able to replica that token into your GitHub repository’s secrets and techniques
configuration:
https://github.com/{your-username}/{your-repo-name}/settings/secrets and techniques/movements
With that added, you are prepared to deploy!
Step 16: Devote and push
Now devote and push all your adjustments:
git upload -A
git devote -m "firebase applications rock"
git push
Then move for your repo’s movements web page
(https://github.com/{your-username}/{your-repo-name}/movements) and watch the
deploy occur routinely!

Then have fun 🎉
Firebase Cloud Purposes are tremendous robust. You’ll be able to in finding
the completed repo right here.
Optimistically getting this tremendous easy begin to Firebase applications was once useful to
you! Excellent good fortune and would possibly your applications be practical! ✌
[ad_2]