

")

")


[ad_1]
Maximum web pages this present day leverage the usage of IP geolocation to perform more than a few targets. It may be used to localize site contents or show the proper translations primarily based on the internet customer’s geolocation. IP geolocation information can also be retrieved from geolocation databases or internet services and products simply by the use of the internet customer’s IP deal with. Regularly used geolocation information contains the rustic, area, and town of the site customer.
This educational demonstrates enforce the IP geolocation provider, the use of the provider from IP2Location.io, right into a site constructed with React. To perform this, it is important to set up React, Node.js, Categorical, and IP2Location.io modules. Underneath are the temporary descriptions of each and every part.
React will probably be used for front-end building, or it is advisable name them internet pages. This can be a fashionable JavaScript library for construction person interfaces that permits builders to construct reusable UI parts and arrange the state of an utility successfully.
Node.js is an open-source server setting that permits builders to run JavaScript at the server facet. It is constructed at the V8 JavaScript engine and offers a formidable set of libraries and equipment for construction scalable and high-performance internet programs.
Categorical is a well-liked Node.js internet utility framework that simplifies the method of establishing powerful APIs, internet programs, and different varieties of server-side programs. That is the framework used to keep up a correspondence between the React and Node.js.
IP2Location.io is a geolocation provider that gives real-time IP addresses to location information. It may be used to spot the geographic location, ISP, area, utilization kind, proxy and different vital details about an IP deal with, which can also be helpful for quite a few programs.
Step 1: Set up and Set Up Node.js
Create a brand new assignment referred to as “my-project”. Throughout the assignment folder, run the next command to initialize the Node.js assignment:
npm init
Step 2: Set up Categorical Module
Subsequent, we will be able to set up the Categorical bundle. Please run the next command to put in it.npm set up specific
As soon as finished effectively, please create a brand new report named as app.js inside of my-project folder.
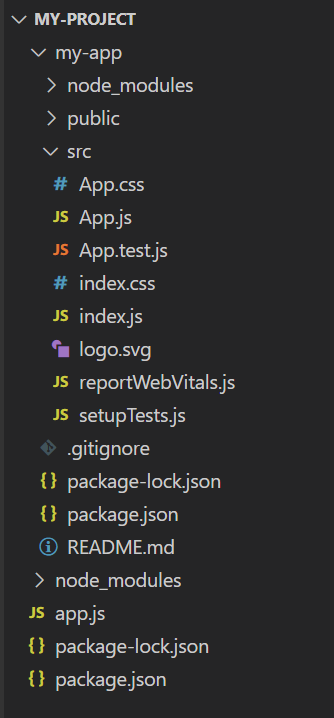
Undertaking listing must seem like the under symbol.
Then, open the App.js report and input the code under.
res.json({description: “Hi My Global”});
})
app.concentrate(9000, ()=>{
console.log(“Server began at port 9000″);
})” data-lang=”textual content/javascript”>
const specific = require('specific');

const app = specific();

app.get("https://feeds.dzone.com/", (req, res)=>{
res.json({description: "Hi My Global"});
})

app.concentrate(9000, ()=>{
console.log("Server began at port 9000");
})
The code above creates a REST API with the endpoint “https://feeds.dzone.com/”. This Node assignment listens for REST API requests on port 9000. Upon receiving a request, it returns a JSON string containing a unmarried key-value pair: {description: “Hi My Global”}.
Run the under command to release the code for trying out.node app.js
Then, open a browser and input “http://localhost:9000” in case you are trying out within the localhost setting. You must see the JSON string displayed at the display.

Step 3: Put in force IP Geolocation The usage of IP2Location.io
Forestall the Node.js assignment with CTRL+C command. Then, execute the under command throughout the my-project folder to put in the ip2location.io Node.js bundle.npm set up ip2location-io-nodejs
As soon as the set up has finished effectively, you’ll adjust the app.js codes so as to add the geolocation options throughout the assignment.
let mykey = “YOUR_API_KEY”;
let config = new Configuration(mykey);
let ipl = new IPGeolocation(config);
let myip = req.question.ip;;
ipl.look up(myip)
.then((information) => {
// answer the information in json structure
res.json({“Nation Identify”: information.country_name,
“Area Identify”: information.region_name,
“Town Identify”: information.city_name})
})
.catch((error) => {
// answer the mistake
res.standing(500).json({‘Error discovered’: information})
});
})
app.concentrate(9000, ()=>{
console.log(“Server began at port 9000″);
})
” data-lang=”textual content/javascript”>
const specific = require('specific');
const {Configuration, IPGeolocation} = require('ip2location-io-nodejs');

const app = specific();

app.get("https://feeds.dzone.com/", (req, res)=>{
    let mykey = "YOUR_API_KEY";
    let config = new Configuration(mykey);
    let ipl = new IPGeolocation(config);
    let myip = req.question.ip;;

    ipl.look up(myip)
    .then((information) => {
        // answer the information in json structure
        res.json({"Nation Identify": information.country_name,
                    "Area Identify": information.region_name,
                    "Town Identify": information.city_name})
    })
    .catch((error) => {
        // answer the mistake
        res.standing(500).json({'Error discovered': information})
    });
})

app.concentrate(9000, ()=>{
    console.log("Server began at port 9000");
})
The code above will carry out the IP geolocation the use of the customer’s IP acquired from res.question.ip, when the person invokes the API name. It’s going to then reply with 3 geolocation knowledge, particularly the rustic identify, area identify and town identify again to the caller. Please word you’ll want an API key for the above code segment to serve as, and you’ll subscribe with a unfastened account. Additionally, on this instance, I simply go back the rustic, area and town knowledge, and you’ll seek advice from the developer documentation if you want to get different knowledge, similar to ISP, area, utilization kind, proxy and extra.
Underneath is the screenshot of the above implementation, assuming your IP deal with is from US, California, Mountain View:

Step 4: Set Up Entrance Finish The usage of React
Now, it’s time to arrange the entrance. Throughout the my-project folder, run the under command to create the react assignment named as my-app.npx create-react-app my-app
Throughout the my-app assignment, set up the axios bundle. This bundle is needed to fetch the end result from Node.js assignment.
npm set up axios
Then, paste the under codes into the App.js report inside of my-app folder.
import brand from './brand.svg';
import './App.css';
import React from "react";
import { useEffect, useState } from "react";
import axios from 'axios';

serve as App() {
    const [data, setData] = useState([]);

    useEffect(() => {
        axios.get('http://127.0.0.1:9000/')
        .then(reaction => {
            setData(reaction.information);
        })
        .catch(error => {
            console.error(error);
        });
    }, []);

    go back (
        <div>
            <p>That is the end result from IP2Location.io</p>
            <p>Nation Identify: {information.country_name}</p>
            <p>Area Identify: {information.region_name}</p>
            <p>Town Identify: {information.city_name}</p>
         </div>
    );
};

export default App;
Please word that the code above makes use of the useState and useEffect hooks to fetch information from a REST API the use of the axios library. This knowledge is retrieved from the backend (Node.js + Categorical) and displayed at the webpage.
As soon as completed, you’ll run the react assignment by means of coming into the under command:npm get started
You must see the under display if it really works.
Should you stumble upon a community error when operating React, it’s possible you’ll wish to permit the cors bundle for your Node JS assignment. To take action, return on your assignment and forestall the node from operating. Then, set up cors the use of the next command:npm set up cors
As soon as completed, open the app.js report and upload the cors bundle as under:
const specific = require('specific');
const {Configuration, IPGeolocation} = require('ip2location-io-nodejs');
const cors = require('cors')

const app = specific();
app.use(cors());
Voila! You must now see the geolocation outcome displayed at the display.
Conclusion
In conclusion, this educational supplies an in-depth information on effectively enforce IP geolocation the use of IP2Location.io in a React constructed site. The educational no longer best covers the set up and setup of Node.js and Categorical, but in addition supplies detailed directions on set up the IP2Location.io module. Moreover, it features a complete walkthrough on arrange the entrance finish the use of React, together with the usage of the useEffect and useState hooks to fetch information from the backend.
Via following the step by step directions equipped on this educational, you’ll no longer best have the ability to effectively enforce IP geolocation for your React constructed site, but in addition acquire a deeper figuring out of its possible programs and advantages.
[ad_2]


